

 PREV
PREV
How Does Hot Foil Stamping Elevate Your Packaging Branding
2024-12-05
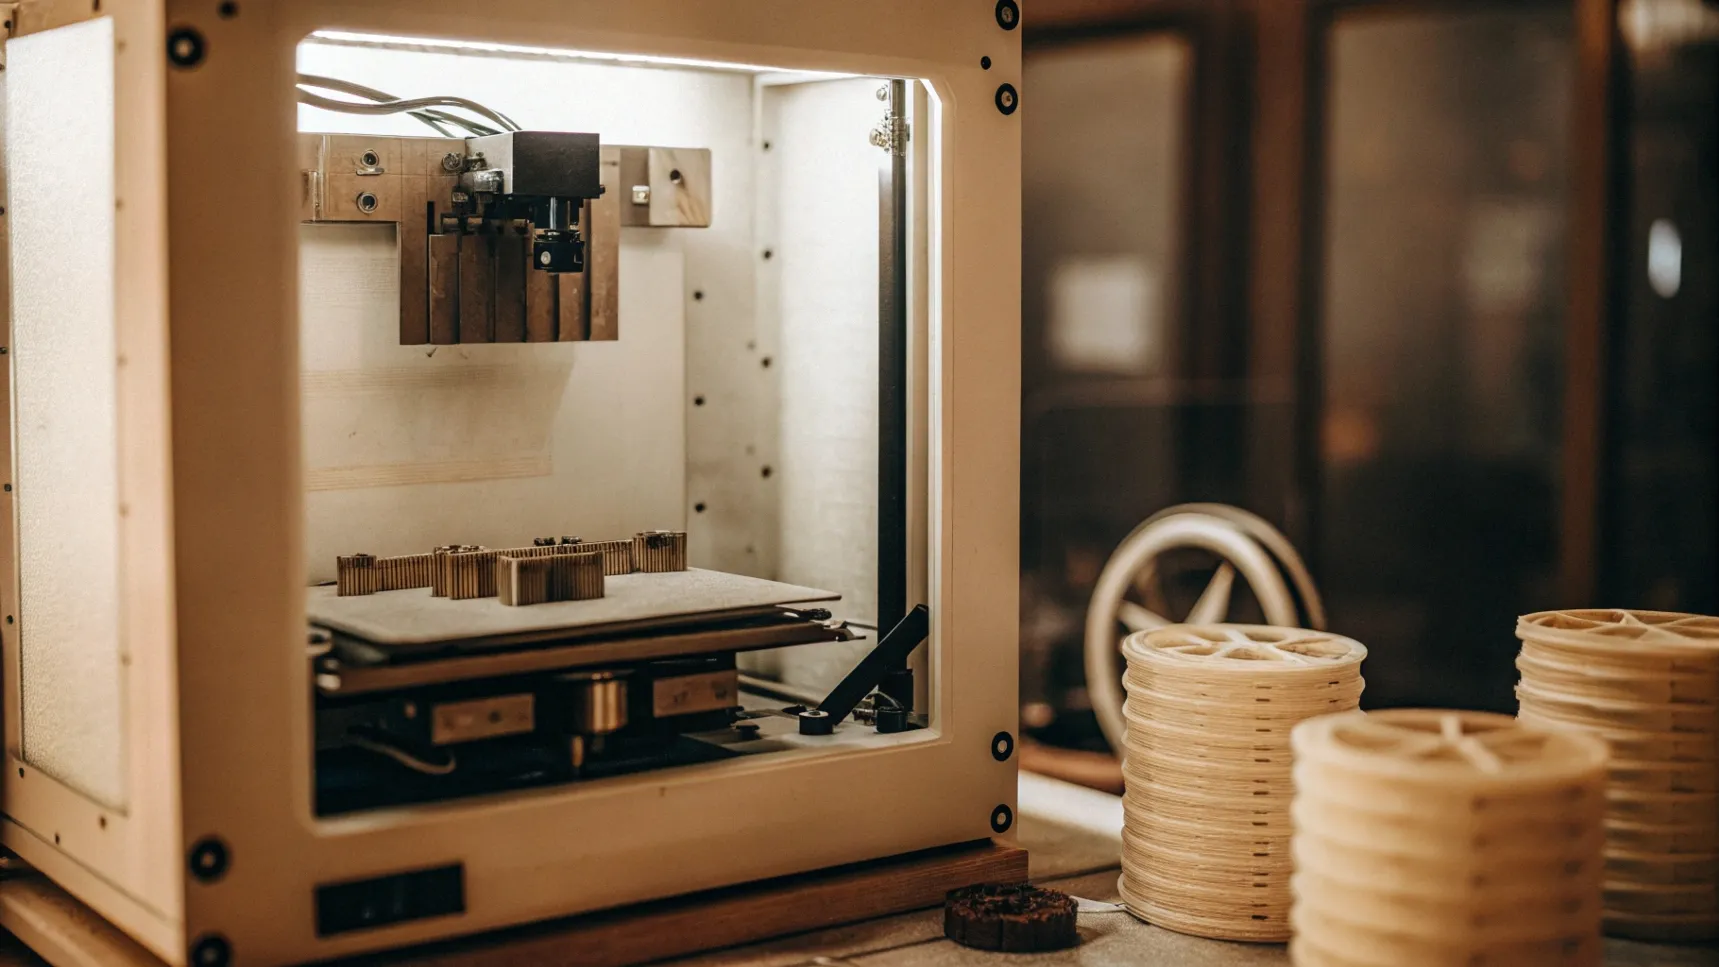



A printed insert can look perfect on a screen and still fail on the packing table. The chain shifts. The lid rubs a raised stone. The finished wrap changes the clearance.
The short answer is clear. 3D printing now replaces some design steps and low-volume parts. It does not replace the full packaging system.
A 2022 comparison used four tests: upfront cost, speed, volume, and materials. Use the same tests for hybrid 3D printing jewelry packaging. Small quantities favor additive production. Higher volumes give traditional methods more room to lower unit cost.
Historical data show that the shift started years ago. PreScouter cites a 2015 PwC survey in which 66.7% of manufacturers used 3D printing in some form. Another 24.7% planned to adopt it within three years, while 9% had no plans. Treat this as an old cross-industry snapshot, not a current packaging adoption rate.
After reading this article, you can decide which parts to make with 3D printing and which parts to produce using other methods. Compare the two plans and write out supplier requirements. You can also set inspection standards for assembly fit, contact friction, shipping, and re‑order parts.
3D printing changes the path from an idea to a physical object. You still need product measurements and material choices. You also need finishing, inspection, and production control.
Ask where the technology saves a slow step or gives you better control. That answer matters more than the novelty.
Additive manufacturing builds a part from a digital model, one layer at a time. Traditional methods cut, fold, form, print, wrap, or mold the final shape. The two routes solve different problems.
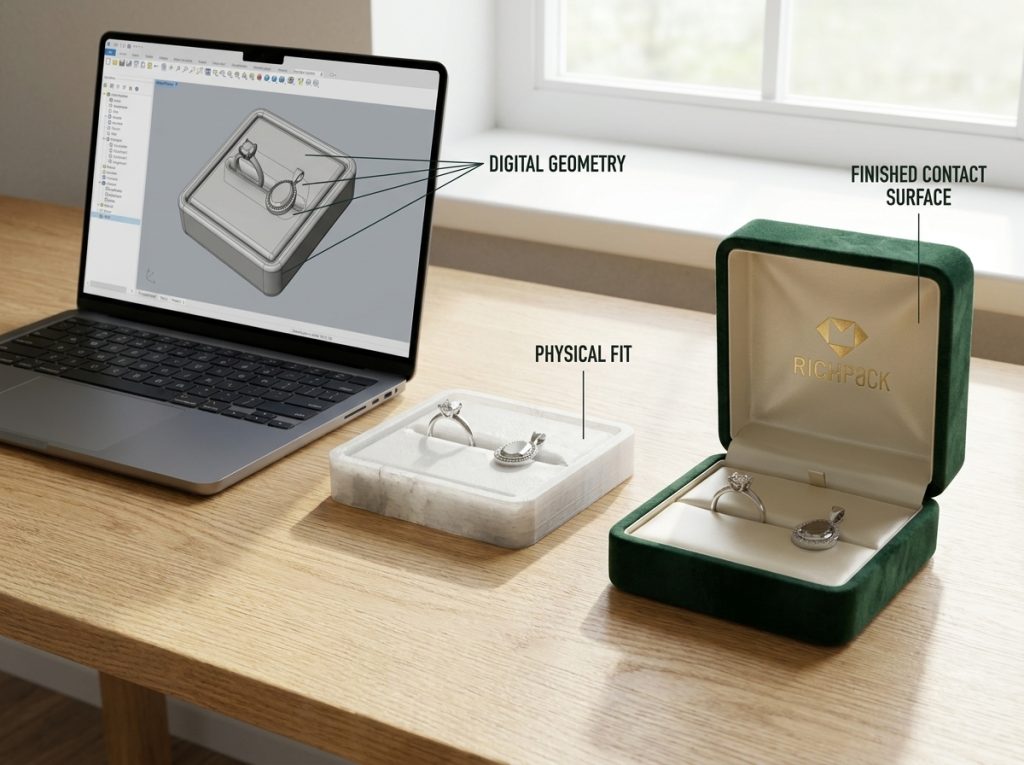
A digital file lets a team change or insert a cavity before it commits to fixed tools. The team can also change a cradle or display angle. It can then print the part, load the real product, and revise the shape.
The first physical object is not a production sample. A visual model checks color, scale, and presentation. A fit sample checks movement, contact, opening, and removal. A production sample adds the final materials, finish, assembly, and inspection record.
The custom jewelry boxes collection shows many customer-facing formats. Plan the printed insert and the outer shell as two separate choices.
The strongest packaging uses are narrow and practical:
Variation is the common thread. Use 3D printing when shapes change, standard tools cannot make the part, or the team needs a fast answer.
For a jewelry brand, the insert may offer more value than a printed outer box. It controls ring slots, earring positions, necklace channels, and watch supports. The outer shell must carry the brand. It must also feel good and survive delivery.
The limits become clearer as orders grow. They also matter more when customers touch the printed part.
Large batches of heavy, repeated parts can take a long time to print. The surface may need sanding, washing, or coating. The shape may be right, while the texture, color, hardness, or edges still vary.
Material choice can change the answer. Traditional packaging can mix board, paper, fabric, and foam. It can also use molded fiber, foil, glue, and shipping cartons. A printed plastic or resin part cannot replace all those layers.
A lifelike model can win approval too soon. The team may not have checked the jewelry contact surface or final lining. It may also miss odor in a closed box and movement in the outer carton.
The screen can persuade. The finished pack decides.
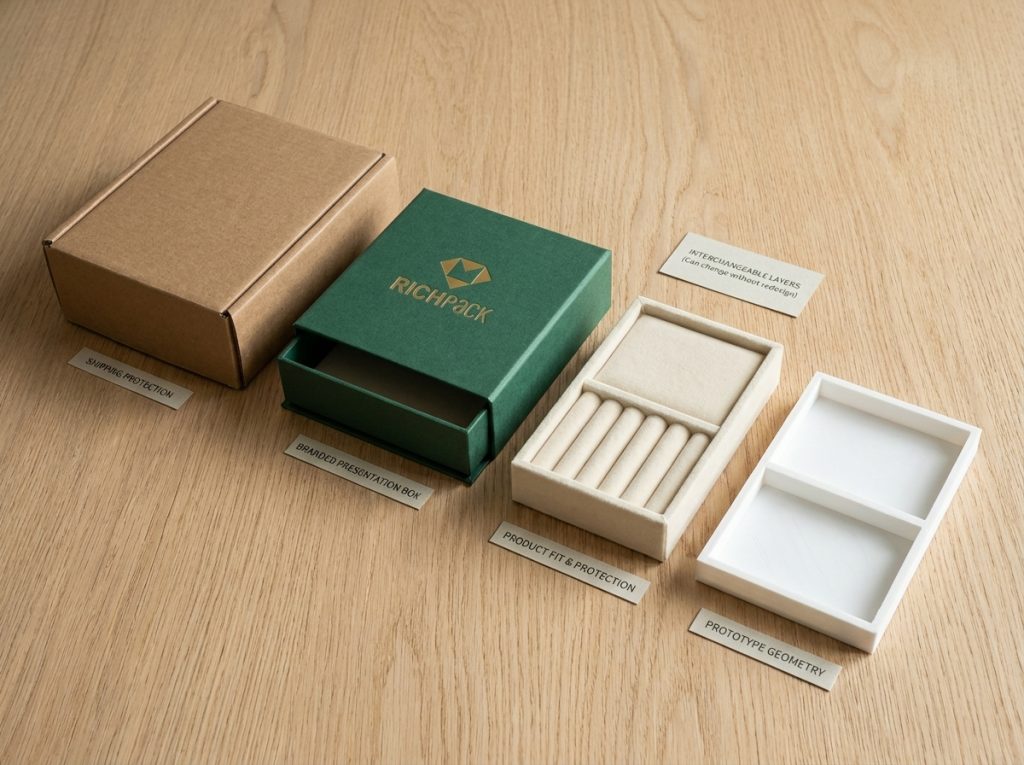
Hybrid packaging combines two or more ways to make one package. A team may print an insert that is still changing. It can use board, fabric, foil, and a shipping carton for stable layers. Each layer follows its job, order size, touchpoint, and shipping risk.
Use the comparison by expected volume, design variation, customer touch, and shipping risk. Do not choose a production method based on the part price alone.
| Decision Factor | 3D Printing | Traditional Packaging Production | Hybrid Decision |
| Design change | Fast digital iteration | Slower after tooling or die changes | Print the changing geometry first |
| Tooling | Low or delayed setup for prototypes | Setup becomes efficient at scale | Delay permanent tooling until geometry is proven |
| Volume | Strong for one-offs and limited runs | Strong for repeat volume | Pilot additive, then scale the stable layer |
| Material range | Depends on the print process | Broad paper, board, fabric, foam, and finish choices | Keep contact and presentation layers proven |
| Surface and touch | Can be realistic, but may need finishing | Mature paper, board, fabric, foil, and coating routes | Use printed parts where tactile risk is acceptable |
| Custom fit | Strong for complex inserts | Strong once the design is stable | Print the insert geometry, convert the outer pack |
| Repeatability | Needs process control and inspection | Mature production control still needs QC | Freeze a golden sample and compare batches |
| Shipping | Part may need added protection | Established packout and shipper systems | Test the complete package, not one component |
The table points to a simple conclusion. Additive production helps while the design changes. Traditional production helps after the design settles. Compare the full package, labor, and shipping path before you trust either price.
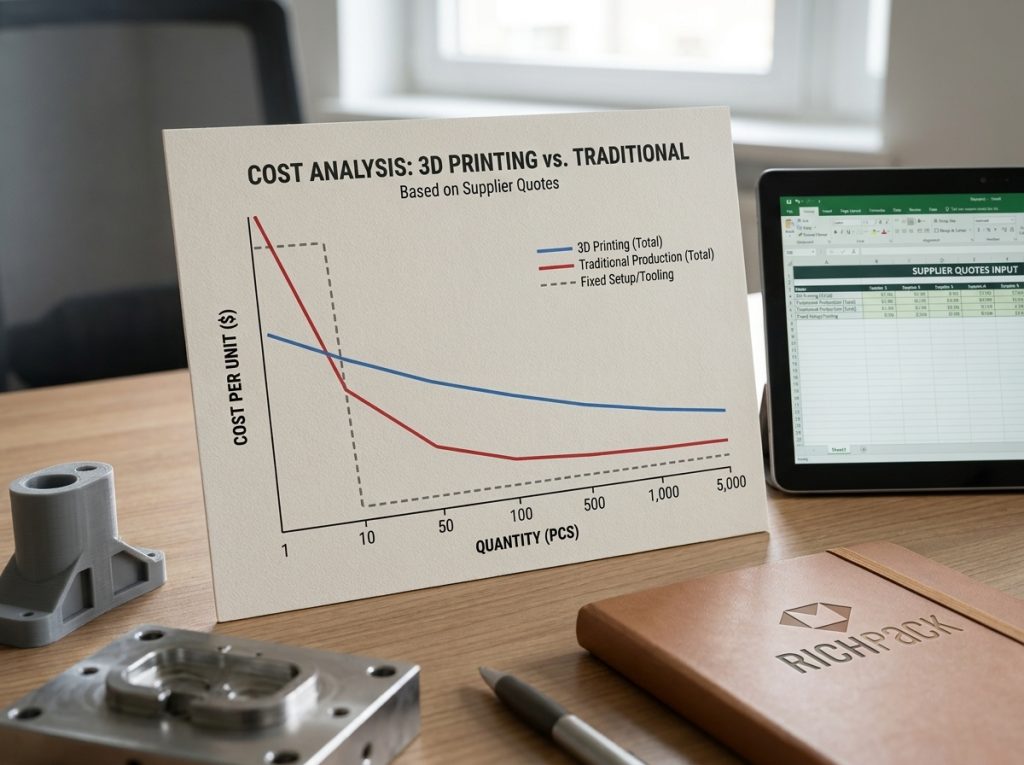
Small runs can favor 3D printing. A traditional route may need setup, dies, or plates. It may also need a special assembly plan before the first useful part exists. A printed prototype needs less early commitment.
This advantage matters most when the brand has:
Low volume does not make printing cheap by default. Count design work, file setup, failed prints, finishing, assembly, checks, and shipping. Several revisions may teach the team a lot. That learning still has a cost.
Start with quantity by SKU, not the total collection. Then mark which sizes are stable. The strategic sourcing guide for custom jewelry boxes adds sourcing questions. It covers structure, order size, and supplier proof.
Traditional production gains strength when the same part is repeated. Setup costs are spread across more units. Converters can run stable materials at a known pace. The team can choose paper, board, fabric, foil, and glue for the final feel.
Scale raises the value of consistency. A brand may need thousands of boxes with the same lid feel and logo position. The ring height, pouch, and care card must also match. The supplier must control every layer, not only the shape.
There is no universal break-even point. Part size, print method, material, labor, tools, freight, and design changes all move it. Ask each supplier to quote the same finished spec. Show setup, samples, units, assembly, freight, and revisions on separate lines.
A low unit price is not enough. It may hide extra finishing or a separate insert. It may also use different board, lining, or freight terms.
A hybrid route divides the work by function. It is a production map, not a label for a single printer or box type:
This approach keeps the speed of 3D printing. It protects the touchpoint and jewelry contact. It also protects brand control and repeat volume.
The result may pair a printed insert with a rigid box. It may add a tested lining, branded finish, and standard shipper. A modern package does not need one method. Each layer needs to pass its own test.
Jewelry makes the hybrid case easy to see. The product is small, valuable, and sensitive to shape. A strong box can still fail if a chain shifts or the lining marks polished metal.
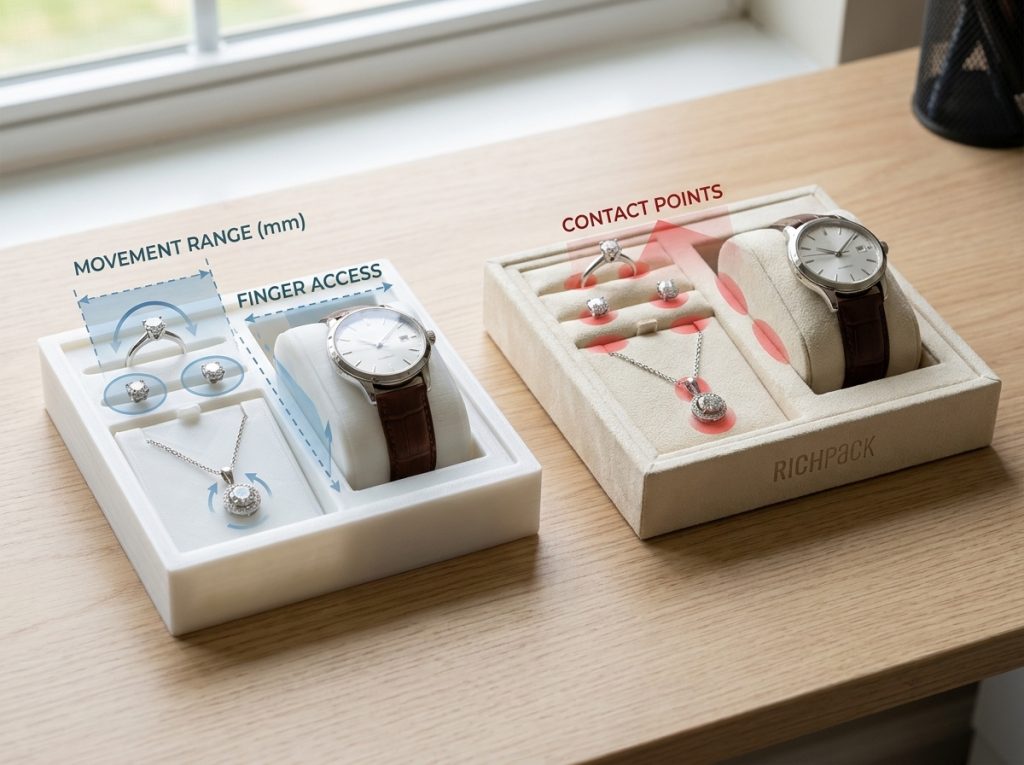
The insert is a good place to test additive ideas because geometry carries the risk. A ring needs a controlled slot. Earrings need pair alignment and post clearance.
A necklace needs a route for the chain and a place for the pendant. A bracelet needs a stable presentation curve. A watch needs support without crushing the band.
Test these relationships with a printed insert before choosing final materials. Load the actual jewelry, then turn the package over.
Open it with one hand. Remove the piece without catching a clasp or dragging a chain through a narrow gap.
The fit target is not “snug.” Record where the jewelry can move. Mark each surface that must not be touched.
Note how much space fingers need. The custom jewelry box inserts page shows insert options. The real product and finished sample still determine the fit.
The outer box has a different job. It carries the logo and shapes the opening. Its weight, stiffness, texture, and edges shape what the customer feels.
Paperboard and rigid board can support many brand systems. The outside may use paper, fabric, or leatherette. The inside may use velvet, microfiber, foam, paperboard, or a molded part. Each layer changes the finished cavity.
That material stack is why a printed shape cannot earn final approval on its own. The bare prototype may fit a pendant. The wrap and lining can raise the finished piece. A lid that cleared the stone in the digital model can rub it in the finished box.
Use the jewelry-box material guide to review the box layers. Check the outer structure, wrap, insert, and contact surface. Ask the supplier to name the contact material and glue. Also ask when the team will review the sample.
For logo placement, review the packaging printing techniques on the real wrap. Check the coating and texture too. A prototype suggests the look. The finished surface decides it.
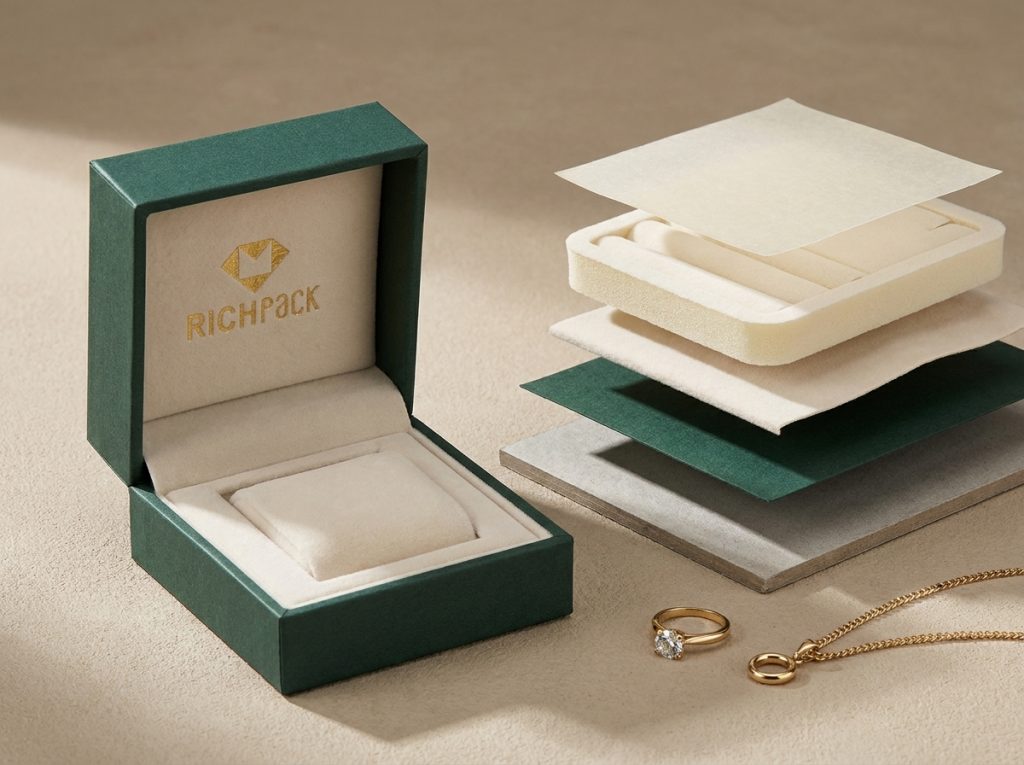
The presentation box creates the reveal. The shipper handles the parcel route. A pouch can limit dust and light contact.
A retail bag completes a handoff. A care card explains storage. None of these layers should solve every problem.
3D printing an insert does not remove the need for a stable outer carton. It does not make a loose lid safe. It does not stop a heavy box from moving inside an oversized shipper. It does not make the parcel discreet.
For ecommerce orders, test the full pack. Check the jewelry position and box opening after transit. Check whether the insert hits the lid.
Also check the empty space in the carton. The jewelry shipping guide links the inner box to its outer protection.
The most useful hybrid loop is simple:
Each sample answers a different question. A digital model checks the shape. A rough print checks access and movement.
A finished sample checks touch, appearance, opening, and assembly. A packed sample checks the delivery risk.
Digital mockup tools can help a team discuss shape and presentation. They do not replace a physical sample. Treat the rendered image as a conversation starter, not a sign-off.
Retail stores and parcel networks treat the same box in different ways. VIP gifts, repairs, and multi-address programs add more needs.
Retail teams need fast access and easy restocking. A parcel needs restraint, privacy, and a protective shipper. A VIP gift may need room for a note. A repair return needs a safe trip back.
The packing table matters too. A part that needs careful alignment adds labor. An elegant insert may slow every order.
Ask the packing team to run a small batch with real jewelry. Record each pause or correction.
Here is the hard lesson. New technology can shorten one step while the costly steps remain. The package still needs a brief, samples, approval, testing, and a reorder plan.
A printed part may arrive quickly. Artwork may still be unfinished. The lining may still need approval.
The shipper may still need a route test. The brand team may still need to approve the cost.
Build a stage-gate schedule:
Each gate should have an owner and a pass condition. “Looks good” is not enough when the lid, insert, contact surface, and shipper can fail in different ways.
CAD describes shape. It does not show the full thickness of a folded wrap or soft lining. It also cannot predict every glue spread or fabric edge.
The failure can be small but visible. A tray slides smoothly before lining. After lining, the corner scrapes.
A necklace channel may hold the chain in the bare model. The chain may climb out after the team adds the surface material.
Review the finished part, not only the digital file. Measure the cavity after conversion. Check the highest point of the jewelry against the finished lid. Keep the approved clearance in the specification pack.
Strength answers one question. Jewelry contact asks several more:
Do not let strength replace a contact review. A printed frame can support a soft liner. A prototype can set the shape. The final contact surface can still use tested fabric, foam, or paperboard.
The custom jewelry box safety tests raise questions about fit and handling. They also raise product safety checks. Use them to guide the discussion. Do not treat them as proof of every new printed material.
3D printing may reduce setup waste. It may also support on-demand work and lower storage needs. The result depends on the process and the full route.
Count failed prints and support material. Add washing, finishing work, power, shipping, and end-of-life needs. For the other option, count the board, wrap, lining, and glue. Add magnets, ribbon, foam, and the shipper.
A mixed package can be hard to separate. A recyclable outer box does not make the full pack easy to recover. The insert, magnet, coating, fabric, and glue may block one route.
Record the claim and its limit. The RichPack sustainability commitment gives the company context. Each pack still needs its own proof.
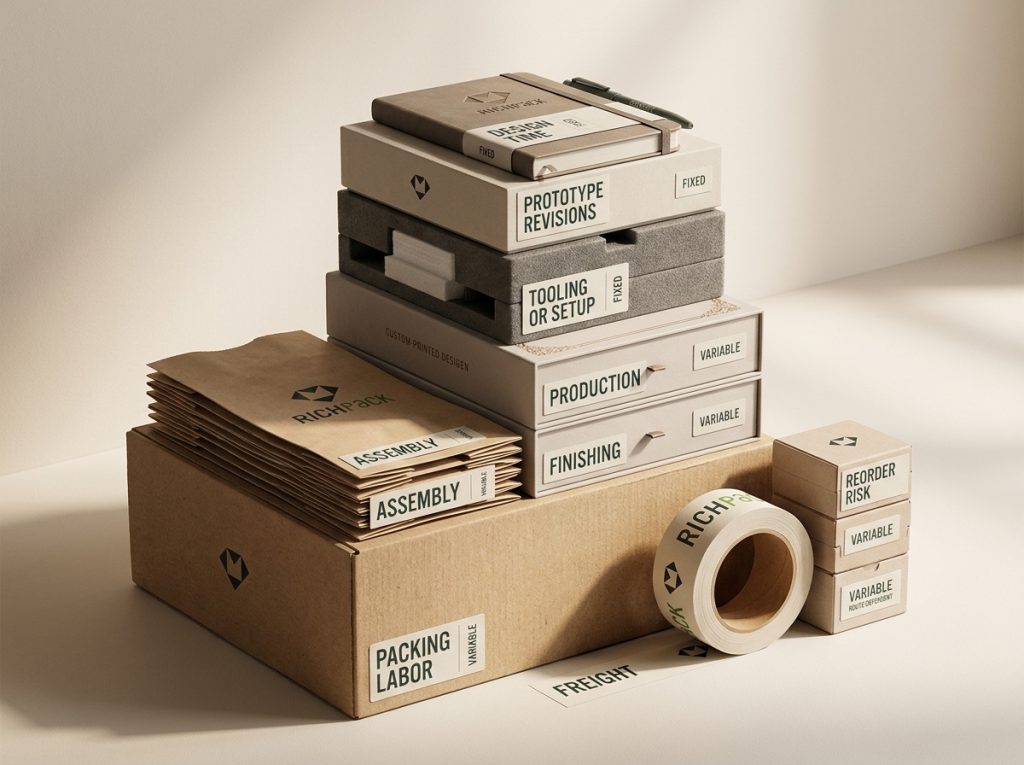
The printed component or box unit is only one line in the budget. Include:
Compare the delivered cost of an approved package. A traditional box may cost more during sampling but less in a stable run. A printed insert may cost more per piece. It can still avoid a larger tool cost while the design changes.
Validation should follow the jewelry, not the printer. Approve the box after the real piece fits and stays safe. It should look right and open well. The packing team should load it at a workable pace, and the full pack should survive its route.
Record the length, width, height, and weight of each test piece. Mark raised stones and sharp edges. Also mark clasps, posts, crowns, polished surfaces, and parts that can catch fabric.
Include the pieces that create the hardest fit. A flat pair of earrings may not expose the same risk as a long pendant. A light chain may behave differently from a heavy watch. A set can change the cavity because the card, pouch, certificate, or care note needs its own space.
Use a product list that separates:
The six-step packaging design process links product facts to design review. Add those product facts to the sample record.
Start with a white sample or an unbranded fit prototype. Check the cavity, slot, channel, and cushion. Then check the display angle, finger access, and lid space. Do this before the team spends time on the final logo.
Open and close the box several times. Turn it over. Shake it, as a packed order may move.
Remove the jewelry several times. Look for the point where a chain catches or a ring leans.
Once the shape passes, add the final materials and test again. A white sample proves structure. It cannot prove color or foil bond. It also cannot prove touch, fabric behavior, odor, or final assembly.
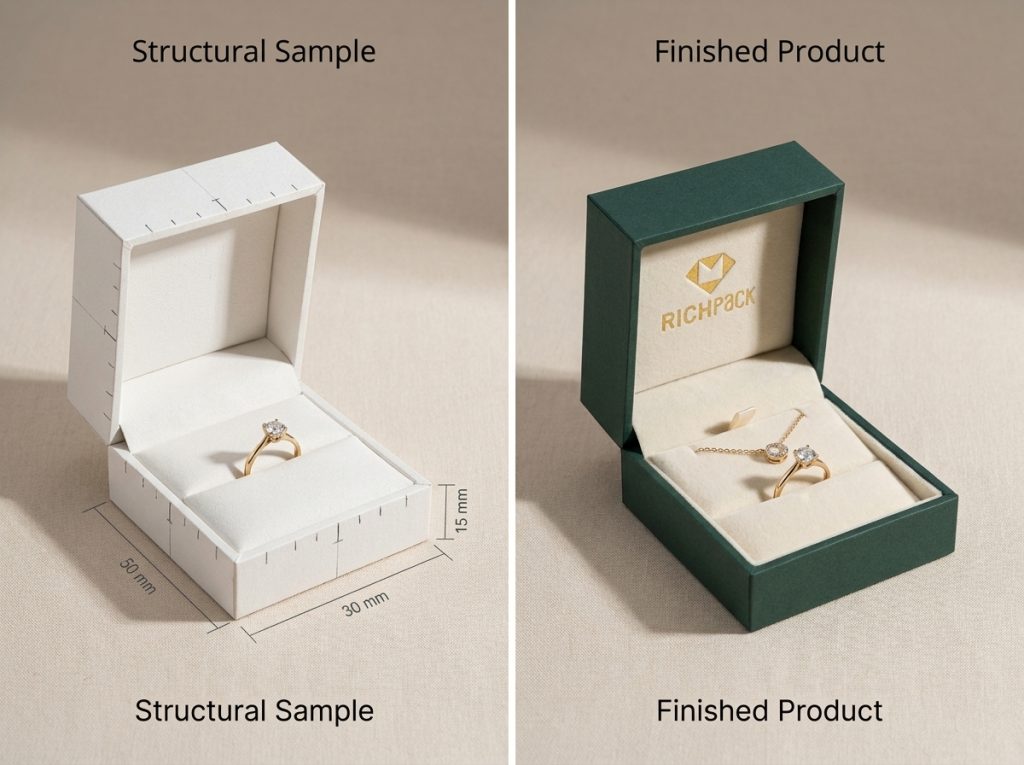
List every surface that touches the jewelry. That may include the top of an insert, the wall of a slot, a card edge, a pouch, a lining fold, or a removable cushion.
Ask for the material name and color details. Ask what glue the supplier uses. Request any contact or odor records. Silver, plated parts, pearls, stones, and coatings may need different checks.
Do not turn a soft feel into a safety claim. Do not turn a low-odor label into proof of long-term compatibility. Check the sample after the adhesive and finish have settled. Note fiber on clasps, color transfer, surface marks, or smell inside the closed box.
The customer judges the box before taking out the jewelry. The base should stay still. The insert should stay in place, and fingers should not press against the piece.
The packing team should see the correct direction at once. Record the time and each insert correction. A small delay on every order becomes a real labor cost.
Test the full unit before shipping. Pack the jewelry, insert, box, accessories, and void fill. Add the outer carton, seal, and label. After handling, check movement, corners, lid position, and visible damage.
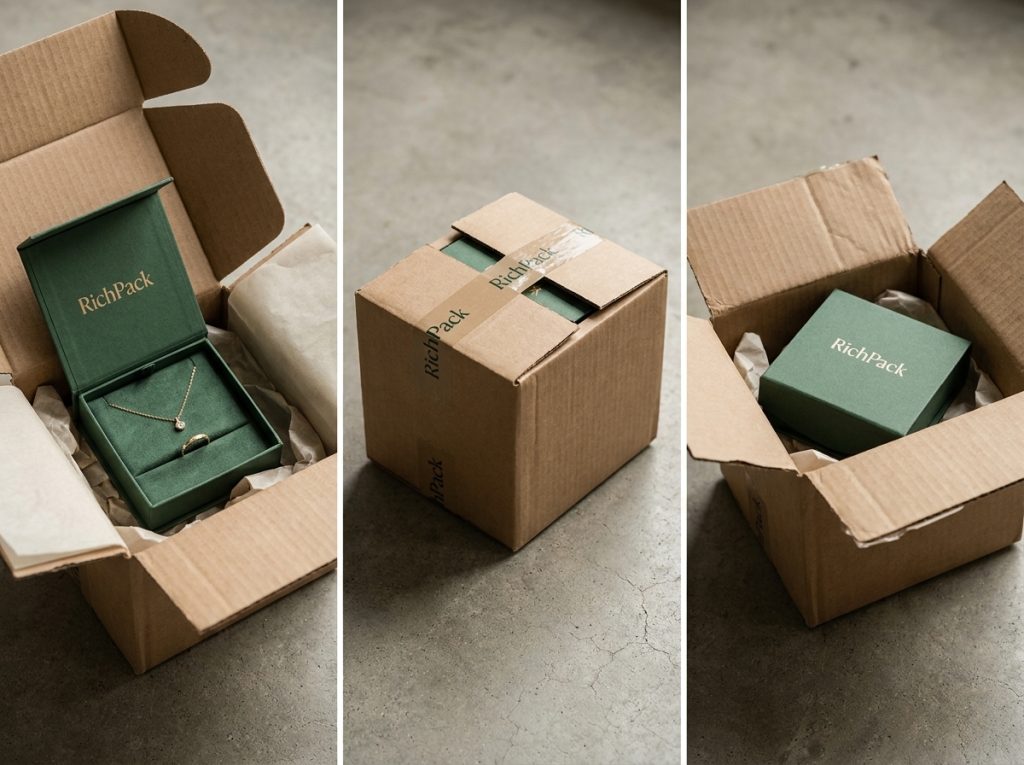
Save the information that makes the approved package repeatable:
Use the rigid box packaging guide when the outer shell moves into repeat production. Keep the insert and contact surface as separate specs. The outside may match while the inside fails.
The supplier conversation should show who owns each decision. One partner may print the prototype. Another may convert the box, source the lining, assemble the pack, or ship it. List each owner.
Ask which stages happen in-house and which stages go to another partner:
Do not infer production capability from a rendered image or a single sample. Ask what the supplier will measure, what the supplier will record, and who approves a change.
Give every supplier the same input:
Ask for separate prices for setup, samples, tools, and units. Add assembly, finish, freight, and revisions. Compare suppliers only when both quote the same finished pack.
Match the evidence to the claim:
The evidence should answer a buyer’s question. A material brochure cannot prove a finished insert fits a pendant. A beautiful photo cannot prove that a reorder will match the approved sample.
Use additive production while the design changes. It also suits unusual shapes and small runs. Use traditional production after the pack is stable, and repeat volume matters.
Use a pilot to test the insert, shell, and shipper together. Move to a larger run after the finished sample passes. Keep a printed part when it solves a fit problem. Remove it when a simpler part costs less and works as well.
The best brief starts with the piece and follows it through the business:
The brief should name the failure that must not happen. “Keep the necklace secure and leave the pendant visible” is more useful than “make a premium insert.” “Keep the lid clear of the raised stone after lining” gives the supplier a testable target.
3D printing can replace some prototypes, inserts, fixtures, and short-run parts. Traditional packaging still works well for repeat volume and broad material choice. It also gives brands mature finishing options. A hybrid route fits most projects.
It can make sense when tooling would take a large share of a small order. Still count design time, failed prints, finish work, assembly, checks, and freight. Compare the approved package, not only the printed part.
The strongest use is early testing of custom insert shapes. Test rings, earrings, necklaces, bracelets, watches, and sets. A printed sample can show movement, access, angle, and lid space before bulk production. Approve the final contact surface and outer box on their own.
A printed insert can control movement when it fits the real jewelry. Its contact surface must also suit the piece. The insert does not replace the box, outer carton, void fill, seal, or parcel test. Approve the fully packed order.
There is no universal answer. Check material use, failed parts, finish work, power, and transport. Also check mixed materials, reuse, and local recovery. Compare the full material list and delivery route.
Compare fit, movement, removal, contact, and odor first. Then compare fiber transfer, finish, unit cost, assembly time, weight, and reorder control. Use the same jewelry and box for both samples. Choose the insert that controls the main risk with less hidden work.
Pair design with prototypes, and tools with materials. Pair inserts with print and finish, then assemble with freight and revisions. List quantity and finished size. Add sample stages, owner, and delivery terms so both prices cover the same pack.
3D printing is replacing slow design steps and some short-run parts. It is not replacing the full packaging system. Map each jewelry SKU to an insert, outer box, contact surface, and shipper.
Print the shape that is still uncertain. Then approve the finished pack before you scale.


2024-12-05

2024-10-29
2025-02-18
Richpack · Rook Piercing Jewellery Packaging Tips for Attracting Piercing Lovers The rook piercing has surged in popularity in recent years, becoming a staple in the world of ear adornment. The number of searches for “Rook Piercing” on search engines has been increasing annually for the past five years, averaging about 15% per year. In… Continue reading Is 3D Printing Technology Killing Traditional Packaging? The Bitter Lessons of Industry Veterans

The wine glass gift box serves as a presentation vehicle that elevates the act of gifting. It can increase the perceived value of products, attract more customers, and differentiate their offerings from competitors. Moreover, in an era where consumers are increasingly focused on the quality of the entire purchasing and gifting experience, the wine glass gift… Continue reading Is 3D Printing Technology Killing Traditional Packaging? The Bitter Lessons of Industry Veterans
Richpack · What You Need To Learn About Moonstone Jewelry Packaging From rainbow moonstone jewellery to pieces crafted with chalcedony and moonstone, moonstone jewellery symbolizes magic, love, and healing. As demand for authentic moonstone jewellery rises, especially in niches like moonstone jewellery for men and moonstones jewelry enthusiasts, businesses need to focus on one critical… Continue reading Is 3D Printing Technology Killing Traditional Packaging? The Bitter Lessons of Industry Veterans
Customizable Wholesale Perfume Packaging with Personalized Branding | Ideal for Distributors Needing Unique and High-Impact Packaging
Eco-Friendly Cosmetic Packaging for Small Beauty Retailers | Tailored for Brands Committed to Green Solutions with Low Minimum Orders
Joyful Yellow Goodie Bags | Made of Thin Paper With Twisted Handles for Joy-Spreading Gift-Carrying
Branded Gift Boxes for Wholesale Jewelry Packaging | Customizable Packaging for High-Volume Orders | Logo Printing Available
View More
Corporate Gift Packaging with Logo Printing | Tailored for Jewelry Businesses and Corporate Clients Needing High-End, Branded Gift Presentation
View More
Affordable Bespoke Jewelry Organizers with Low Minimum Order Quantities | Designed for Small-Scale Jewelry Retailers Needing Custom Packaging
View More

