

Packaging is the first thing your customers touch. It must not arrive crushed or wrinkled. After working with many clients, I have seen tape ruin a brand’s look. The first impression is gone if the box looks cheap.
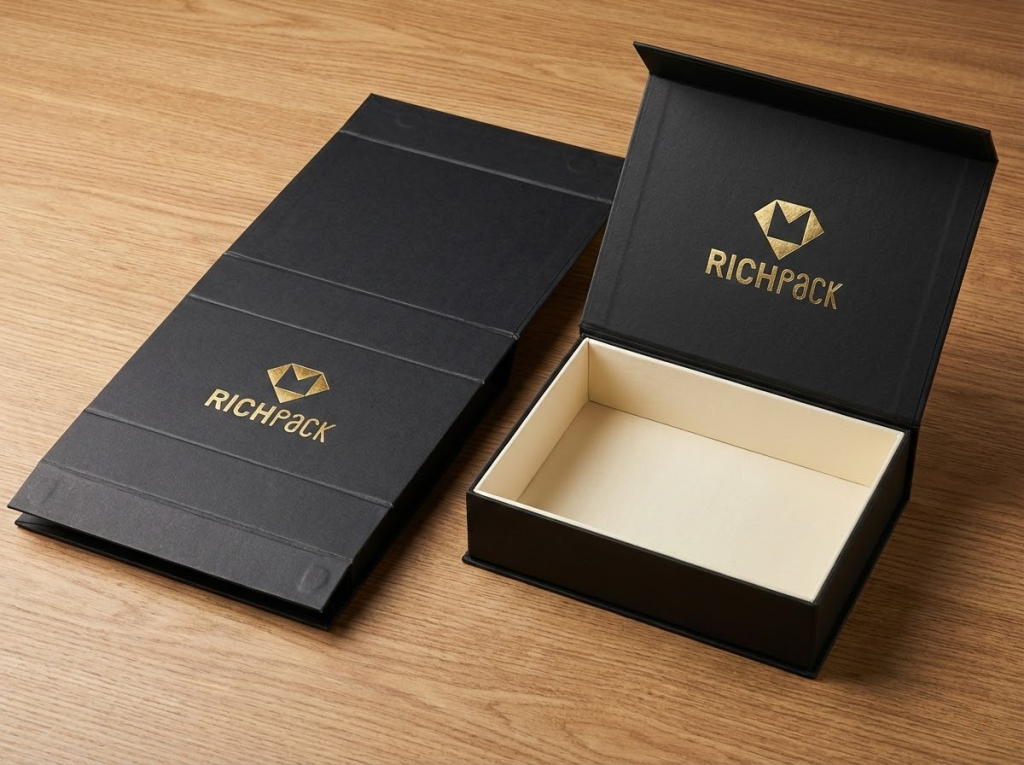
Magnetic foldable gift boxes solve these issues. I’ve found these work best because they ship flat and build fast. They close with a sharp magnetic click. These boxes look like high-end retail packaging.
The market was USD 1.82 billion in 2024. It should reach USD 3.50 billion by 2034. I see more brands asking for these designs every day.
I wrote this guide to help you choose well. We will look at why they work. I will also share what to check when buying wholesale.
I often call these boxes a game-changer for jewelry brands. They use strong magnets hidden in the lid to snap shut. You do not need tape or glue to close them.
The real magic is the flat-pack design. I have seen brands save huge amounts on shipping this way. These boxes arrive flat and take up very little space.
You can set them up in under ten seconds. Just fold the panels along the pre-made lines. The corners click into place and stay firm.
This design solves a big problem for many importers. Standard boxes take up too much room in a container. These foldable boxes cut your shipping volume by up to 70%.
I always tell my clients to check these five parts first. They define how your brand feels to a customer. One trick I use is feeling the board thickness right away.
| Component | Role | Common Spec |
| Greyboard/chipboard core | Structural rigidity | 1.5mm – 3mm thick |
| Outer cover paper | Visual and tactile surface | Art paper, kraft, textured specialty |
| Inner liner | Interior finish and protection | Art paper, velvet, satin, EVA foam |
| Neodymium magnets | Magnetic closure mechanism | Disc or bar type; 0.5–1.5kg pull force |
| Pre-scored fold creases + glue tabs | Flat-pack and self-lock function | Factory-precision scored |
The secret lies in the engineering drawing. We call this the “dieline.” I have learned that even a tiny error here ruins the box. A good dieline ensures panels line up perfectly.
In the factory, we cut the board and hide magnets inside. We then glue the paper onto the board. This creates a unit that stays flat until you need it.
When you are ready, just fold it into shape. It locks tight and looks like a solid box. This saves you time and warehouse space.
Both boxes look great on a shelf. However, the logic changes when you look at your shipping bill. I have compared the two for many large wholesale orders.
| Factor | Foldable Magnetic Box | Standard Rigid Box |
| Shipping Style | Ships flat | Ships full-size |
| Units per Carton | 60 to 80 units | 12 to 20 units |
| Setup Time | 5 to 10 seconds | Ready to go |
| Unit Cost | A bit higher | Lower |
| Best Use | E-commerce and imports | High-end retail |
You might see names like “collapsible” or “flat pack” online. Do not let the jargon confuse you. They all refer to the same type of box.
I suggest focusing on the specs instead of the name. Check the board thickness and magnet strength. These details matter more than what the supplier calls it.
Next, I usually check the glue tabs. Good tabs make the box feel much more premium. This matters for your brand and your customers.
Most high-end boxes use rare-earth magnets. These are small but very strong. I usually see them in disc or bar shapes.
Standard boxes need a pull force of 0.5kg to 1.5kg. Be careful not to go too strong. I have seen over-strong magnets warp the box over time.
Also, keep magnets away from credit card strips. Ask your supplier about the magnet rating if you sell wallets. This small step prevents big headaches later.
These boxes are popular for more than just looks. They solve many real business problems at once. I have seen demand jump in Europe and North America lately.
New Power Packaging says this is the fastest-growing style for 2025. It helps brands save money and look great.
Your packaging says a lot about your brand. I have noticed that 52% of online shoppers return if the box feels premium. For younger buyers, that number hits 61%. The magnetic snap makes a great “click” sound. It feels much better than tape or simple flaps.
This “click” tells the customer your product is high quality. Many of my clients use this for launch events or gift sets. It gives a luxury feel without a huge price tag. Now, let’s look at the operational side.
Let’s look at the math behind these boxes. I often compare a standard 30x20x10cm box. A rigid box fits about 15 units per carton. A foldable one fits up to 80 units.
For a 2,000-unit order, you go from 130 cartons down to 28. This saves a lot of space on ships. You could save USD 0.30 to USD 0.80 per unit. That saving usually pays for the box itself.
People rarely throw these boxes away. One study found that 62% of people keep premium gift boxes. Magnetic boxes are the most popular ones to keep. I see people use them for jewelry or desk storage.
Your logo stays on their desk for a long time. This gives you free marketing every single day. I have found this works best for building long-term brand fans.
Other closures often fail over time. Ribbons get loose and messy. Tuck flaps tear after opening them a few times. Velcro picks up lint and stops sticking. Even snap buttons can break during shipping.
Neodymium magnets stay strong for years. They close perfectly every time. You do not have to line them up. This also saves your team time when packing orders.
The gift packaging market is growing fast. Experts think it will reach 43.99 billion dollars by 2034. New laws in the EU favor eco-friendly options. These foldable boxes help you meet those rules.
They use less space during shipping, which cuts carbon emissions. You can use FSC-certified paper and safe glues. Many of my partners use these to show they care about the earth.
You can find these boxes in almost every industry. I work with brands in jewelry, skin care, and electronics. Because so many people use them, the quality is very high.
You are not taking a risk with this format. It is a smart, standard choice for any premium brand. Next, I usually suggest looking at custom finishes for your logo.
I have spent years helping brands pick the right materials. Your choices drive how the box looks and feels. They also affect your total cost. Getting these specs right early saves you from costly mistakes.
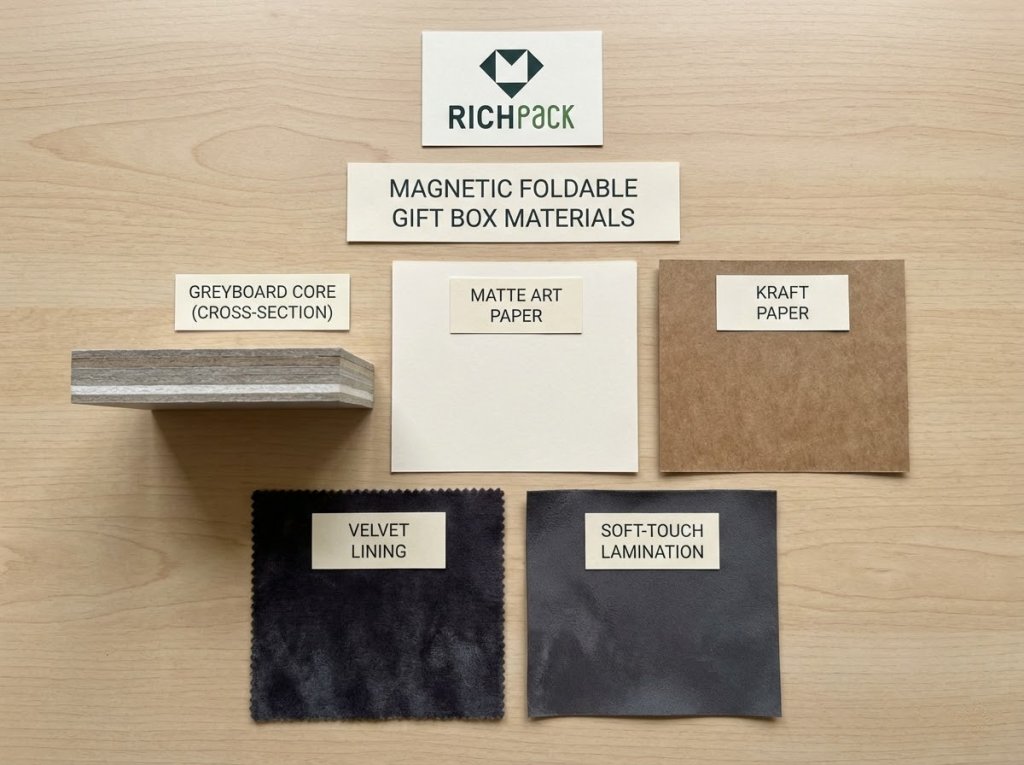
Greyboard is the frame of your box. Most people call it chipboard. It is made from recycled paper pulp. It comes in many thicknesses. I like it because it folds well without cracking.
I usually suggest these weights based on your product:
White board looks much cleaner on the inside. It costs more than greyboard. However, you might not need an extra paper liner.
Some shops use corrugated board for heavy items. It protects well against impacts. But it does not feel as premium as Greyboard.
This choice hits your brand image the hardest. Now, let’s look at your options.
| Cover Paper Type | Visual Character | Best For |
| Matte art paper | Flat, non-reflective | Minimalist, lifestyle, luxury brands |
| Gloss-coated paper | Bright, reflective | Vibrant colors, photography-heavy designs |
| Kraft paper | Natural brown, earthy | Eco-conscious, artisanal brand identities |
| Linen/leatherette texture | Tactile, premium texture | Jewelry, watches, high-end accessories |
| Soft-touch laminated paper | Velvety, fingerprint-resistant | Cosmetics, fashion, corporate gifting |
| Pearlescent/metallic paper | Lustrous, celebratory | Holiday sets, wedding gifting |
I suggest matte or gloss art paper for clear logos. These offer the best print quality. Use textured paper for foil stamps or embossed designs. It adds a nice touch that customers can feel.
The inside is what people see during the reveal. It sets the quality level right away.
One trick I use often is pairing velvet with a ribbon tab. This adds very little cost. But it makes the box feel much more expensive.
Do not let the factory pick your magnets for you. The feel of the click matters.
Disc magnets are common and cheap. They work well for small boxes. Bar magnets run along the full edge. They give a more even closure for large boxes.
I suggest a 0.5–0.8kg pull for light items. Go for 1.0–1.5kg for heavy goods. This keeps the lid shut during shipping.
Let me be clear about one risk. Strong magnets can wipe credit cards or hotel keys. Check the magnet placement if your box holds gift cards.
Sustainability is very important for modern brands. You need the right papers to prove your claims.
FSC means the paper comes from safe forests. PEFC is also a good choice in Europe. You can also ask for high recycled content.
Next, look at your inks and glues. I suggest water-based glues and soy inks. They are much better for the planet. Always ask your supplier for the real certificates.
I see many brands struggle with the wrong box shape. Magnetic foldable gift boxes come in many styles. I will show you how to pick the right one. This saves you from costly mistakes later.
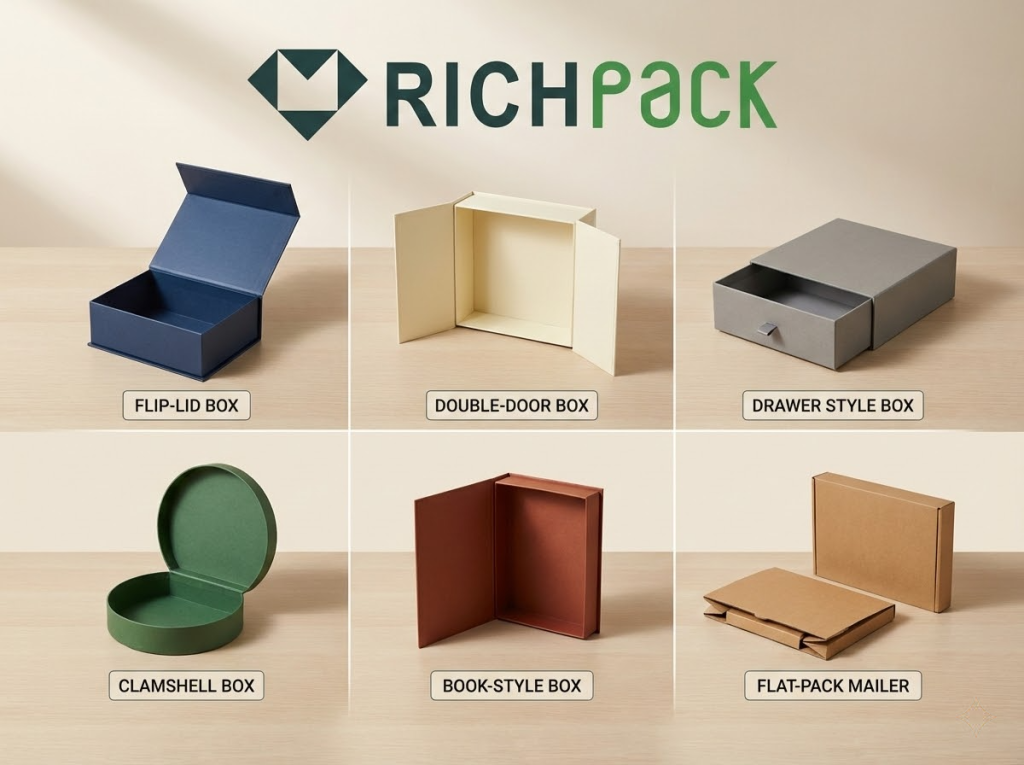
Most buyers start with the standard flip-lid box. It opens just like a book. Magnets at the front keep it tight. I find this works best for almost any product.
One trick I use often is checking the supplier’s stock first. Most suppliers keep this style in stock. This helps you save money on bulk orders. It is easy to find and easy to customize.
Now, let’s look at the double-door style. Two lids open from the center like a cabinet. This creates a real “wow” moment for your customer. I often suggest this for wedding favors or luxury sets.
It costs about 10 percent more than the flip-lid. But the reveal is worth the extra price. The double magnets keep the doors perfectly aligned. Your brand will look very high-end with this choice.
Some products feel better with a horizontal slide. I call this the drawer-style box. A tray slides out from a sleeve. Magnets stop it from falling out.
I use this often for high-end jewelry and pens. It feels very ceremonial. Keep in mind, these are harder to make. They usually cost more than other styles.
A clamshell box has a hinge on one full side. The lid stays attached to the base. I recommend this for flat items like books or tablets.
You will never lose the lid during packing. This makes shipping much faster for your team. It folds flat along the spine. I’ve found this works best for busy fulfillment centers.
The book-style box looks like a hardback book on a shelf. The spine is thick and stands tall. I see brands use this for VIP gifts.
You can print your logo right on the spine. It feels very premium and stays in the home longer. It costs more because the board is thicker. This style is very hard to forget.
Let me be clear about e-commerce shipping. You need a flat-pack mailer box. These are strong enough to ship without a second box.
The magnets replace the need for plastic tape. I’ve seen brands cut waste by 30 percent with this style. It is a great choice for green brands. It arrives flat and snaps together in seconds.
| Format | Best Product Match | MOQ Consideration |
| Flip-lid foldable | Universal | Lowest, widest availability |
| Double-door | Gift sets, multiple items | Standard; +10–15% unit cost vs. flip-lid |
| Drawer style | Jewelry, stationery | Standard; more complex tooling |
| Clamshell | Flat products, tablets | Standard |
| Book-style | Brand documents, display sets | Higher (complex structure) |
| Flat-pack mailer | DTC e-commerce | Standard; may require structural testing |
Customizing turns a basic box into a brand statement. You control these details. Each choice tells your customer something new.
Most shops offer standard sizes like A4 or A5. I usually suggest custom sizes for a perfect fit. Always give the factory internal dimensions. This is the actual space for your product.
Factories calculate external sizes based on board thickness. I suggest specifying the internal height, too. Think about how the customer grabs the item. Do they need finger space or a ribbon pull?
Accuracy is vital for foam inserts. A 2mm mistake can ruin the whole batch. I have seen this happen on many first orders. One trick I use is to send the product to the factory.
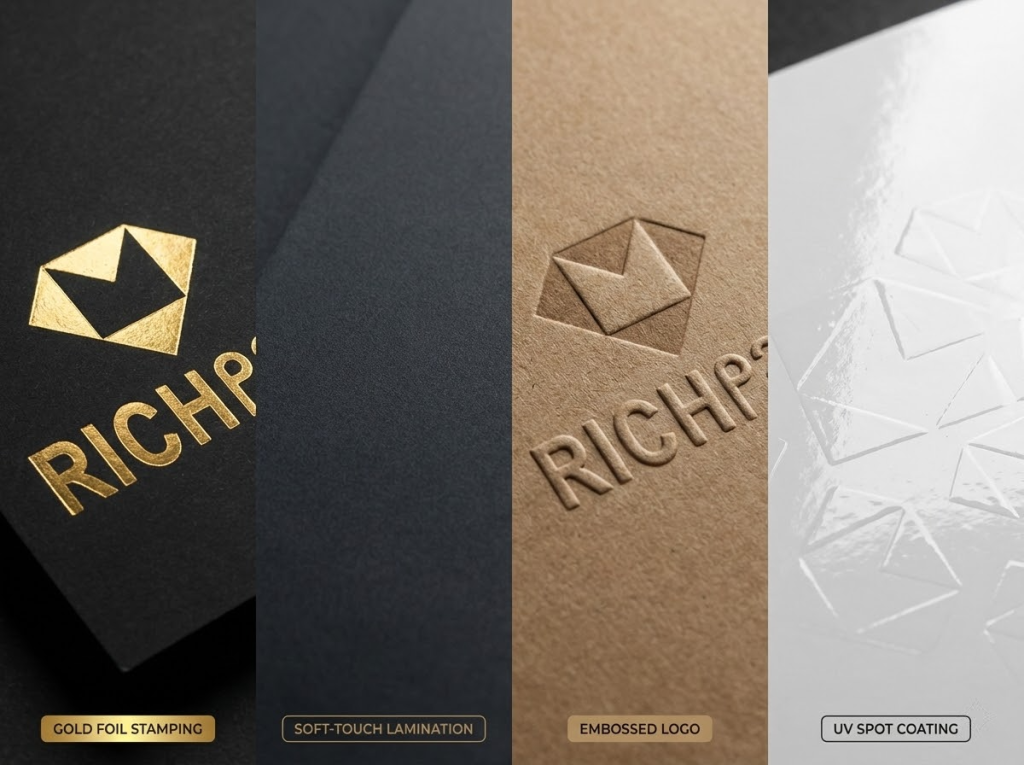
The finish makes a box feel luxurious. It is about how it looks and feels. After working with many clients, I found that the finish sets the tone.
Matte lamination is flat and not shiny. It looks modern and very high-end. I see this most with fashion brands. It can scratch more easily than gloss, though.
Gloss lamination is very reflective. It makes bright colors pop. It shows fingerprints easily. I suggest this for bold, colorful designs.
Soft-touch film feels like velvet. It is very popular for luxury jewelry. It costs more but feels the best. I always recommend this for premium brands.
Hot foil uses heat to apply metal foil. Gold and silver are very common. I often use rose gold for beauty brands. It makes logos stand out.
Embossing creates raised areas on the paper. It shows real craftsmanship. Debossing pushes the design down. It has a quiet and refined look.
UV spot adds gloss to just one area. I like using it on logos. It creates a nice contrast with matte paper. This draws the eye to your brand.
The interior is what people see during the reveal. Many brands skip this part. Then they wonder why their photos look boring. I suggest spending time here.
EVA foam inserts are cut to fit your product. They hold items at the right angle. This is a must for fragile jewelry. It keeps everything safe during shipping.
You can use velvet or satin linings. I suggest matching your brand colors. Most suppliers can match Pantone colors easily. This makes the box look custom.
Print your brand story on the inside lid. You can also add QR codes here. It makes the box more useful. This helps you connect with the buyer.
Ribbon pulls help customers lift the product out. It is a small detail. But it makes the experience much better. I use these for heavy or tight items.
Use branded tissue for an extra layer. It adds to the excitement of opening. It is a cheap way to look more professional.
You can add more than just a lid. These extras help with wholesale orders. I find they add great value.
Use ribbon or satin handles. This turns the box into a gift bag. I see this often in retail stores. It saves the customer from needing a bag.
Windows are clear plastic cutouts. They let people see the product inside. This works well for candles or food. It builds trust with the buyer.
A belly band is a paper sleeve. It adds more space for branding. You can use it to seal the box. It is easy to change for seasons.
Attach tags to the handles. Use them for digital links or prices. They add a nice tactile layer.
Use two magnet pairs for very large boxes. This keeps the lid closed tight. I find that one pair is not enough for big sizes.
Getting the right color is hard. Brands with strict rules need to be careful. I have seen many colors go wrong.
Offset printing is best for large orders. I suggest at least 500 units. It gives the best color match. It also costs less per box.
Use digital printing for small test runs. The colors might look a bit different. Always check the proof first. I do this for every new design.
Ask for a ΔE of 3 or less. This is the industry standard. Anything over 5 looks wrong to the eye. I always put this in my contracts.
This box style is very useful. But I have found it works best for specific needs. Let me share where I see the most success.
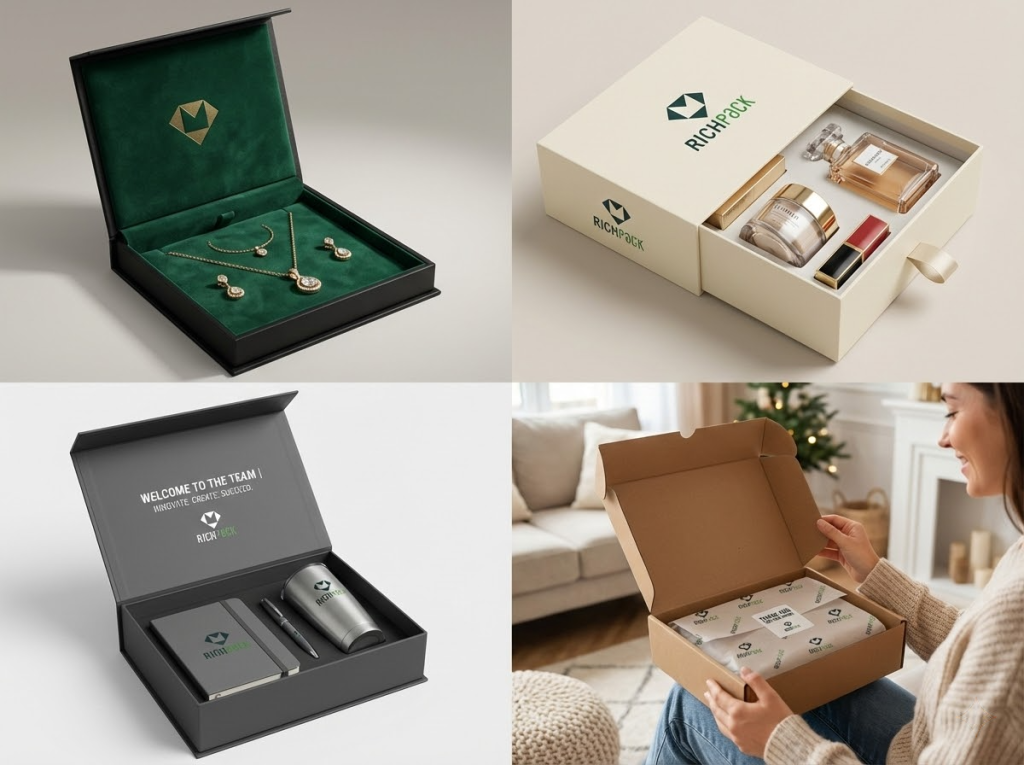
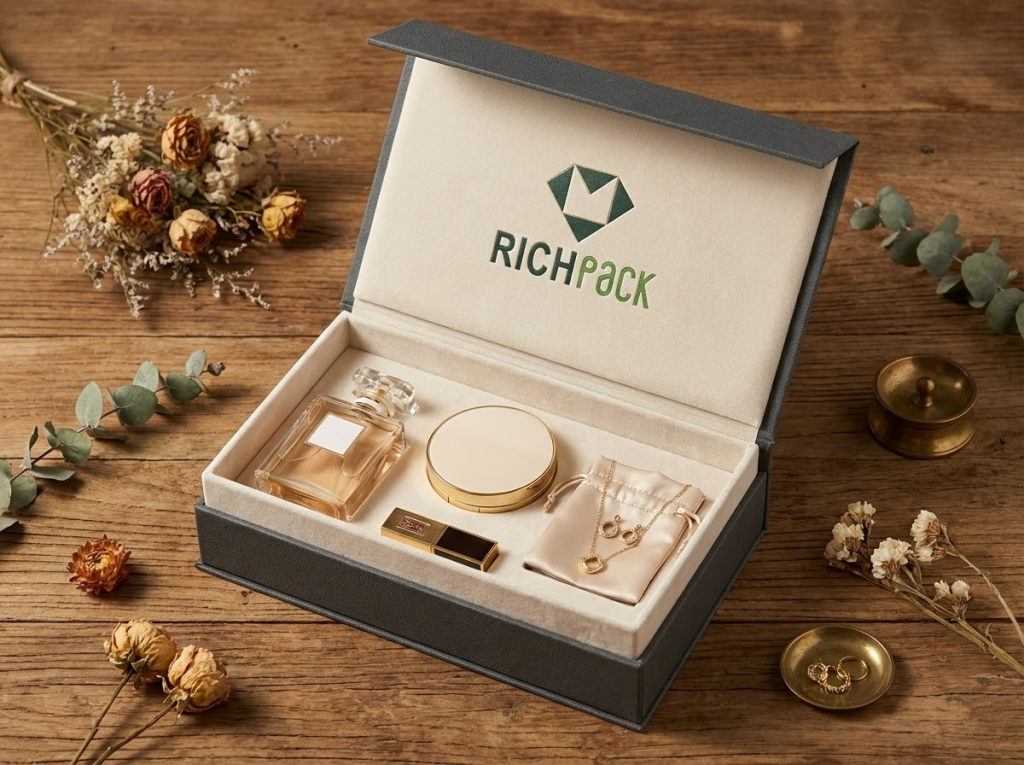
I use these boxes for almost all my high-end jewelry clients. They are the top choice for gift sets. After years of work, I know why they win.
Velvet or satin linings show off your pieces beautifully. The hard walls stop any crushing during shipping. The magnets keep the lid shut without messy ties.
These boxes ship flat to save you money on storage. For brands selling 500 units or more, this is the best choice. It balances cost and a premium look perfectly.
Use a 1.5-2mm board for added strength. Use small disc magnets to protect metal clasps. Always add custom foam to keep the jewelry in place.
Beauty brands love these for holiday gift sets. I find they work well for limited items, too. You can change the size to fit many different products.
The unboxing feel is a big part of the brand story. Luxury buyers expect this kind of high-end touch. It makes the product feel more expensive.
Many big stores now demand green packaging. These boxes ship flat and use less fuel. This helps you meet new rules for the planet.
I have seen many bottles break during shipping. I always suggest using custom EVA foam. This stops the product from tipping over. It also stops costly returns.
Corporate gifting is growing very fast right now. Experts think this market will hit USD 50 billion soon. I see many firms using these for press kits.
These kits look great and ship very easily. You can pick exact colors to match your brand. I suggest using Pantone prints for a perfect look.
Many clients add ribbon handles to these boxes. This lets guests carry them like a bag. It is a smart trick for large events.
Most makers ask for 300 to 500 units for custom work. I find this is a good starting point for most firms. It keeps your costs per unit low.
Better boxes lead to fewer returns for my clients. I have seen this happen many times. A nice box builds a bond with your buyer.
You can print thank-you notes right inside the lid. This makes the buyer feel special. It also helps them remember your brand.
Your team must pack fast during busy times. A good box snaps together in under 10 seconds. This is much faster than old box styles.
Saving time on packing saves you a lot of money. I suggest this for any brand with high daily orders. It makes your warehouse much more efficient.
These boxes work very well in luxury shops. They stay open at a nice angle on shelves. Staff do not have to fix them after every customer.
The clean edges look very sharp in a display. They help the product stand out to shoppers. This leads to more sales in the store.
Some shops sell these boxes as empty gift wraps. Shoppers love them because they are easy to use. They look better than standard wrapping paper.
Holidays bring the biggest sales of the year. I often help buyers prep for Christmas and the New Year. These boxes meet every need for the peak season.
They assemble fast and shut very tightly. You can use bright colors and gold foil for a festive look. This makes them perfect for the holiday rush.
Storing 5,000 flat boxes is very easy for most warehouses. They take up very little room compared to rigid boxes. This is a huge win when space is tight.
I suggest ordering these months before the rush starts. This ensures you have stock when buyers are ready. It makes the whole season run much smoother.
I have seen many brands pick the wrong box. What works for others might fail for you. Let me share a simple plan to help you choose.
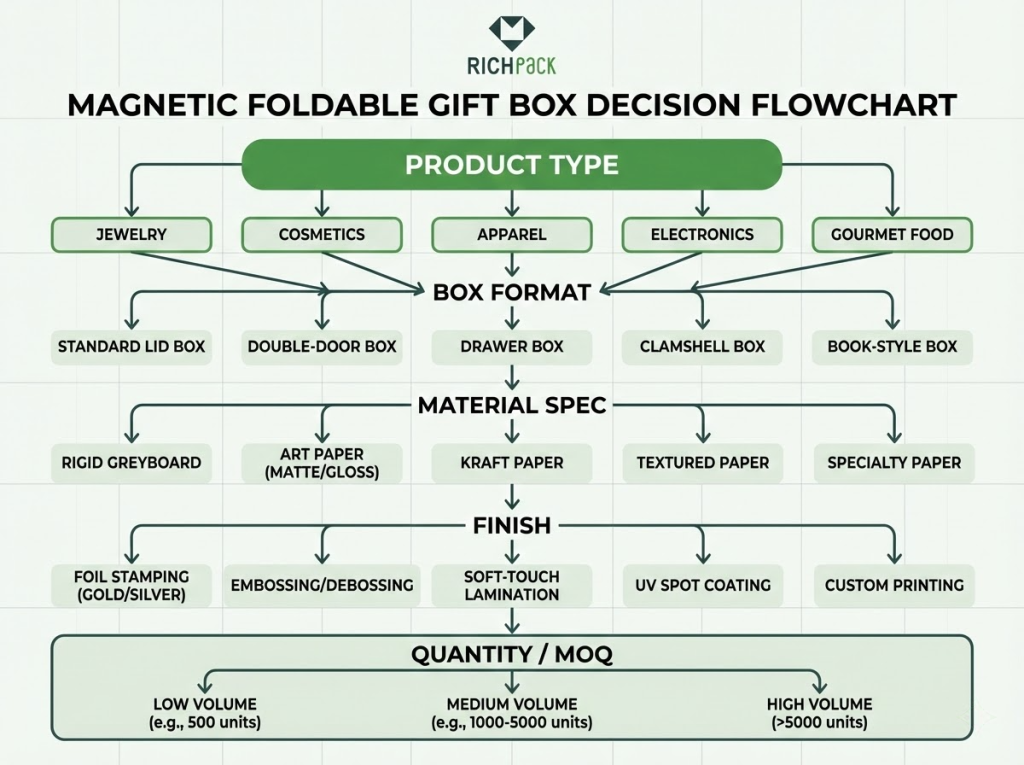
Most buyers make one big mistake. They pick a box size first. I always tell my clients to start with the item itself. Measure the exact size and weight. Think about how fragile it is. Then, build the package around it.
For a product set, I map out every part:
Use these facts to find the right inside space. Do this before you talk to a supplier. It saves a lot of time later.
Your finish must match your brand style. I have found that the wrong look can hurt sales. Use this guide to help you choose the best look.
| Brand Positioning | Recommended Cover | Recommended Finish | Interior |
| Minimalist/modern luxury | Matte art paper | Soft-touch lamination, debossed logo | White or solid art paper |
| Bold/expressive | Gloss or matte art paper | UV spot, vibrant print | Contrasting color paper |
| Jewelry/high-end accessories | Textured specialty paper | Gold or silver foil stamping | Velvet or satin |
| Eco-conscious | Kraft paper | Minimal print, embossed logo | Natural kraft interior |
| Corporate/B2B gifting | Matte art paper | Pantone-matched, foil or spot UV | Printed interior brand messaging |
| Seasonal/celebratory | Coated paper | Metallic foil, holographic elements | Tissue or ribbon |
Changing your mind later costs a lot. Fix your finish before you pay for tools. This is a trick I use to save money.
Do not just look at the price per unit. I always run the full math for my clients. Here is how I do it.
Total cost per unit = (unit price × quantity + shipping + storage cost × weeks) ÷ quantity
Foldable boxes often cost 5 to 15 percent more to make. But they save a lot of space. I have seen shipping savings cover that extra cost easily. Check your own volume and route first.
Low prices usually mean hidden problems. I have seen thin boards that break easily. Some magnets lose their grip in a few weeks. I suggest asking for real samples. Do not trust digital pictures.
When you get the samples, check these things:
Minimum order quantities change based on your design. I see buyers get stuck here often. Know these tiers before you start your project.
| Customization Level | Typical MOQ Range |
| Stock magnetic foldable boxes (plain) | 50–200 units |
| Custom color printing, standard finishes | 300–500 units |
| Full custom: specialty paper, foil, custom size | 500–1,000 units |
| Custom inserts + specialty lining | 500–1,000 units |
| Personalized/variable data printing | 100–300 units (digital printing) |
If your order is small, you might need a simpler box. Or, you can wait to buy more at once. This helps you get a better price.
Now, let us get you a good price. A clear request helps you avoid surprises. I always include these details in my emails.
The more facts you give, the better the quote. This keeps your project on track and on budget.
I have helped many brands source jewelry boxes. I often see small mistakes turn into high costs. Many buyers only look at the price. Then they deal with damaged goods and high returns.
This hurts your brand and your profit. I want to share what I have learned. Here is my plan to help you choose the right box. These tips will protect your investment.
Two-piece rigid boxes are a classic luxury choice. They have a separate lid and base. These boxes are very strong. But they ship at full size.
This makes storage and freight very costly. My clients often find them slow to pack. You must place the lid perfectly every time. This slows down your team.
Magnetic foldable boxes are much faster. They ship flat to save you money. One trick I use is switching to these to cut storage costs. I suggest two-piece boxes for ultra-luxury retail only.
Use magnetic boxes if you care about speed. They work best when you need to scale fast. They also keep the lid attached so it never gets lost.
Tuck-end cartons are the cheapest option. They arrive flat and save space. These work for very high volumes. But they feel cheap to the touch.
They do not last very long. I rarely suggest these for high-end jewelry. They do not create a great unboxing moment. Customers often toss them out right away.
Use them only if your product costs under 20 dollars. For better branding, go with a magnetic box. It makes your jewelry feel more valuable. I have seen this lead to better reviews.
Drawer boxes slide open for a cool reveal. This works well for watches and rings. But these boxes are hard to make. The sliding part can get stuck in humidity.
They also cost more per unit. I find flip-lid magnetic boxes easier to source. They offer a great look for less money. You can customize them much faster at scale.
Only pick a drawer box if the reveal is vital. I suggest testing the drawer in different climates first. For most brands, the magnetic flip-top is a safer bet.
Corrugated boxes focus on shipping safety. They protect your goods during transit. But they look very plain. Most customers throw them away.
They do not help your brand stand out. I often put a magnetic box inside a mailer. This keeps the jewelry safe. It also gives the customer a great unboxing.
Choose a mailer if you only care about transit. If you want to build a brand, use both. The mailer protects while the magnetic box impresses. This is how I help clients reduce damage.
Fabric bags are soft and easy to store. They work with small charms or crafts. But they do not protect the jewelry. They also lack a premium feel.
I’ve found that custom magnetic boxes cost the same at scale. They offer much more value to your brand. I always suggest a box over a bag for luxury.
A box shows that you care about quality. It protects the item from tarnishing or bending. This leads to fewer complaints from your buyers. Now, let’s look at your next order.
I want you to understand how we make these boxes. It helps you pick the right partners. You will avoid many bad surprises this way.

Step 1 — Dieline engineering. First, my team makes a flat drawing called a dieline. This plan shows every cut and fold. It makes sure the box fits together perfectly.
Step 2 — Board cutting and scoring. We cut the greyboard to the right size. Then, I score the lines for the folds. This presses the board so it folds without breaking.
Step 3 — Cover paper printing. We print your design on thin art paper. I suggest offset printing for large orders. It keeps colors very steady.
Step 4 — Lamination and surface finishing. Next, we add a finish like a matte or glossy coat. We also add foil or raised logos now. I always do the raised parts before the foil.
Step 5 — Cover the paper by mounting it onto the board. We glue the printed paper onto the board. I watch this step very closely. A tiny slip makes the corners look messy.
Step 6 — Magnet insertion. We put strong magnets into small holes in the board. I make sure they line up exactly. If they are off, the box will not stay shut.
Step 7 — Interior lining and final assembly. We glue the soft inner lining inside. Then we fold the boxes flat. My team checks every box before we ship them.
Good makers check quality at every step. After working with many brands, I suggest you ask about these points:
For big orders, I always ask for a pre-production sample. This is a real box made on the big machines. It proves the quality before we start the full run.
If you buy from other countries, use these tools to stay safe:
I always ask for these papers from a new supplier. It shows they are professional and reliable.
Standard timelines for these custom gift boxes usually look like this:
| Phase | Typical Duration |
| Sample approval (first sample) | 5–7 business days |
| Sample revisions (if needed) | 3–5 business days per round |
| Pre-production sample (large orders) | 7–10 business days |
| Full production run | 12–18 business days after approval |
| Sea freight (Asia → North America/Europe) | 20–35 days depending on port |
| Total from order to delivery | 7–12 weeks (sea freight) |
Air freight is much faster but costs a lot more. I only use it for urgent restocking.
Even good boxes can have issues. Tell your receiving team to check for these:
Take photos if you see these things. I do this to manage supplier claims quickly. Catching errors early saves you a lot of money.
I have seen small mistakes ruin big product launches. Many buyers focus only on price or design. They miss the details that protect profit margins. Let me share how to avoid these common traps.
These errors often lead to a poor fit or high costs. You might face shipping delays or damaged goods. I want to help you create boxes that look great. This guide keeps your inventory safe and your customers happy.
Digital mockups always look perfect on a screen. I’ve found that physical samples tell a different story. You need to feel the magnet strength yourself. Check the corners for gaps after opening the box many times.
Never skip this step before a full production run. I suggest checking the paper color under your own office lights. Photos from a supplier can be very misleading. Hold the box to ensure it feels solid and reliable.
Your product size is just a starting point. I always add 3 to 6mm of side clearance. This leaves room for the insert and your customer’s fingers. It makes the product much easier to remove.
Add 5 to 10mm of height to the box. This prevents the lid from pressing down on your product. Always give your supplier internal dimensions. Do not just send the raw product measurements.
The unit price is only one part of the cost. I calculate the total landed cost for every project. This includes shipping, customs, and warehouse space. These extra costs change your actual margin.
Foldable boxes often cost 10% more to make. However, they save up to 70% on shipping fees. They take up much less space in your warehouse, too. Run these numbers before you pick a box style.
Retail lights differ from warehouse lights. I’ve seen matte finishes look dull in the wrong setting. Soft-touch films also feel different depending on the factory. Some feel silky while others feel like rubber.
Always check your sample under your actual store lighting. Do not rely on a screen or a desk lamp. See how the finish handles fingerprints during a normal day. This ensures the box stays beautiful in the customer’s hands.
Many brands forget the inside of the box. The interior is the first thing a customer sees. A plain white liner can make a premium box feel cheap. This ruins the unboxing experience for your buyers.
I suggest matching the inside material to the outside. You can also add a small printed message inside. This is a small change with a high return. It makes your brand look more professional and thoughtful.
Bad shipping marks lead to big headaches. I make sure my purchase orders are very detailed. List your carton labels and material certificates clearly. This prevents confusion when the goods arrive.
Specify how the boxes should sit on the pallets. Tell the supplier how to pack the inner cartons. This protects the boxes during a long sea voyage. Clear communication stops surprises at your loading dock.
Budget 7 to 12 weeks for sea freight orders. This covers everything from sample approval to your door. I usually see production take 12 to 18 business days. Your first order always takes longer. Reorders move faster because the tools are ready.
Most shops start at 300 to 500 units for standard printing. If you want special materials or inserts, expect a 500 to 1,000-unit minimum. I’ve seen some digital printers take orders as low as 100 units. This is a great way for new brands to start.
Yes, you can get FSC-certified boards and papers easily. I always tell clients to ask for the chain-of-custody papers. You need these to prove your eco-claims. Most top-tier makers have these ready for you.
Standard box magnets can harm old magnetic stripe cards. I’ve seen this happen when cards sit right on the closure. If you ship gift cards, tell your maker. We can use weaker magnets or move their spot. Modern chip cards are usually safe.
Give your maker exact sizes and material types. List your finish, lining, and any extras like handles. I also need your quantity and shipping spot. A full list gets you the best price. It saves you from hidden costs later.
Magnets offer a quick, one-handed snap. Ribbons feel like a ceremony, but do not hold the box shut. I prefer magnets for shipping or high-volume sales. They keep the product safe. You can even use both for a high-end look.
You can order small lots, but the price per box goes up. I often see costs double or triple for small runs. Try using a standard box with a custom insert first. This lets you test the market without spending too much. It is a smart move for new brands.
These boxes give you a luxury look with low shipping costs. I love them because they save space and look great. You must choose the right board and magnets carefully. Getting this wrong leads to costly mistakes.
I’ve helped many brands pick the right specs for their jewelry. My goal is to help you buy with confidence. Use these tips to avoid the errors I see most often. This step-by-step plan keeps your brand looking sharp.
Are you still unsure about which box fits your brand? I work with jewelry and gift brands every day. We build packaging that works for your whole supply chain.
Just submit your email to get exclusive offers (reply within 12 hours)
 PREV
PREV