

 PREV
PREV
5 Jewelry Box Styles for Ring Gift Box: How to Choose the Perfect Case
2025-04-27
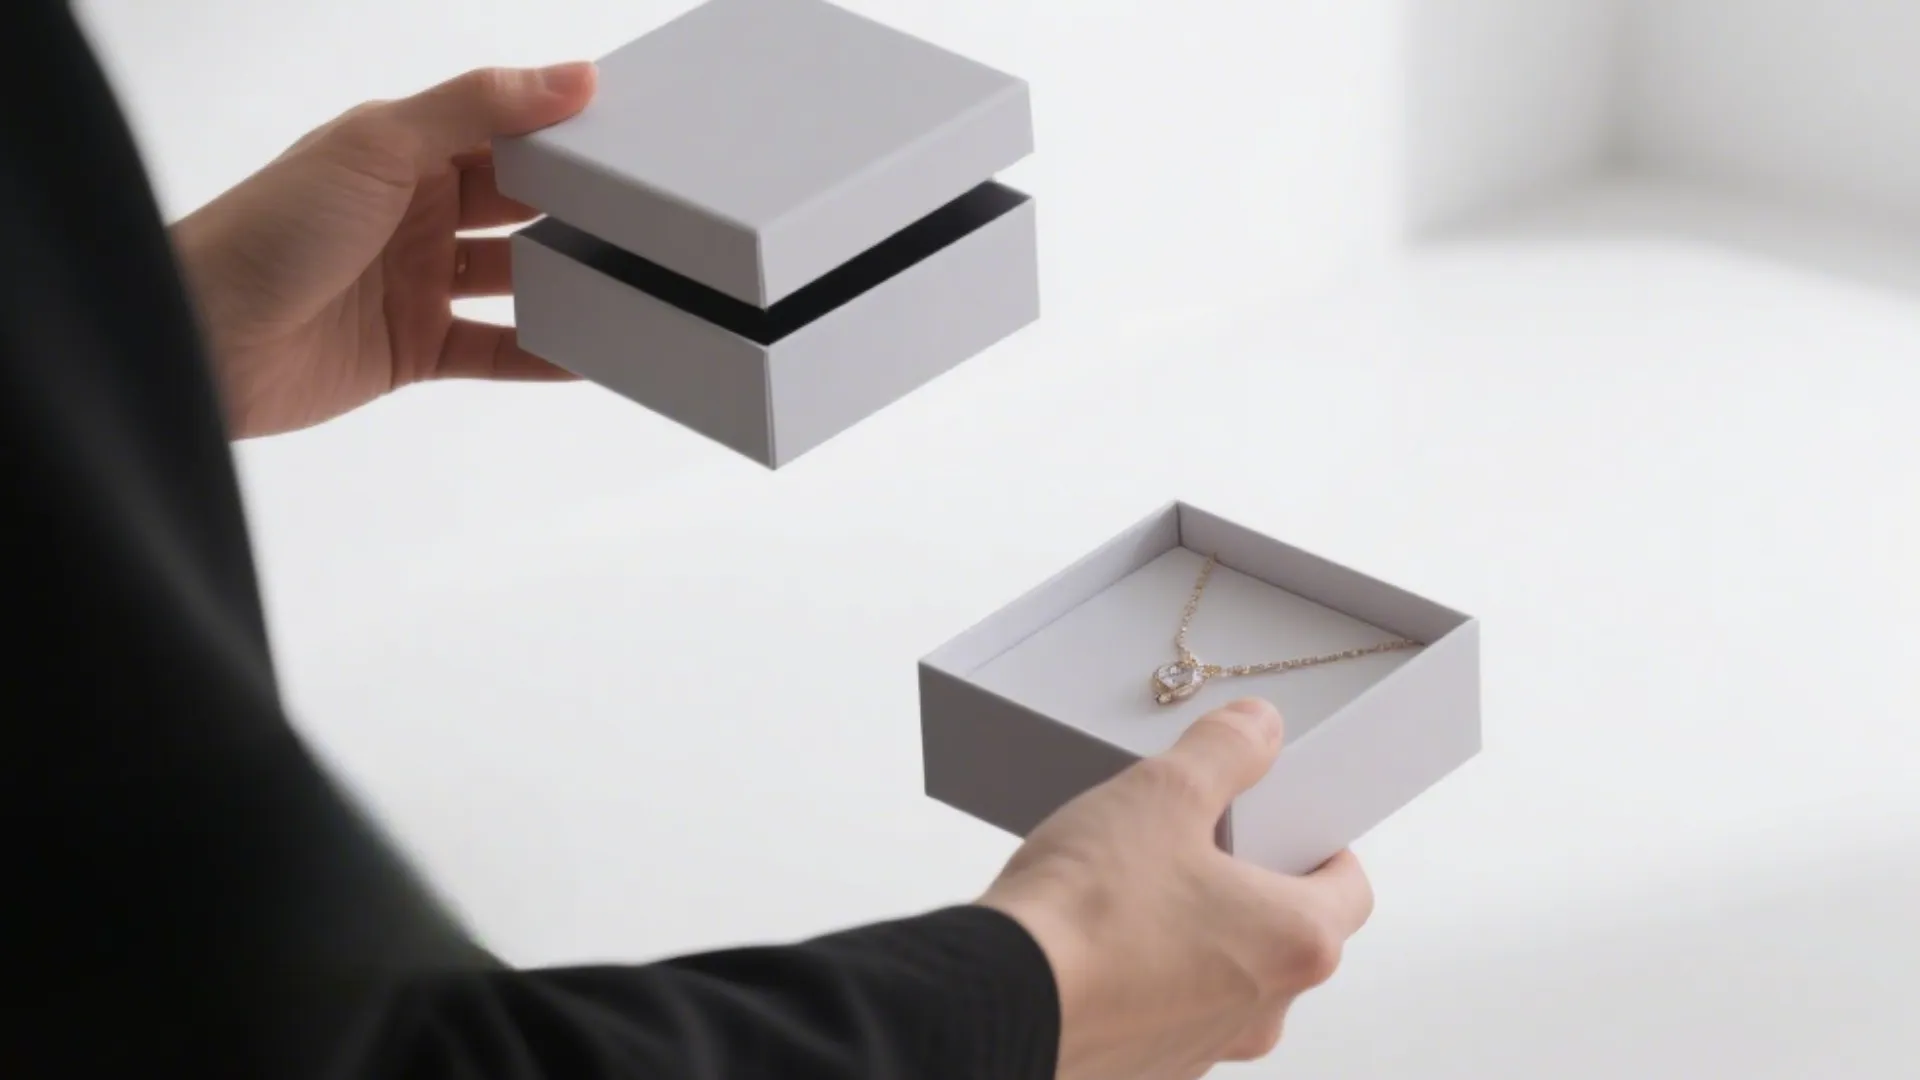



A ring can look beautiful in a product photo and still fail inside the box. The stone may touch the lid. The band may lean in its slot. The box may feel plain when the customer opens it.
The best lid-and-base ring boxes connect the visible moment to the physical details behind it. The lid, base, insert, lining, logo, and shipping pack should function as a single system.
After reading, you will be able to compare five design directions, match an insert to a ring, write a supplier brief, and set sample checks before bulk production. You will also know which details can support a purchase decision and which claims need proof.
Start with RichPack’s custom jewelry boxes when you need a product range to discuss with your design or purchasing team.
A lid-and-base box gives the ring a defined stage. The base holds the insert. The lid controls the first view, the closing action, and the amount of space above the stone.
That simple structure leaves room for thoughtful design. It also makes a poor fit easy to see, so the design must be checked with the real ring and the finished box.
| Design question | Physical detail behind it | Customer-facing result | Check before production |
| Does the ring appear at once? | Lid height, insert position, and contrast | A clear first view | Open the finished box at normal eye level |
| Does the stone stay protected? | Slot depth, stone height, and lid clearance | Fewer contact points | Close the box with the real ring |
| Does the box feel intentional? | Board, wrap, edge finish, and closure | A stronger hand feel | Review corners, seams, and opening force |
| Does the brand feel recognizable? | Color, logo position, and finish | Easier brand recall | Approve artwork on the actual substrate |
| Can the system travel? | Inner box, outer carton, void control, and labels | A consistent delivery experience | Check the fully packed route sample |
The opening action should reveal the ring without making the customer hunt for it. A dark ring in a dark cavity can lose its outline. A tall insert can hide the stone. A lid that opens too far can make the logo disappear from the viewing angle.
Set the viewing position before you choose the final proportions. A counter display, a hand-delivered gift, and a parcel opened at home may need different visual priorities.
Lid clearance is the open space between the highest point of the ring and the inside of the lid. It protects a raised stone, halo, or setting from rubbing against the lining or board.
For an early mockup, a 2 to 3 mm planning gap can help start the conversation for a small ring box. It is not a universal production tolerance. The final space depends on the stone, insert compression, lining thickness, lid folds, closure, and box size.
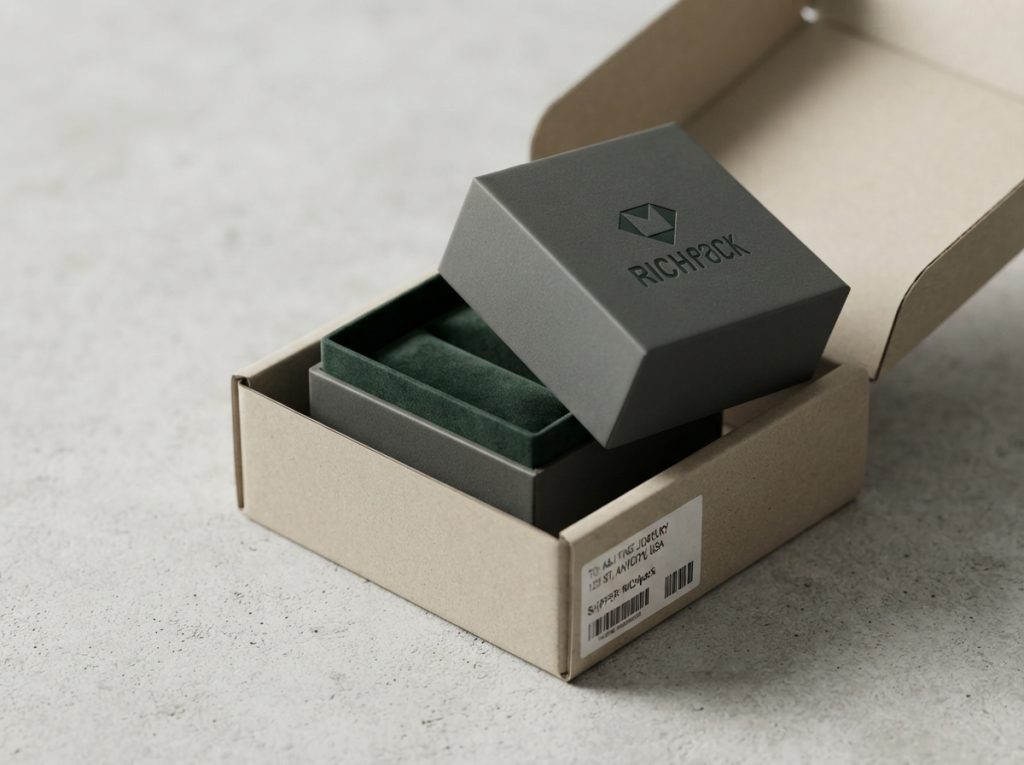
The presentation box creates the opening moment. The outer shipper handles parcel movement, compression, labels, and void space.
Do not ask one small ring box to do both jobs by default. A beautiful box can still slide inside a carton or arrive with a rubbed corner. Keep the inner box refined and give the outer pack the protection and discretion the delivery route requires.
Retail staff may open and close the box many times. A direct-to-consumer parcel may be turned, stacked, and handled before the recipient sees it.
Write the route into the brief. The same ring box can use different outer packaging, labeling, or packing instructions for a store, a VIP handoff, and an international parcel.
Every attractive idea needs a physical translation. “Make the box feel luxurious” is too broad to approve.
Replace it with observable details:
A framed reveal uses the lid, base, insert, and negative space to direct attention toward the ring. The design lever is the opening view, not decoration added to every surface.
This direction works well when the ring is the hero product. It can also support a collection with several ring sizes if the insert and viewing height stay consistent.
The lid can act like a border around the ring. A lower lid keeps the opening compact. A deeper lid gives more room for an inside message or logo, but it may change the angle at which the ring is seen.
Mock up the box from the customer’s normal hand position. Check whether the stone, band, and brand mark appear in the same opening sequence.
For rigid construction details, compare RichPack’s guide to rigid box construction for jewelry. The finished height still needs to follow your ring and insert.
Contrast can come from color, texture, or value. A smooth, dark lid over a lighter lining can outline a bright stone. A quiet exterior with a colored interior can keep the outside restrained while making the opening memorable.
Use one main contrast first. Too many finishes can make the box compete with the ring. The customer should see the product before noticing the construction tricks.
A lid-and-base box may lift straight off, hinge, or use a fitted closure. Each motion changes what the customer sees and feels.
Check whether the lid can be removed without brushing the stone. Check whether the base stays stable in one hand. Check whether the insert remains seated when the box opens.
A high insert edge can make a low-profile band look smaller. A deep shadow can hide prongs or a halo. A tight slot can tilt the ring toward one side.
Use a side view and a top view. The top view shows centering. The side view shows stone height, lining folds, and clearance.
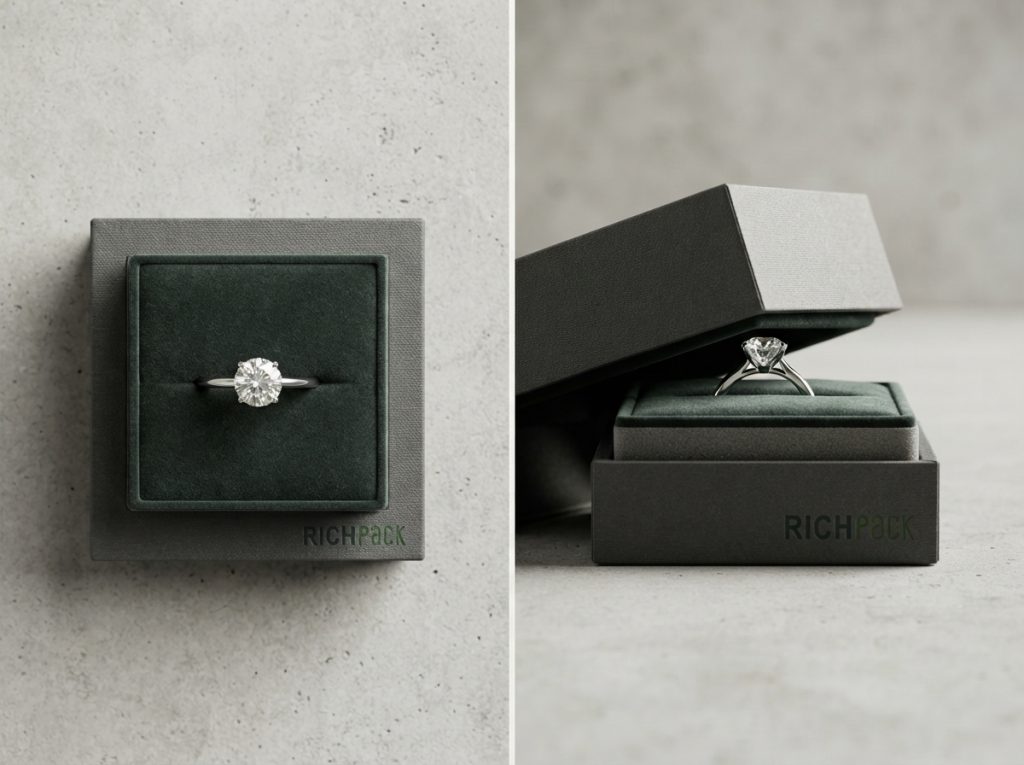
Do not approve the opening effect with an empty sample. Use the actual ring, including its highest stone and normal finish.
Take one photo with the box closed and one with the lid open at the intended viewing angle. Keep those photos with the physical sample and the approved drawing.
Material contrast gives the box a richer visual and tactile rhythm. The safe way to use it is to separate the jobs of each layer.
The structural board gives the box shape. The exterior wrap carries color and touch. The insert holds the ring.
The lining touches the product. Adhesive, magnets, ribbon, coating, and the outer carton add more variables.
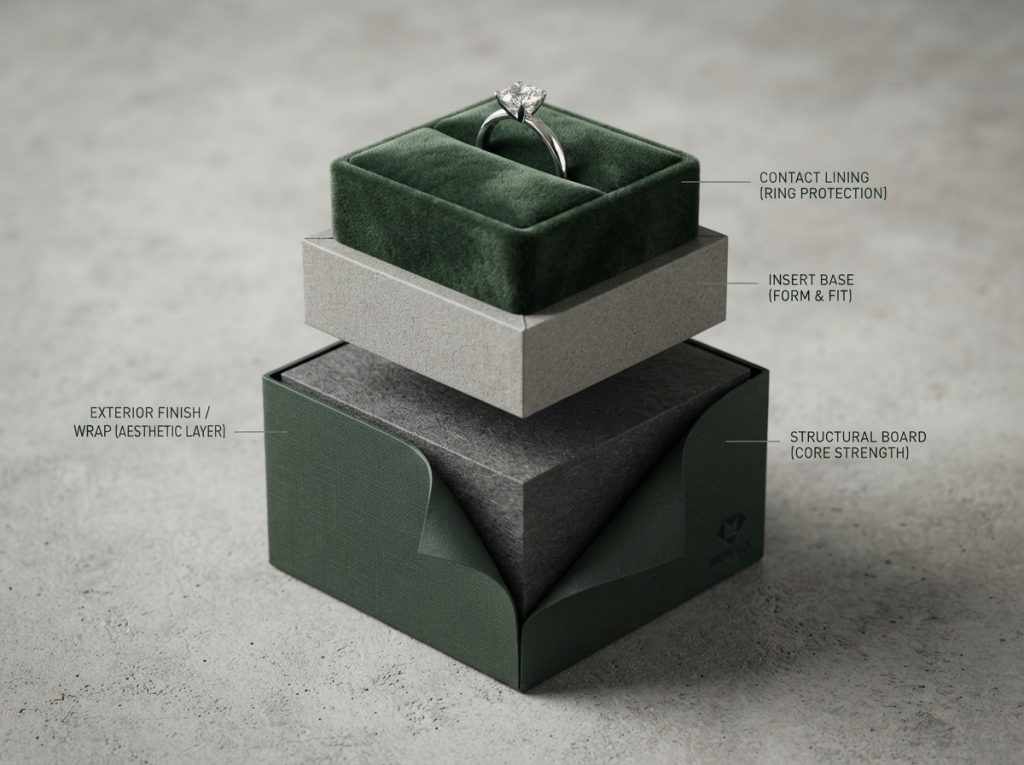
Use RichPack’s packaging material options as a starting point for a material conversation, then approve the complete finished stack.
A soft-looking outside does not mean the ring touches a soft material. The board underneath may control the walls, while the insert and lining control the product contact.
Write these items as separate lines in the specification:
This makes a quote easier to compare and helps quality teams identify a change.
Textured paper, fabric, or leatherette can create a strong hand feel. The inside can then stay quiet so the ring remains the focus.
Review the edge folds and corners first. Those areas show wrinkles, lifting, and rub marks before a large flat panel does. A sample that looks smooth in the center may still fail at the lip.
Kraft, coated paper, fabric, and leatherette each change how colors appear. A printed color that looks correct on a screen may look different on a warm or textured surface.
Keep a physical color reference with the sample request. Record whether the logo must match a jewelry card, pouch, shopping bag, or display fixture.
A closed box can hold odor longer than an open sample. Review the cured box after it has remained closed for the storage period your team expects.
Check loose fibers on velvet or microfiber. Rub the lining against a similar metal surface only as an early screen, then confirm the finished contact surface with the actual ring. A single fiber on a clasp or a rough edge near a stone can change the customer’s impression.
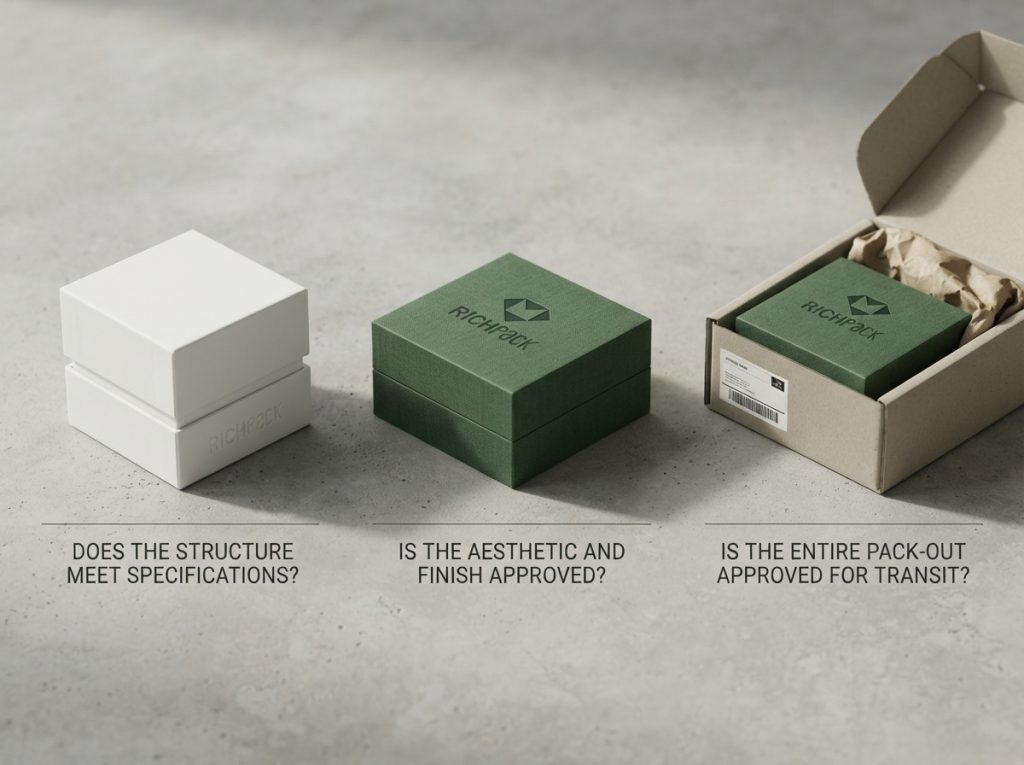
The white sample shows structure. The finished sample shows the real fit, wrap thickness, lining compression, color, texture, and closure.
Approve the finished material stack, not only the names of the materials. If a supplier proposes a substitution, record the new board, wrap, lining, finish, and approval owner before production.
The insert is where the box stops being a shell and starts behaving like ring packaging. It should hold the band, protect the stone, and make removal natural.
RichPack’s custom ring boxes can help your team compare starting formats. For a new program, the insert still needs to be built around your ring form.
A slot that is too wide lets the ring lean or rotate. A slot that is too tight can make removal awkward and place pressure on the band or setting.
Measure the ring in its finished form. Include the band profile, stone height, setting width, and any coating or surface detail that must not rub. Note the smallest and largest versions if the collection has size variation.
Set the highest point of the stone as the reference. Then add the insert cover, lining folds, and the inside lid surface to the fit review.
A white insert can look correct before wrapping. The finished lining can raise the ring or reduce the usable cavity. Close the box slowly and look for contact from more than one angle.
The slot must secure the ring without making the customer pinch the stone or drag the band across a hard edge. Leave a clear finger path and test the motion with the same hand a customer would use.
If the box is for retail staff, repeat the action several times. If it is for gifting, test it with the ring positioned exactly as it will arrive.
A jewelry brand may want one recognizable outer box for several ring styles. That can work when the insert changes in a controlled way.
Keep the base, lid, and brand treatment stable. Create approved insert variants for low-profile bands, raised settings, wide bands, and ring sets. Do not force every product into one cavity just to keep the outside identical.
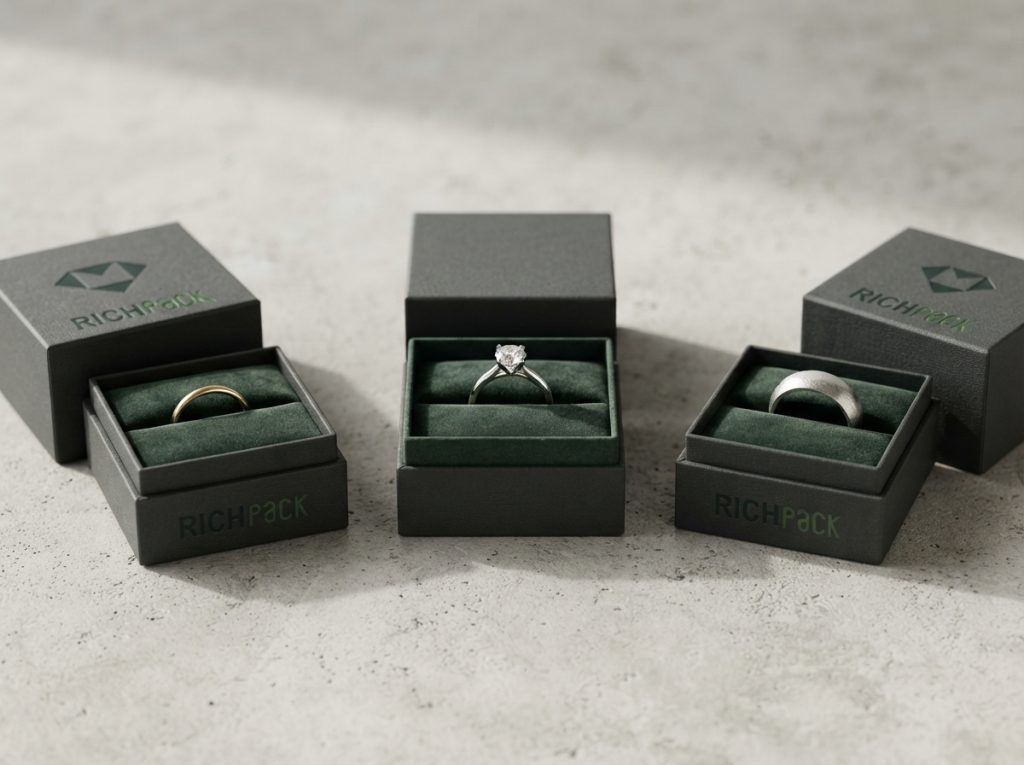
The wrapped insert is the finished insert. Its edges, compression, folds, and adhesive can all affect the ring.
Ask for the insert drawing and the material details used in the sample. RichPack’s custom jewelry box inserts can give the team a clearer starting point. If you also need trays for a collection, compare RichPack’s jewelry trays and keep the ring-box fit rules in the same specification pack.
A ring box does not need a logo on every panel to feel branded. One clear mark, one controlled color, or one inside detail can be easier to recognize and easier to reproduce.
The commercial value comes from consistency. When the box, ring, card, pouch, and outer pack share a visual language, the customer spends less effort working out who made the product.
Choose the surface that the customer sees first. The lid may work for a closed-box photo. The inside lid may work for an opening ritual. The base may suit a discreet mark that does not compete with the ring.
Record the logo size, clear space, position, orientation, and finish. A verbal request such as “make it larger” creates avoidable revision work.
Color can separate the exterior from the interior, mark a collection, or connect the box to the rest of the brand system.
Use a physical color reference when the wrap is textured, coated, or warm-toned. Keep a note of the viewing light used for approval. This does not remove every variation, but it gives the team a shared point of comparison.
Foil stamping can create a crisp mark on a suitable surface. Embossing can add depth and touch. Both depend on artwork size, paper texture, pressure, coating, and the shape of the panel.
Fine lines may lose clarity on a deep texture. A folded edge may distort a mark. Review the options in RichPack’s guide to logo application techniques and ask for the finish on the real wrap.
An inside-lid message, a colored lining, or a small care card can support the opening without crowding the ring.
Keep the order clear. The customer should see the ring, understand how to remove it, and then notice the supporting message. Do not place a card where it pushes the insert upward or touches the lid.
A digital proof confirms the file. A flat proof can confirm a rough color and placement. The finished box confirms folds, texture, gloss, foil edges, and viewing angle.
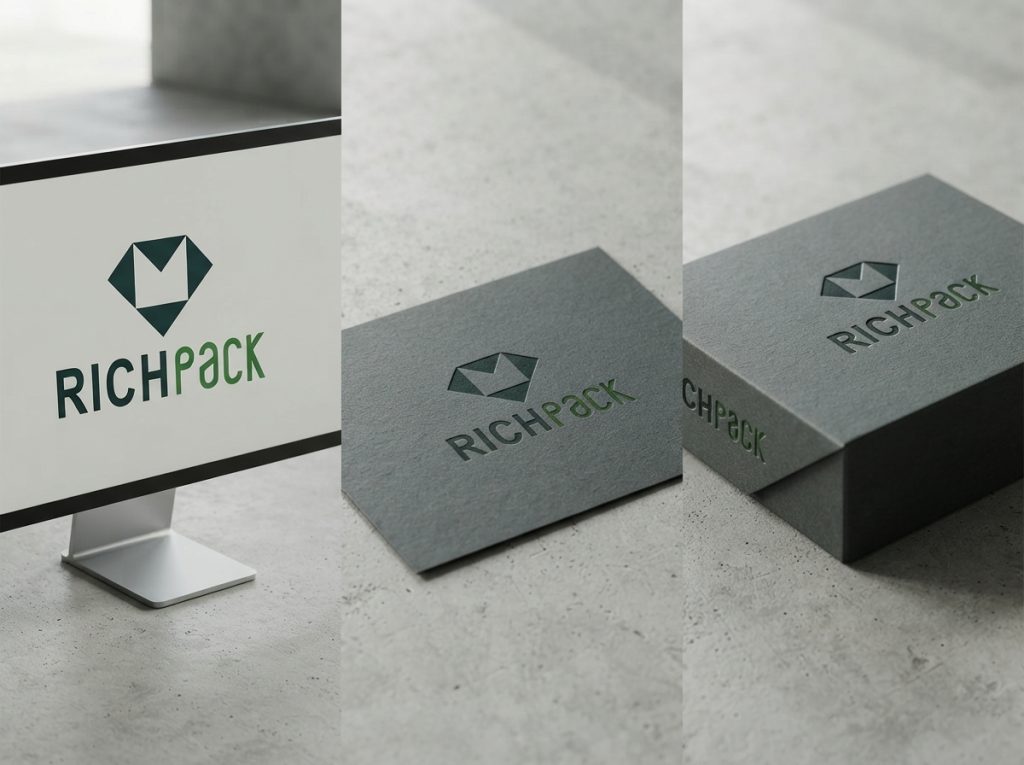
Approve the artwork on the finished box before bulk production. Keep the approved sample, artwork version, and material record together. For a broader branding reference, compare jewelry boxes with logo that uses a defined logo position and finish.
The fifth idea is less about a visual trick and more about making the design survive the route from production to the customer. A ring box can feel special at the brand table and still arrive scuffed, visible, or incorrectly packed.
Use safe jewelry shipping guidance to separate the presentation layer from the delivery layer. For environmental claims, review RichPack’s sustainability commitment and keep each claim tied to the material or component it covers.
Every extra part uses space, labor, and money. Include a care card, pouch, polishing cloth, authenticity card, or note only when it serves a clear customer or operations need.
Place each accessory in the actual box. Close it, turn it gently, and open it again. A loose card can create a hard edge. A pouch under the lid can reduce clearance.
A presentation box is not automatically a shipping system. The outer carton should hold the inner box, control movement, and protect corners without adding unnecessary space.
Consider the delivery route, carton size, void control, tape, labels, and storage conditions. A direct parcel and a hand-delivered VIP gift may need different packouts.

The outer carton may pass through many hands before the recipient sees the ring. Check the product name, brand marks, windows, labels, and packing slips.
Use neutral outer packaging when discretion matters. Review one fully packed carton, not just the flat carton artwork.
A reorder should not depend on someone remembering the first sample. Save the approved box, insert drawing, BOM, artwork, color reference, packing method, and change history.
Name the approval owner. Record any allowed material substitution. Compare the next sample with the physical master before release.
Review the ring, insert, lid, base, accessories, inner box, outer carton, label set, and packing direction together.
ISTA provides package testing resources, and ASTM D4169 describes performance testing for shipping containers and systems. Use the current method that fits the route and pack. A standard name is not a test result, and mentioning a standard does not create a certification claim.
A supplier brief converts the chosen design direction into information that another team can quote, sample, and check. Keep the creative idea, physical specification, and approval rule in the same document.
Include:
If the ring is still changing, label the measurements as draft values and state when the final sample will arrive.
State how the customer should open the box. Should the lid lift off, hinge, or release with a light magnetic pull? Should the insert stay in the base? Should the logo appear before the ring or with it?
Describe where the box will be opened and stored. A jewelry counter, a parcel doorstep, and an event table create different handling needs.
Separate structure from contact:
Do not write “soft insert” as the complete requirement. State the ring restraint, lining surface, color reference, and edge expectations.
Use three approval stages:
The first checks geometry and clearance. The second checks finish and final fit. The third checks the entire delivery pack.
Write visible pass rules. For example, the ring must remain seated when the box is turned gently, the stone must not touch the lid, and the finished logo must match the approved position.
Separate test, launch, and reorder quantities. List each product variant and market. State the target arrival date, delivery points, outer-carton needs, and the approval dates.
Ask the supplier to show structure, insert, finish, sampling, packing, and freight as separate quote lines. A low unit price is difficult to judge when the sample, insert, or delivery assumptions are hidden.
For a one-stop project discussion, send the completed brief to RichPack custom packaging services.
Approval is where a creative direction becomes a repeatable product. Keep the stages separate so a good-looking finish does not hide a fit problem.
Check the base, lid, wall height, opening motion, closure, insert position, accessory space, and lid clearance. Use the actual ring if the geometry is close enough to handle.
Mark changes on the drawing. “Make the slot tighter” is less useful than a note showing the location, direction, and approval owner.
Check the finished wrap, corners, seams, lining, logo, foil, embossing, coating, color, odor, and closure feel.
Open and close the box with the ring inside. The finished layers may change the fit from the white sample.
Put the inner box, accessories, void control, labels, tape, and outer carton together. Turn the carton gently and inspect whether the inner box can hit the walls.
For route testing, use a plan suited to the product and delivery system. Do not present a test reference as proof that every route will perform the same way.
Keep one dated record with:
The record should be readable by design, procurement, quality, and packing teams.
Compare every reorder with the master sample. Check the last known problem first, whether that was color, insert fit, lid friction, edge wrap, or packing direction.
Require written approval for changes. A reorder is a new production event, even when the requested wording is “same as before.”
Cost comparison works when every quote describes the same finished product. The structure, insert, finish, packing method, quantity, and destination must match.
Ask for separate lines for:
Fixed setup cost spreads across quantity. If a project has a $120 setup cost, that part equals $1.20 per box at 100 boxes and $0.12 per box at 1,000 boxes. This is planning math, not a market price or supplier quote.
Check finished dimensions, board, wrap, insert, closure, finish, packing, delivery terms, and product variants.
A cheaper quote may exclude the insert, use a different lining, omit the finished sample, or assume another freight method. Put every difference in one comparison sheet before choosing.
A test quantity limits inventory exposure but may spread setup costs across fewer units. A launch quantity may reduce the unit cost while increasing storage and cash risk.
Count variants that share one outer structure. Then ask whether a product change, new finish, or new insert would make the first run obsolete.
Late changes can affect the dieline, insert, finished sample, production slot, and freight. Add an approval deadline for the artwork, finished sample, and production release.
The cheapest quote is not useful if it leaves no time to find a lid-clearance or packing problem.
Before approval, ask:
These questions protect both the design and the budget.
Use the visible symptom to start the correction. Then inspect the physical part behind it.
| Visible failure | Likely cause | Fast check | Design response |
| Ring leans or moves | Slot is wide, or support is weak | Turn the packed box gently | Revise slot geometry and retest removal |
| Stone touches the lid | Ring or insert is too high | Check the highest point and lining folds | Increase clearance or lower the insert |
| Logo looks different | Substrate, texture, coating, or light changed | Compare the finished sample with the reference | Approve the actual wrap |
| Box arrives scuffed | Inner box slides or outer pack is weak | Inspect void space and corner contact | Adjust carton and packout |
| Box feels plain | Brand detail is scattered or too small | View the closed and open box together | Give one surface a clear brand role |
| Reorder does not match | Files, materials, or tolerances changed | Compare with the physical master | Use versioned specifications and approval |
Check slot width, depth, insert firmness, lining thickness, and the band profile. Then check whether the ring is meant to rotate or stay fixed during opening.
Do not tighten the slot until removal becomes difficult. The correct result is controlled movement with a clear customer motion.
Check stone height, insert position, lining folds, lid board, and closure position. A softer lining does not solve a lack of space.
Use the finished ring and finished box. Mark the contact point and update the drawing.
Check the substrate, finish, color reference, viewing light, artwork version, and folded edge. Then compare the mark on the lid, spine, and any curved or folded area.
Approve one finished reference sample. Keep it with the production specification.
Inspect the inner box, carton wall, void control, tape, and carton direction together. Look for repeated contact at corners and edges.
If the outer pack needs a new design, retest the complete pack. Do not judge transit protection from the presentation box alone.
Compare the artwork, BOM, insert drawing, material source, finish, closure, and packing method. Ask the supplier to identify every change, including substitutions that appear minor.
A dated master sample gives the production team something physical to match.
Lid and base ring boxes are two-piece boxes with a separate lid and base that hold a ring insert. The structure creates a clear presentation moment, while the insert controls ring position and stone clearance.
Start with proportion, fit, and one clear brand detail. Use a finished wrap, a controlled color contrast, a well-positioned logo, and an insert that keeps the ring centered. A physical sample matters more than a material name or digital mockup.
The best insert matches the band profile, stone height, size range, lining, and removal motion. A slot or shaped channel can work, but the supplier should check the real ring, the finished lining, and the lid clearance before bulk production.
There is no single number for every ring box. A 2 to 3 mm gap can serve as an early planning range for a small box, but the finished ring, insert compression, lining folds, lid, and closure must determine the final clearance.
Yes. Common options include print, foil stamping, embossing, and an inside-lid message. Send vector artwork and a physical color reference, then approve the logo on the finished substrate.
Review a structural white sample, a printed and finished sample, and a fully packed route sample. Check fit, stone clearance, removal, closure, finish, accessories, outer-carton movement, labels, and packing direction.
Use the same finished size, board, wrap, insert, lining, closure, logo finish, quantity, packing method, destination, and freight assumption. Ask suppliers to separate samples, setup, per-unit packaging, packing, and freight.
Use a neutral outer carton when the product or destination calls for discretion. Review product names, brand marks, labels, windows, packing slips, and tape on one fully packed carton before dispatch.
Strong two-piece ring boxes make the opening moment clear, keep the ring stable, and carry the brand into delivery. Choose the design direction, then prove it with the real ring, finished insert, finished box, and packed carton.
Prepare the ring dimensions, stone height, artwork, quantity, destination, and approval dates before requesting a quote. That brief gives a packaging partner enough detail to design, sample, produce, and deliver with fewer surprises.


2025-04-27


2025-05-31
2024-10-10
Every year, 1.2 million plus jewelry thefts occur in homes worldwide, a figure as great as the number of individual bricks used to build a 10 – story building in a large housing complex, multiplied by 100. This makes keeping valuables safe a big concern. A simple box is not enough to protect your precious gems and… Continue reading 5 Design Ideas for Stunning Lid and Base Ring Boxes That Drive Sales
89% of packaging brands expect to make changes to their designs. This also includes David Yurman packaging respondents. In order not to lose in the competition, we should seriously study strategies to improve David Yurman packaging design. This article explores the 5 key ways define the future of David Yurman packaging, guiding brands toward creating unforgettable unboxing experiences. 1. Unveiling the David… Continue reading 5 Design Ideas for Stunning Lid and Base Ring Boxes That Drive Sales
Nowadays, offline engagement is rare and precious. However, in the online world where AI technology is constantly optimized and messages are complicated, online engagement has become even more important for a jewelry brand. Interactive Packaging is one of the technology trends that have emerged. Today we will learn more about the new path of jewelry display and… Continue reading 5 Design Ideas for Stunning Lid and Base Ring Boxes That Drive Sales
Eco-Friendly and Personalized Recycled Paper Bags with Custom Prints | Tailored Packaging Solutions for Jewelry Brands and Retail Store Display Needs
Premium Custom Paper Grocery Bags for Sustainable Shopping – Personalize Custom Kraft Paper Bags and Custom Paper Bags with Handles with Your Brand’s Logo
Sophisticated Laminated Paper Bags with a Premium Glossy Finish | Superior Packaging Solutions for Jewelry Merchants and High-End Retail Displays
Adorable Baby Gift Boxes | Custom Newborn & Infant Gift Packaging | Premium Baby Shower Gift Sets
View More
Cost-Effective Bulk Packaging Solutions for Jewelry Brands | Perfect for Wholesalers Needing Scalable and Customizable High-Volume Packaging
View More
Creative Brown Paper Bag Puppets for Fun Crafting Activities – Learn How to Make a Paper Bag Puppet with Richpack’s Customizable Easter Paper Bags for Kids
View More

