



The sample looked perfect until the team pushed it into the drawer. The wrapped edge caught on the side rail. A ring slot held a wide band too tightly. One necklace slid across the divider and crossed another chain.
That is how a custom order turns into a rework order. The fix starts before production, with better drawer measurements, a real jewelry list, and a sample test in the actual drawer.
A Jewelry Drawer Tray Box is a fitted tray or tray system for a furniture, retail, stockroom, repair, or display drawer. It is different from a drawer-style jewelry gift box with an outer sleeve. The goal is simple: make every design choice measurable before mass production.
You can follow these nine steps:
By the end, you can prepare a clear quote request, test a sample with real jewelry, and release a repeat order with fewer hidden assumptions.
Good custom trays start with facts about daily use. A logo, one drawer width, and an idea photo are not enough. The brief must state where the tray will sit, what it will hold, and how staff will use it. It should also mark the parts that may change later.
Start with the work location. A front-counter display tray has different needs from a stockroom organizer, a repair intake tray, or a fitted insert inside a customer-facing cabinet.
A retail display may need a low front edge, fast finger access, strong color contrast, and a clean presentation under store lighting. A backroom tray may need labels, removable modules, denser capacity, and a lid for movement between rooms. A repair center may value numbered positions and durable, easy-to-clean surfaces more than decorative stitching.
Record who opens the drawer, how many times staff open it each day, whether the tray leaves the drawer, and whether customers touch the jewelry. Also note whether the tray must fit an existing store fixture or a new cabinet still under design.
List the jewelry before drawing compartments. Use actual products or dimensioned samples, not a general statement such as “rings, earrings, and necklaces.”
For each product family, record the largest and smallest pieces. A ring list should include shank width, setting height, and quantity. An earring list should separate studs, hoops, drops, pairs on cards, and single display pieces.
A necklace list should include chain length, pendant width, and clasp size. Bracelets and watches need inside diameter, case size, band width, and pillow compression.
Photograph one sample piece beside a ruler. Name it with the same SKU or style code used in the compartment plan.
Capacity is a business choice, not a count of empty squares. Decide how many pieces the tray must hold on opening day, how many staff need to access it, and how the assortment may change over the next reorder cycle.
Do not fill every millimeter. Dense layouts can slow removal, hide labels, and make chains cross. A practical plan reserves space for fingers, tags, clasps, and future products. For changing collections, use a few removable modules instead of making the whole tray adjustable.
Stackable jewelry trays for drawers can add capacity without replacing the first tray, but the total stack must stay below the drawer’s usable height.
Divide the request into three levels:
A must-have item might be a 12 mm finger gap beside a watch pillow. A preferred item might be a Pantone-matched lining. An optional item might be a printed dust cover. This order helps the supplier quote alternatives without changing the core function.
It also keeps a late decorative request from forcing a new sample after the layout has been approved.
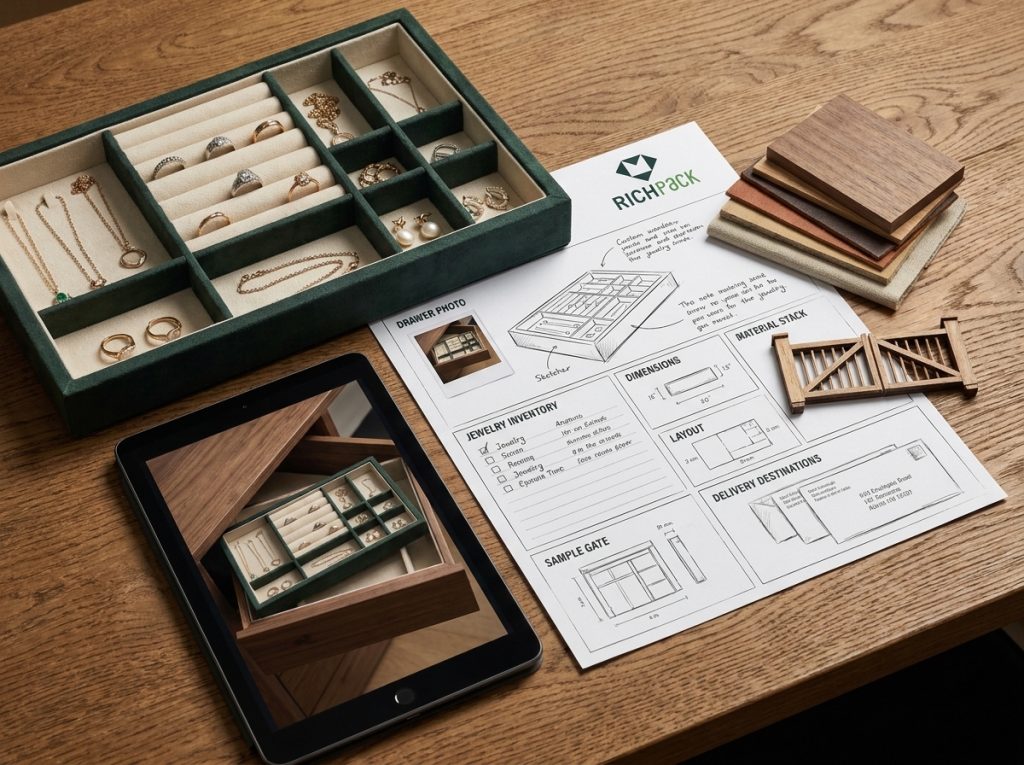
One controlled brief should drive every quote, drawing, sample, and reorder. Give it a project name, version number, owner, and date. Do not send the dimensions in one email, the logo in a chat message, and the layout change in a marked-up photo with no version record.
The fields below make it easier to quote and check a tray. They link the use case to the right files, sizes, materials, and sign-off steps. Each supplier then prices the same job. Each reviewer also sees the same record.
| Brief field | What to record | Why it matters |
| Project and version | Project code, version, date, owner | Stops old files from returning later |
| Use location | Retail, stockroom, repair, display, packaging | Sets durability and access needs |
| Drawer data | Inside dimensions, photos, hardware, quantity | Defines the fit problem |
| Jewelry inventory | SKU, type, count, dimensions, weight | Defines the compartment problem |
| Layout | Fixed, removable, stackable, lidded | Defines the structure |
| Material stack | Base, padding, lining, finish | Prevents vague material substitutions |
| Brand files | Vector logo, Pantone or approved color target | Controls logo and color |
| Approval plan | Drawing, color proof, sample, golden sample | Controls release gates |
| Order plan | Quantity by size, layout, color, and destination | Clarifies MOQ and packing |
| Delivery data | Required arrival date, country, ship-to sites | Builds the real schedule |
RichPack’s customizable drawer organizers for jewelry page shows drawer dividers and expandable tray ideas. Use those categories to describe the requested system, then attach the daily-use details above.
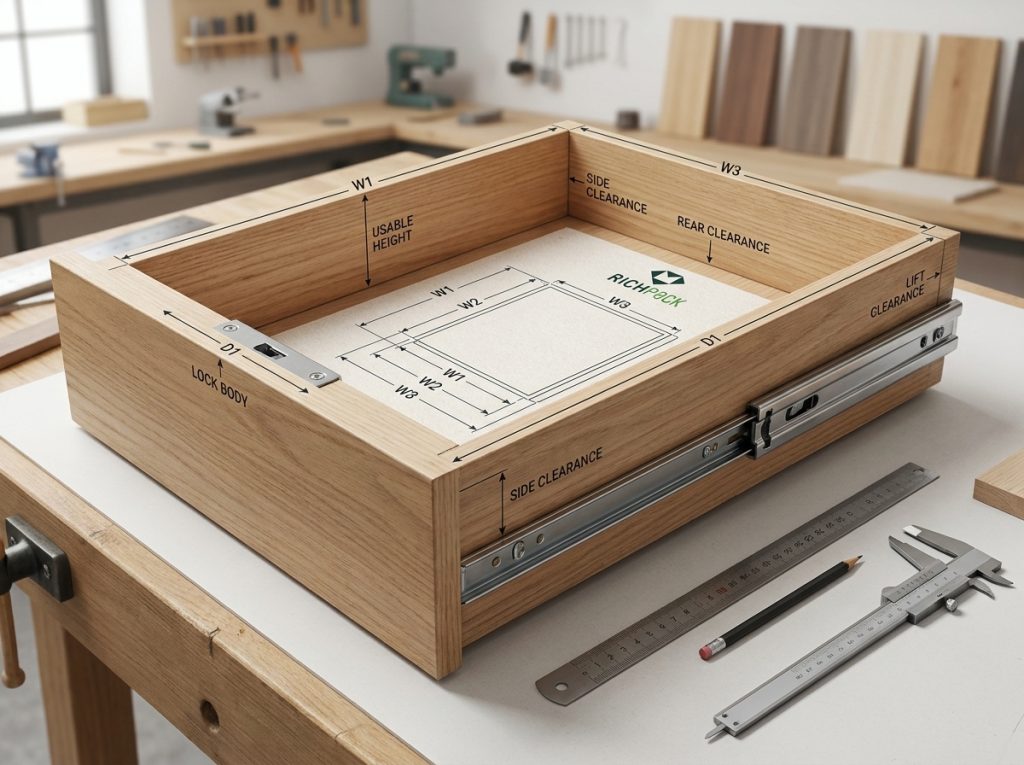
Measure the space the finished tray can actually occupy. Drawer fronts, slides, locks, corner blocks, liners, and a slightly out-of-square cabinet can reduce that space. A single width, depth, and height value may miss the tightest point.
Use a steel rule or reliable tape for the first survey. Use calipers for small clearances, hardware, and critical product dimensions. Photograph the measuring position so the supplier understands where each value starts and ends.
Measure the inside width near the front, at the center, and near the back. Record all three values. The smallest value is the first constraint, but it is not automatically the final tray width.
A wooden drawer can taper. A metal cabinet can have folded corners. A soft liner can compress at one point and bunch at another. If the tray has a rigid base, the supplier needs the smallest clear opening plus an agreed side clearance.
Label the measurements W1, W2, and W3 on a top-view sketch. Do not average them.
Measure the inside depth along the left side, centerline, and right side. Start at the true inner front surface and stop at the rear wall or fixed obstruction.
Check whether the drawer closes against a back bumper, lock body, cable, or anti-tip part. A tray that fits while the drawer is open may stop the drawer from closing if the back clearance is ignored.
Label the values D1, D2, and D3. Add the exact measuring points to the drawing.
Usable height is the vertical space between the drawer floor and the first object above the tray when the drawer moves. That object may be a rail, shelf, drawer above, lock, or cabinet frame.
Measure the lowest point. Then allow room for the tallest jewelry, labels, pull tabs, lids, and any second tray. A watch may sit above its pillow.
A high ring setting may rise above the ring slot. A loose chain can lift when the drawer moves.
For stackable jewelry trays for drawers, test the full stack with loaded jewelry, not empty trays.
Mark every feature that enters the tray space. Common obstructions include:
Take a straight top-view photo and two side-view photos. Put a ruler in the image. A supplier can design a notch or local clearance only when the obstruction has a location and size.
Do not copy one clearance number from another project. The Home Decor currently recommends deducting about 1/8 inch from the actual drawer dimensions for its custom inserts, but that is one supplier’s current method for construction and ordering. It is not a universal tolerance.
Ask the supplier to state:
This table turns a drawer survey into a fit plan. Fill every field and attach the marked photos. Ask the supplier to put the final outer tray size on the approval drawing. Do not release production from raw drawer sizes alone.
| Measurement | Record | Design use |
| W1 W2 W3 | Front, center, back inside width | Finds the narrowest path |
| D1 D2 D3 | Left, center, right inside depth | Finds taper and rear interference |
| H1 H2 H3 | Lowest usable height at key points | Controls jewelry and stack clearance |
| Obstruction map | Position and size of hardware | Defines notches and exclusions |
| Lift clearance | Finger gap or pull feature | Allows tray removal |
| Supplier external size | Finished tray dimensions | Becomes the approval value |
| Size tolerance | Allowed variation by axis | Defines check limits |
For a deeper measuring walkthrough, use RichPack’s page on how to measure jewelry box dimensions. Keep the signed measurement sketch with the sample approval record.
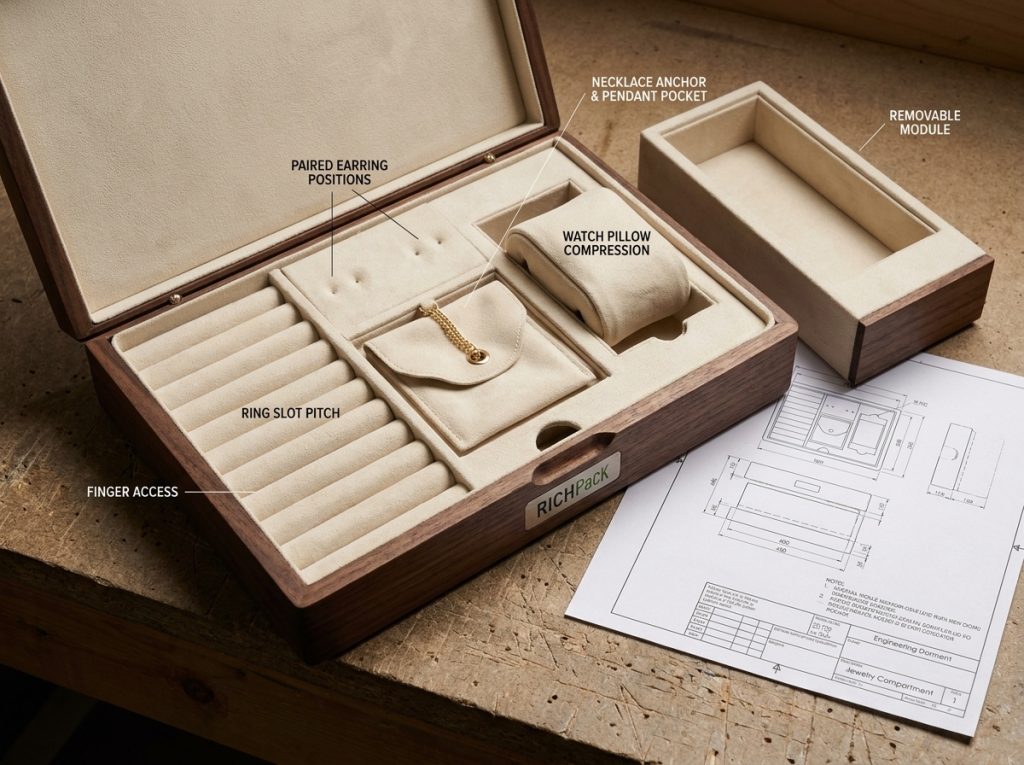
A compartment should control position, contact, removal, and the first view of the jewelry. Start with the product dimensions and the staff action. Then decide whether the piece needs a slot, pad, pillow, hook, pocket, channel, card, or open compartment.
Jewelers Mutual advises storing pieces separately to reduce scratches and keep chains from tangling. A custom layout can apply that basic care principle at retail scale, but only if the dividers and restraints match the actual jewelry.
Ring rows need more than a total ring count. Measure the narrowest and widest shanks, the tallest settings, and any unusual shapes. Wide bands need more pitch between slots. High settings need space above the tray and beside neighboring stones.
Test how the ring enters and leaves the slot. A slot that looks secure may grip a wide shank too tightly or let a thin ring lean. If staff remove rings many times each day, the surface must recover without tearing or showing deep compression lines.
For mixed collections, separate delicate rings from heavy signet rings. Do not use one dense row for every style.
Earring storage should keep pairs together and make missing pieces obvious. Studs may sit in pierced cards, separate holes, or small paired recesses. Hoops need enough vertical or horizontal space to avoid spring pressure. Drop earrings need a path that keeps hooks and pendants from crossing.
Decide whether staff handle earrings on cards or as loose pieces. That changes the compartment width, label position, and finger access.
Use one marked sample for each earring family during the prototype review. Small holes and narrow slots are hard to judge from a rendering.
Give each necklace a controlled chain path. A practical layout uses an anchor near the top, a clear route for the chain, and a separate recess for the pendant. The chain should not cross another chain or pass under a removable divider.
Long chains may need a gentle return path rather than one tight fold. Thick clasps need wider channels than the chain itself. Fine chains need smooth edges with no exposed adhesive or rough seams.
Close and open the loaded drawer several times. If the chains lift, drift, or cross, change the restraint before production.
Bracelets and watches need support that matches their inside diameter and stiffness. A pillow that is too large can strain a clasp or make the piece hard to remove. A loose pillow allows the item to rotate and touch nearby pieces.
For watches, record case diameter, case thickness, band width, closed circumference, and the position of the clasp. For rigid bangles, measure the inside width and height. For soft bracelets, decide whether they lie flat, wrap around a pad, or sit in a shaped recess.
Jewelry sets need a planned viewing order. Keep the necklace, earrings, ring, and certificate in distinct positions without forcing them into equal-sized cells.
People need space to use the tray. Add a finger notch, open edge, ribbon lift, or clear reach zone where a piece would otherwise sit too deep. Check that labels remain readable after the jewelry is loaded.
Removable modules work well when collections change or when one drawer serves several product lines. Fixed inserts work better when exact presentation and daily speed matter most. A mixed system can use a stable outer tray with a small number of replaceable modules.
The table below turns common jewelry families into layout details. Use it to start the drawing, then replace every example dimension with measurements from the actual assortment.
| Jewelry family | Measure | Common restraint | Sample check |
| Rings | Shank width, setting height, count | Ring roll or slotted pad | Grip, lean, stone clearance |
| Stud earrings | Card or post size, pair count | Paired holes or recess | Pair visibility and removal |
| Hoops and drops | Overall height, width, hook length | Open cell, card, or hanging path | Crossing and hook snag |
| Necklaces | Chain length, clasp, pendant | Anchor, channel, pendant pocket | Tangle and edge contact |
| Bracelets | Inside diameter, width, clasp | Pad, recess, or bar | Rotation and clasp pressure |
| Watches | Case, band, circumference | Compressible pillow | Case clearance and compression |
| Sets | Largest piece and viewing order | Mixed fitted layout | Balance and item separation |
RichPack’s custom jewelry box inserts page shows how rings, earrings, necklaces, watches, and sets can require different restraint systems. The same engineering logic applies to a drawer tray, even when the outer tray is wider and shallower.
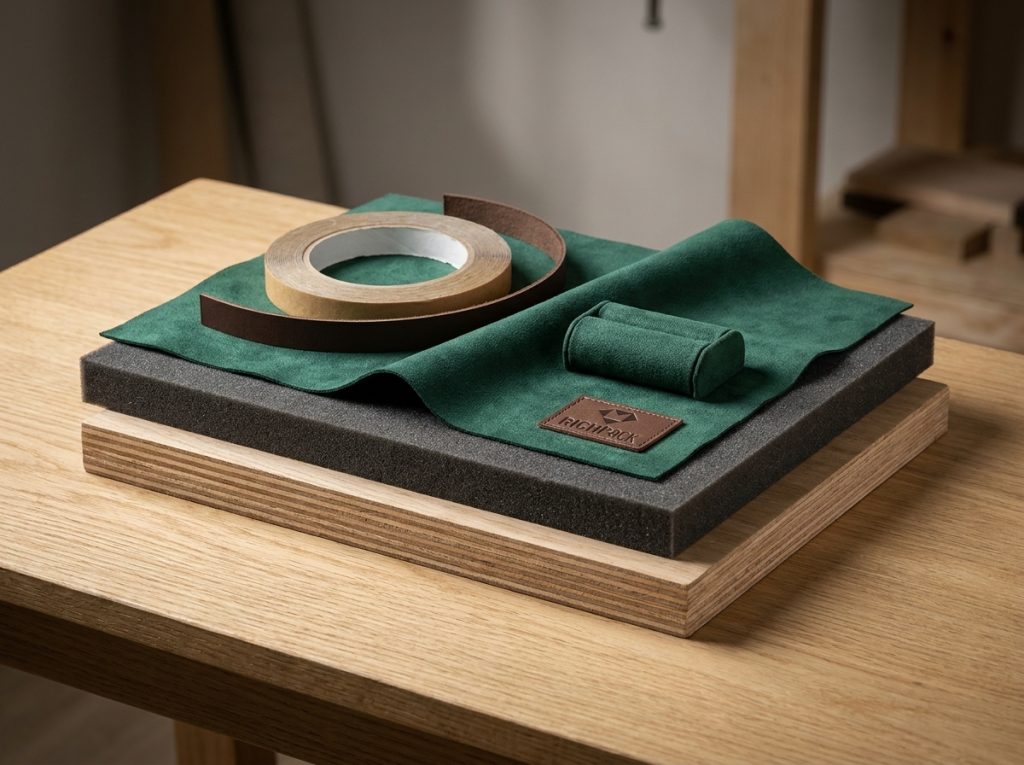
Choose each material for a clear job. A tray is more than one fabric name. The base holds its shape.
The pad controls pressure. The lining touches the jewelry. The finish carries the color, logo, seams, and edge detail.
The base controls flatness, strength, weight, and edge shape. Common choices include rigid paperboard, wood, wood panels, molded plastic, acrylic, and metal. Choose it for the tray size, handling level, moisture risk, weight, and edge form.
Padding sits between the base and contact lining. It creates ring rolls, pillows, shaped recesses, and soft transitions. Foam density and compression matter more than the word “foam” alone.
The contact lining is the visible surface beside the jewelry. Specify it separately from the base and padding in the bill of materials.
Velvet has a deep pile and changes shade when brushed. It can make bright metal easy to see. Microfiber has a finer and more even face, so it may be easier to wipe.
Suede and faux suede vary in fiber length, backing, shade, and ease of cleaning. Flocking can coat shaped parts. Check its bond at every edge and recess.
Ask for a labeled swatch of the exact production material. Rub it with a clean white cloth and inspect dark and light jewelry samples for loose fibers. Bend or compress the wrapped edge several times to see whether the backing shows.
Base liner and insert selection on touch, rub marks, loose fibers, cleaning, and product fit. The material name alone tells you little.
Use the matrix below as a first screen. The scores are planning scores for a typical jewelry tray, not lab results. For Cost efficiency, 5 means lower expected cost. The final choice still depends on the exact grade, backing, adhesive, color, and jewelry.
| Contact material | Stain resistance | Cushioning | Fiber control | Cost efficiency | Best starting use |
| Velvet | 3/5 | 4/5 | 3/5 | 3/5 | Premium presentation with strong color depth |
| Microfiber | 4/5 | 3/5 | 4/5 | 3/5 | Fine surfaces and easier daily wiping |
| Suede or faux suede | 3/5 | 4/5 | 3/5 | 2/5 | Soft touch and a muted luxury look |
The score does not replace a swatch test. Wipe each sample, press it against a polished metal piece, close it in a small sample box, and inspect it after the agreed review period. Ask the supplier for the exact production grade before you compare prices.
Lining color affects visibility. Pale metal can disappear against light gray. Dark oxidized silver can lose detail on black velvet. Bright stones may need a neutral field that does not compete with their color.
Test the swatch under the same lighting used in the store, showroom, repair room, or product photography area. View polished gold, silver, dark metal, pearls, clear stones, and colored stones on the same sample.
If the lining must match a brand color, define the approved material sample. A Pantone target can guide development, but texture and light change the visual result. Approve the actual material, not a screen image.
Soft does not mean chemically safe. The Canadian Conservation Institute explains that silver tarnish forms when silver reacts with sulfur-containing gases. It also warns that some materials near silver or copper can release harmful sulfur compounds.
Ask the supplier to disclose the lining, foam, adhesive, coating, and backing. Keep a closed sample with sample jewelry for an agreed review period. Check odor when the container opens, loose fibers, surface marks, adhesive residue, and visible changes on sensitive metal samples.
This is a basic screen, not a lab certificate. High-value items and metals that tarnish may need lab tests or advice from a care expert.
Stackable trays suit changing inventory and deep drawers, but the loaded stack needs lift access and vertical clearance. Lidded trays help during internal movement and storage, but hinges, flaps, or loose covers consume space. Fixed inserts provide the most controlled appearance inside a permanent drawer.
Removable inserts make cleaning and range changes easier. They can also shift when the outer fit is loose. Decide whether staff should remove the whole tray, a few modules, or neither.
Use the following matrix to compare the complete structure. It separates visible material from the base, padding, and use format so a lower quote cannot hide a different construction.
| Decision | Best when | Main risk | What to approve |
| Rigid paperboard base | Light retail trays and branded surfaces | Edge wear or moisture | Board grade, thickness, wrap |
| Wood or engineered wood base | Large trays and furniture integration | Weight, odor, size change | Species or panel, seal, flatness |
| Molded plastic or acrylic | Wipe-clean or precisely formed parts | Scratch visibility and hard contact | Resin, finish, edge treatment |
| Velvet or suede lining | Deep color and soft presentation | Fiber, shade, cleanability | Exact swatch and backing |
| Microfiber lining | Fine surface and lower pile | Quality varies by grade | Weight, backing, abrasion |
| Flocked surface | Shaped recesses and uniform coverage | Edge adhesion and shedding | Process sample and rub test |
| Stackable format | Flexible capacity | Height and lifting access | Loaded stack test |
| Lidded format | Movement and dust control | Added height and hinge wear | Closure cycle and clearance |
| Fixed insert | Permanent display and fast operation | Harder to clean or change | Fit, removal plan, service access |
Review RichPack’s guide to choosing materials for jewelry boxes for a wider material comparison. For this project, keep the decision tied to the exact drawer, jewelry, cleaning method, and contact risk.
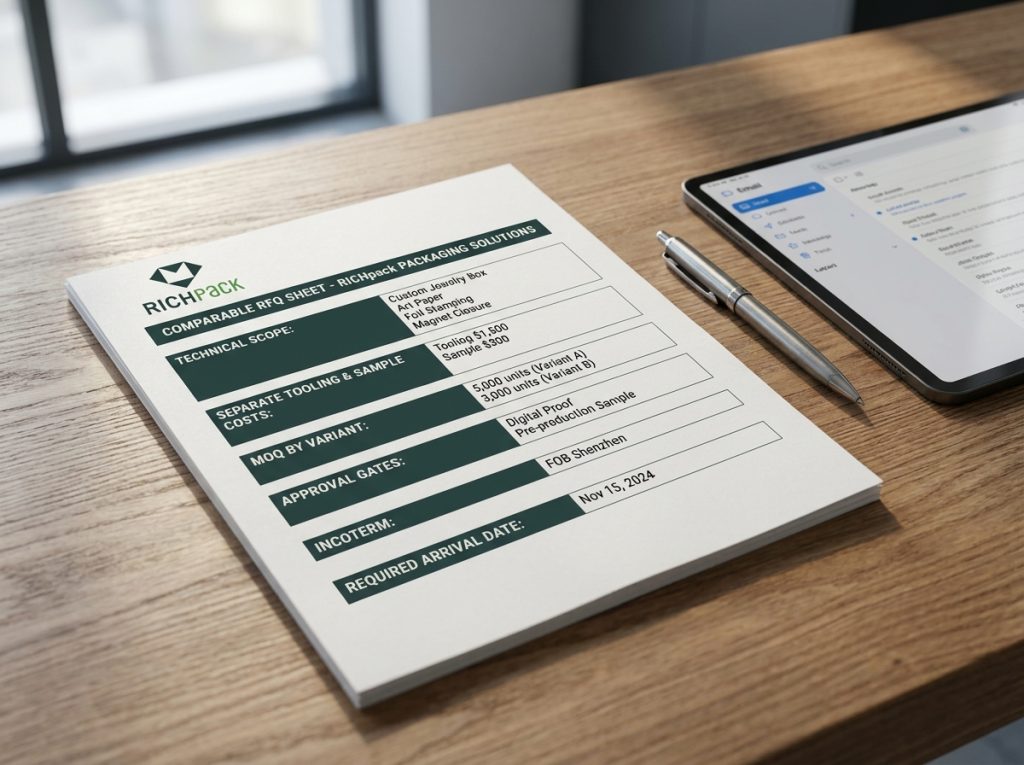
A quote is useful only when the job is clear. Send the same brief version to each supplier. Compare what each price includes and leaves out. Also list which assumptions may change after the sample.
Freeze one brief before asking for prices. Add the drawer drawing and jewelry list. Add the layout, material stack, logo files, quantity for each version, ship-to countries, target date, and sign-off plan.
Ask each supplier to list deviations. One supplier may quote a wrapped rigid base while another quotes a thin plastic shell. One may include a finished sample, and another may include only a rendering.
Do not compare the total price until the technical scope matches.
Ask for an item list. It should state whether the price covers design, drawings, color work, tools, samples, units, unit wraps, export cartons, checks, freight, duties, and tax.
Ask how many design changes and sample rounds are included. Confirm what happens if the approved material becomes unavailable. Require written approval before any substitute enters production.
RichPack’s custom packaging cost guide gives a wider cost view. It treats the build, materials, finish, order size, sample, and freight as separate choices.
Split one-time costs from repeat costs. A cutting die, mold, setup, or drawing fee may apply only to the first version. A major change may need a new sample, color proof, or courier fee. Units, packing, and freight return with each order.
Ask whether tooling belongs to the buyer, how long it will be stored, and whether it can support a reorder. Record the currency, payment terms, Incoterm, quote validity, and tax treatment.
This split makes a low first quote easier to audit. It also shows which changes create a new one-time charge.
MOQ can apply to a design, size, color, material, or production run. Ask the supplier to show the rule for every variant. Two tray sizes in the same color may or may not share one MOQ. A different lining or logo process may create a separate setup.
RichPack’s current custom jewelry trays for drawers page lists a typical MOQ of 500 pieces for fully custom trays and notes that some simple projects may differ. Treat that as a current RichPack example, not an industry-wide number.
If demand is uncertain, ask for a common outer tray with replaceable modules. That may reduce variant risk without weakening the fit.
Build the schedule back from the required arrival date. Give each stage its own date. The stages should cover the brief, drawing, materials, color, sample, review, changes, production, checks, packing, freight, customs, and local delivery.
RichPack’s current tray page gives an example of one to two weeks for design and prototyping and four to six weeks for mass production after sample approval. The Home Decor currently states about two to three weeks for its own fabrication process. These ranges describe different products and suppliers, so they should not be combined into one promise.
Use dates and approval owners. “Production starts after approval” is incomplete unless the approval file and approval time are defined.
The quote comparison table below keeps cost and timing assumptions visible. Require every bidder to fill the same rows and mark every exclusion instead of leaving a blank cell.
| Quote field | Supplier response | Buyer check |
| Technical version | Brief and drawing version | Same scope for all bidders |
| Quantity by variant | Size, layout, color, logo | MOQ applied correctly |
| Design and engineering | Included changes and deliverables | Editable and approval files |
| Tooling and setup | Type, ownership, storage | One-time or repeat cost |
| Sample | Quantity, material, method, courier | Made with planned production materials |
| Unit price breaks | Quantity tiers | Same construction at each tier |
| Packing | Sleeve, bag, carton, labels | Clean and transit-ready |
| Inspection | Method and report | Agreed criteria |
| Freight and Incoterm | Route, service, exclusions | Landed cost visibility |
| Schedule | Start, gates, ship date, arrival | Real dependencies |
| Substitution policy | Written approval required | No silent material change |
| Reorder terms | Tooling, files, lead time | Version remains available |
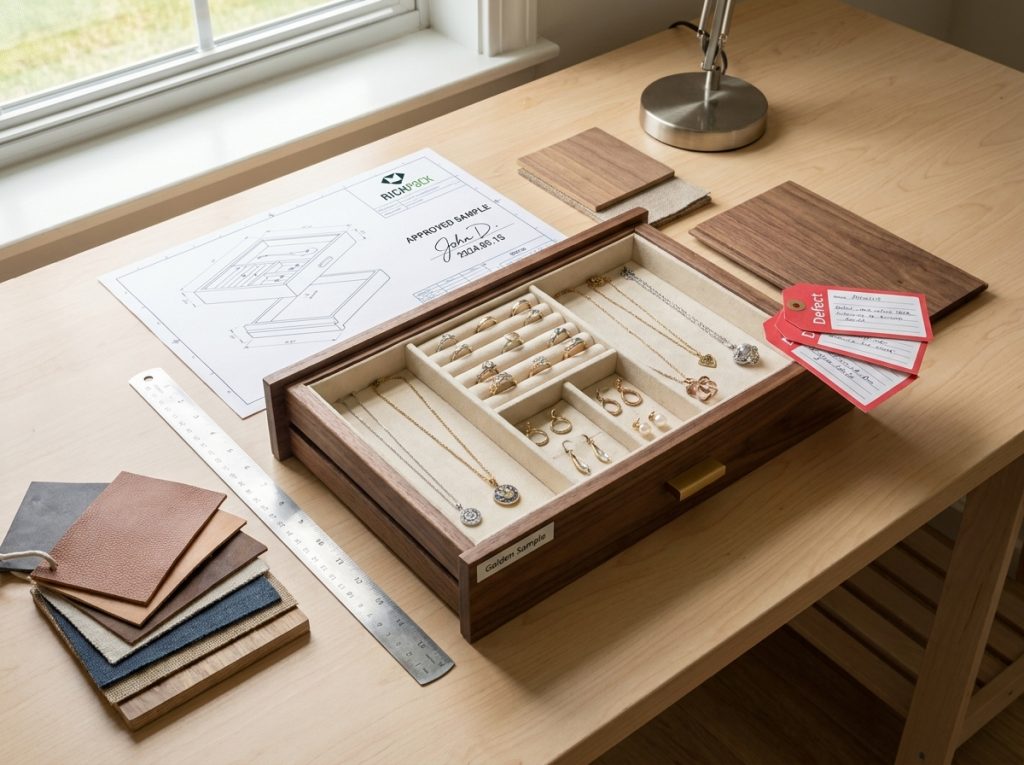
Approve the finished result, not the idea. A drawing controls dimensions and layout. A material swatch controls color and texture. A complete sample made with the planned production materials and methods shows how those choices work together inside the real drawer.
Place the sample in the exact drawer or a verified fixture mockup. Open and close the drawer slowly, then at normal use speed. Check the front corners, rear clearance, side rub, lift access, and the space above loaded jewelry.
Remove and replace the tray several times if it is designed to be removable. Watch for fabric abrasion, compressed edges, or a corner that catches the hardware. Test every drawer type in the project, not just one convenient example.
Record the fit with photos and a short video. Mark the sample and the drawer with their matching codes.
Use actual saleable samples or size-accurate test pieces. Fill every compartment to its planned capacity. Include the largest ring setting, longest pendant, widest watch case, thickest clasp, and most delicate chain.
Check the first view when the drawer opens. Then check the less glamorous details: can staff read tags, remove a piece without touching its neighbor, return it to the correct position, and spot a missing item?
An empty sample hides most layout errors.
Run a short handling test that matches daily use. Remove and replace each jewelry type several times. Open and close the loaded drawer. Carry the tray if the staff will move it.
Look for:
Photograph any failure beside the sample code. A clear failure record is easier to correct than a note saying the tray “does not feel right.”
Review the color under the intended light. Compare the production material with the signed target. Check pile direction, shade across parts, seams, folds, corners, exposed backing, glue lines, and the cleanliness of recesses.
Measure logo position from fixed edges. Check foil, print, embossing, debossing, plaque, or embroidery for size, alignment, fill, and legibility. A logo may be centered on the part but look off-center after compartments are loaded.
Use RichPack’s overview of packaging safety tests to build project-specific checks. Keep claims limited to the tests actually performed on the approved construction.
The golden sample is the signed sample used for mass production. Mark it with the project code, version, approval date, and signatures or approval names. Store it away from normal handling.
Attach the final drawing, bill of materials, color standard, logo file, packing method, and approved deviation list. If the sample changes, issue a new version. Do not approve a change through a phone call with no updated record.
The sample approval table below creates a clear release gate. Every row needs a result, evidence, owner, and status. A blank field means production is not ready.
| Approval item | Test | Evidence | Release rule |
| Drawer fit | Open, close, remove, replace | Photos and video | No rub or hardware conflict |
| Jewelry fit | Load all sample SKUs | Loaded sample photos | Every piece fits and can be removed |
| Movement | Operate drawer and move tray | Failure notes or pass record | No crossing, snag, or hard contact |
| Contact surface | Rub, fiber, odor, mark review | Swatch and sample record | No unacceptable transfer or odor |
| Color | Compare under intended light | Signed color target | Within agreed visual range |
| Logo | Position, size, finish, legibility | Measured photo | Matches signed drawing |
| Workmanship | Edges, seams, glue, flatness | Check photos | No agreed major defect |
| Packing | Pack and unpack sample | Packing photos | Arrives clean and undamaged |
| Documents | Drawing, BOM, files, version | Approval package | All records match the sample |
| Golden sample | Mark and sign final sample | Stored reference | Required before production |
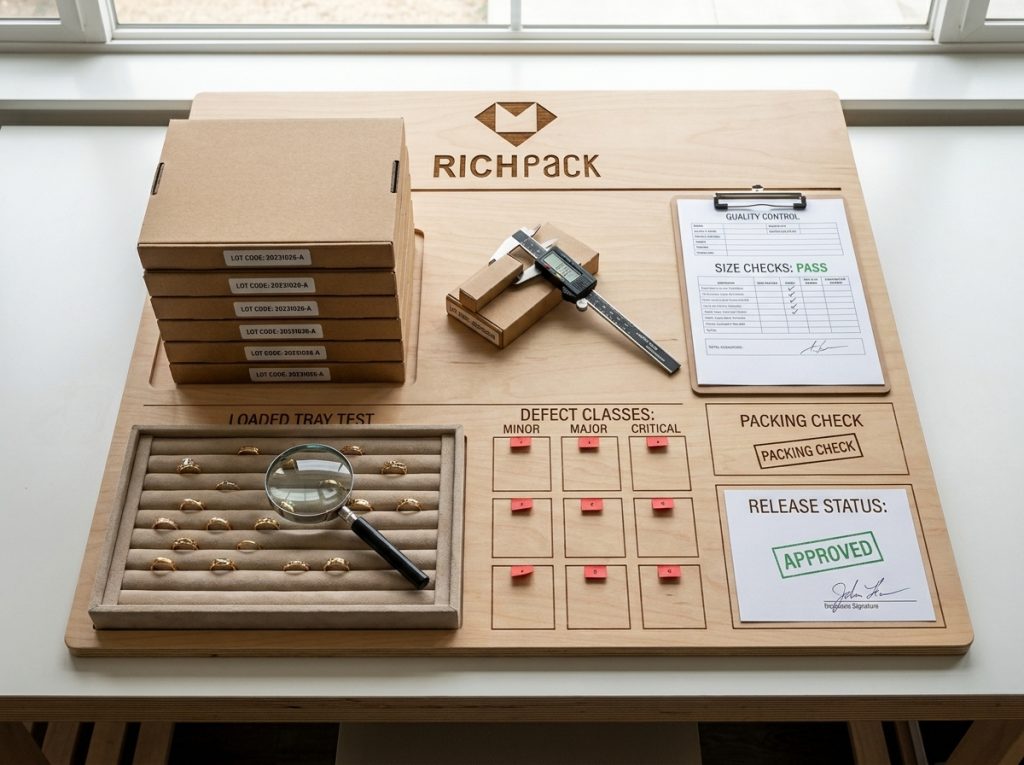
Mass production should match the approved sample within agreed limits. The buyer and supplier need the same defect language, measurement method, sampling plan, packing standard, and version record before the batch is finished.
Classify defects by the harm they cause. A critical defect creates a safety, security, contamination, or legal problem. A major defect prevents intended use or creates a clear brand failure. A minor defect affects appearance without blocking normal use.
Project examples may include:
Write the examples with photos. Do not rely on the words alone.
ISO 2859-1:2026 gives plans for checking a sample from each lot. The plans use pass-or-fail traits and can be tied to an acceptance quality limit. ISO published this third edition in January 2026. The standard gives a repeatable method, but it does not set the defect rules for a jewelry tray.
The buyer and supplier must agree on the lot and check level. They must also set the sample size, pass and fail numbers, and any AQL values. A small first order may use another plan or a full check for key features.
Record the chosen method in the purchase order and check sheet.
Measure the finished external width, depth, and height across the sample. Check critical compartments, ring slot pitch, pillow size, divider position, and any notch that clears drawer hardware.
Use the same tool, data points, and method used for sample approval. Fabric compresses, so define whether a measurement uses light contact or a stated pressure. Check more than the first carton.
Compare results with the signed drawing and tolerance table. A tray can look acceptable and still fail the drawer fit.
Packing must keep the contact surface clean and the tray flat. Separate finished surfaces from rough carton walls, loose hardware, ink transfer, dust, and crushing pressure. Prevent pillows and removable modules from moving during transport.
Check the master carton count, orientation, moisture protection where needed, labels, destination code, and carton strength for the chosen route. Open a packed sample after a handling trial and inspect the tray as the receiving team will see it.
Do not let transit protection introduce a new odor or fiber source next to the lining.
Give each production version a clear identity. A useful code can include store or fixture family, drawer size, layout, color, logo, and version. Keep the code on the outer carton, packing list, drawing, and internal order record.
Save the approved BOM and supplier material codes. Keep the color target, tool record, golden sample site, check report, and reorder notes with them. If one store has a different drawer, give it a new version. Do not change the main file through an informal note.
RichPack’s strategic sourcing guide provides a broader view of supplier control, production planning, and repeat orders. For a tray program, version discipline is what turns one successful sample into a stable multi-location system.
Use this receiving checklist for the first batch and each changed version. Keep the signed report with the purchase record so the next reorder starts from the observed production data.
| Inspection area | What to check | Record |
| Identity | Project, version, size, color, layout | Carton and unit codes |
| Dimensions | External size and critical compartments | Measurement sheet |
| Materials | Base, padding, lining, finish | BOM and visual comparison |
| Fit | Sample actual drawers | Fit photos and result |
| Jewelry use | Sample SKU load | Loaded tray photos |
| Workmanship | Flatness, seams, glue, edges, cleanliness | Defect counts and images |
| Branding | Logo, color, position, finish | Signed target comparison |
| Contact risk | Fiber, odor, marks, residue | Test result |
| Packing | Protection, count, labels, carton | Packing report |
| Quantity | Ordered and received by variant | Reconciliation |
| Release | Accepted, held, reworked, rejected | Authorized decision |
Costly tray errors can start with a small guess. The table pairs each mistake with the result and the control that should replace it.
The same pattern appears in other first packaging orders. RichPack’s review of first packaging order mistakes adds checks for supplier messages, samples, and the production plan.
| Mistake | Likely result | Better control |
| Measuring width and depth once | Tray rubs or will not enter | Measure three points on each axis |
| Choosing a preset layout before listing jewelry | Compartments waste space or pinch products | Build a jewelry inventory first |
| Calling the material only velvet or wood | Supplier quotes different constructions | Specify base, padding, lining, finish |
| Approving color on a screen | Finished lining misses the target | Sign a material swatch or sample |
| Testing the sample empty | Tangles, pressure, and access problems stay hidden | Load real sample jewelry |
| Comparing only unit price | Tooling, sample, packing, and freight remain hidden | Use one itemized RFQ table |
| Accepting a verbal change | Production differs from the approved sample | Issue a drawing and BOM version |
| Inspecting only appearance | Fit and compartment dimensions drift | Measure batch samples |
| Using one file for several drawer types | Stores receive the wrong fit | Create controlled version codes |
| Discarding the golden sample | Reorder disputes become subjective | Store the signed sample |
Golden Sample is the signed sample used for mass production quality control.
Contact Lining is the material surface that touches or sits next to the jewelry.
Compartment Layout is the planned position and size of each ring slot, earring space, necklace channel, bracelet recess, or watch pillow.
Finished Tray Size is the outside size of the completed tray after the base, padding, lining, wrap, and edge treatment are added.
MOQ is the minimum order quantity a supplier accepts for a design, size, layout, color, or production run.
An obstruction map is a drawing that marks drawer rails, locks, screws, stops, cables, and other parts that reduce usable space.
RFQ is a request for quotation that gives suppliers the same drawings, quantities, materials, files, and delivery terms.
Tolerance is the allowed difference between the approved size and the size of a production tray.
There is no universal clearance. Drawer shape, tray strength, fabric thickness, lift method, and size limits all matter. Measure the drawer at several points.
Ask the supplier to put the final outer tray size and each gap on the approval drawing. One supplier publishes a 1/8 inch deduction, but that is an example and not a rule for every build.
The best choice is a tested stack of base, pad, lining, and finish. Paperboard, wood, plastic, acrylic, foam, velvet, microfiber, suede, and flocking each solve a different need. Check fit and daily handling. Then check cleaning, loose fibers, odor, rub marks, and contact with real jewelry.
Yes, but each size, layout, color, material, or logo may have its own MOQ or setup fee. Ask for the quantity and price of each version. One outer tray with changeable modules can reduce the number of full-tray versions.
The schedule depends on the drawing, materials, sample rounds, order size, checks, freight, and customs. Supplier examples vary. Set a date for each stage from brief approval to final arrival. Release production only when the sample and approval files match.
Use a lid when trays move between rooms, travel to events, or need a dust cover. A lid adds height, parts, and a wear point. A fixed tray in a clean retail drawer may work better without one. Test the lid with a full tray and check the total height.
One tray can serve both jobs when the layout supports display and staff use. It must also control labels, movement, and backroom handling. Retail use needs low edges and open access.
Storage may need more capacity, labels, lids, or stacks. Put both jobs in the brief and test both with the sample.
Send one controlled project brief. Add marked drawer sizes, photos of blocks and hardware, and the jewelry list. Include key product sizes, a layout sketch, material needs, the vector logo, and a real color target or Pantone reference. Finish with the quantity for each version, the sign-off plan, ship-to sites, and required arrival date.
A successful Jewelry Drawer Tray Box order is a chain of clear records. Drawer sizes define the outer fit. The jewelry list defines the cells.
The material stack defines the build and contact face. The signed sample defines the bulk order. The check report and version record protect delivery and reorders.
Start with one folder. Put the brief and size sketch in it. Add the jewelry list, drawing, BOM, real color record, sample photos, golden sample code, purchase order, and check report.
This habit keeps key project facts in one place. They are less likely to vanish as the job moves from design to buying, the supplier, and the receiving team.
RichPack can turn that brief into a fitted tray through its packaging design process. The work moves from the layout to the sample, bulk run, checks, and delivery. Send real drawer data and jewelry samples first. The quote will be easier to compare, and the finished tray will have a clear job.





 PREV
PREV