

 PREV
PREV

10 Eco-Friendly Cosmetics Packaging Ideas to Inspire Sustainable Beauty Brands in 2025
2025-07-13
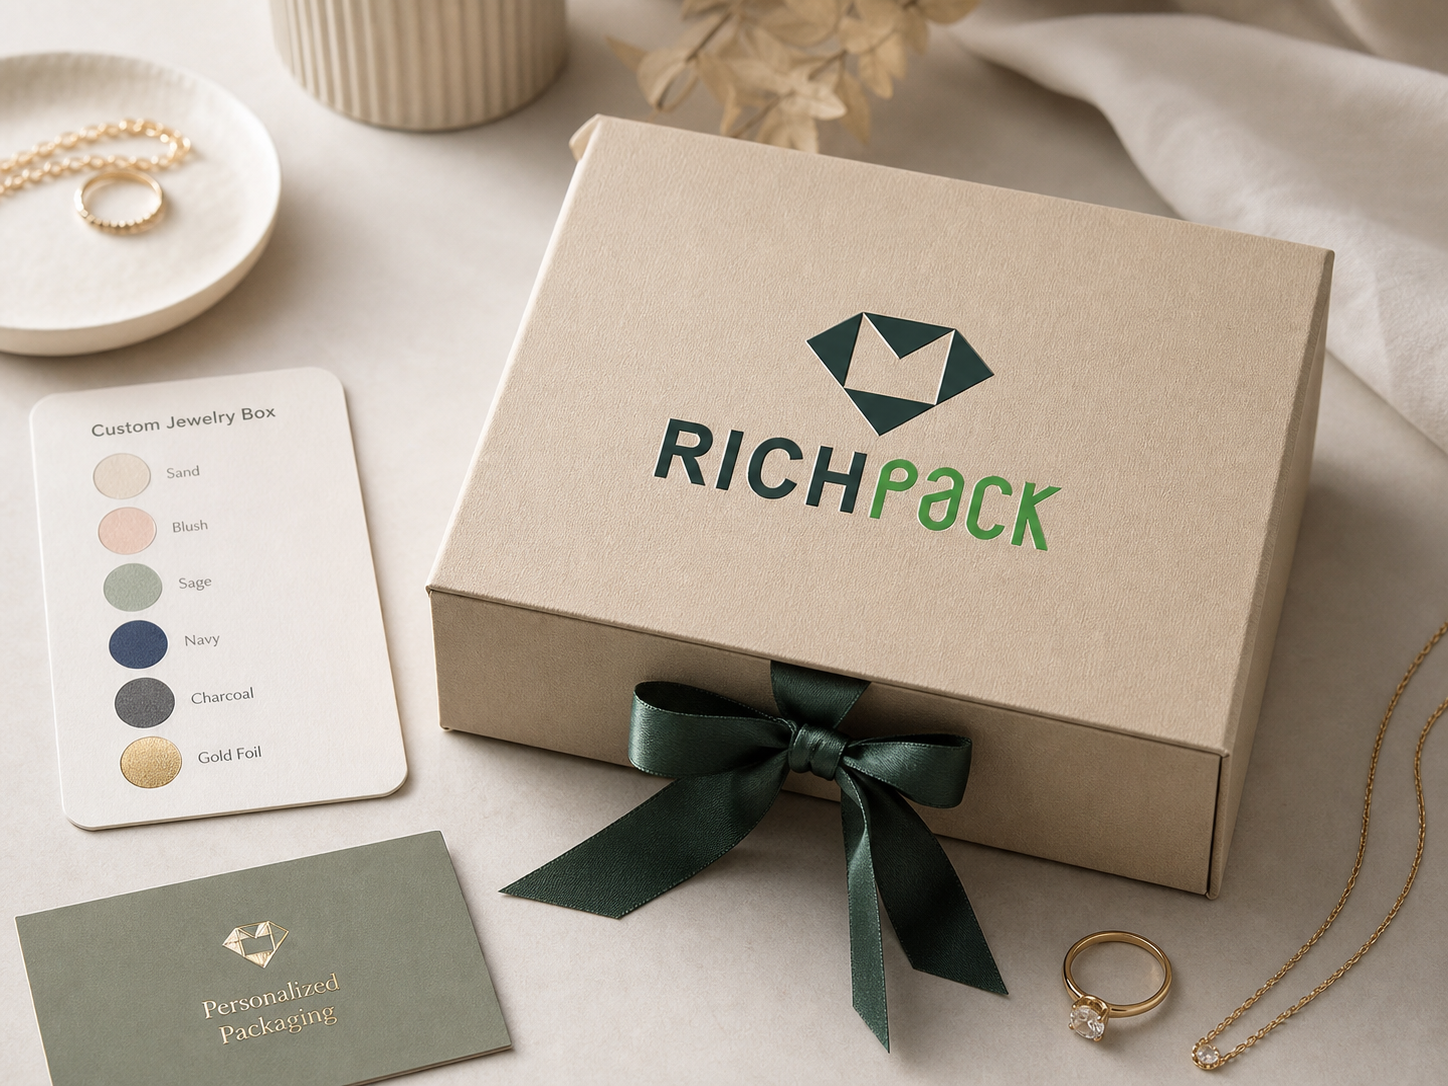



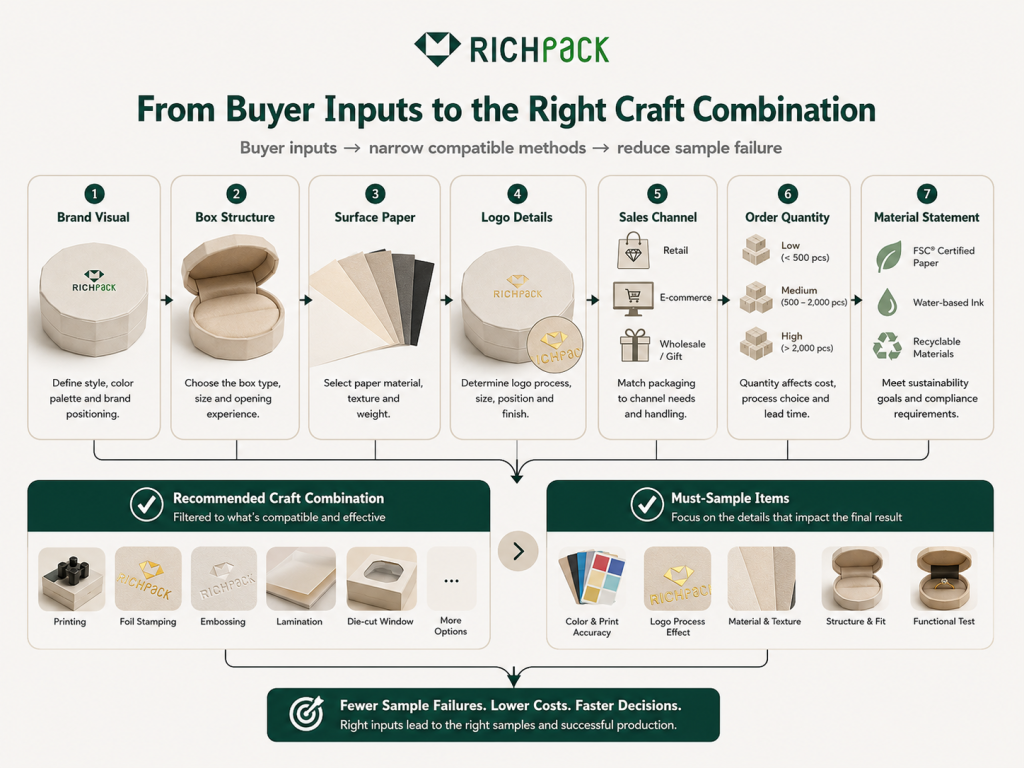
A logo can look sharp on screen and ragged on the finished box. The usual cause is simple: the design was approved before anyone matched it to the paper, finish, and box structure.
For a useful size reference, rigid setup boxes often use a 2 to 3 mm chipboard core wrapped in decorative paper. Folding cartons use thinner paperboard and behave differently at folds. That construction choice changes how ink, foil, embossing, coatings, and inserts perform when you personalize jewelry box cardboard.
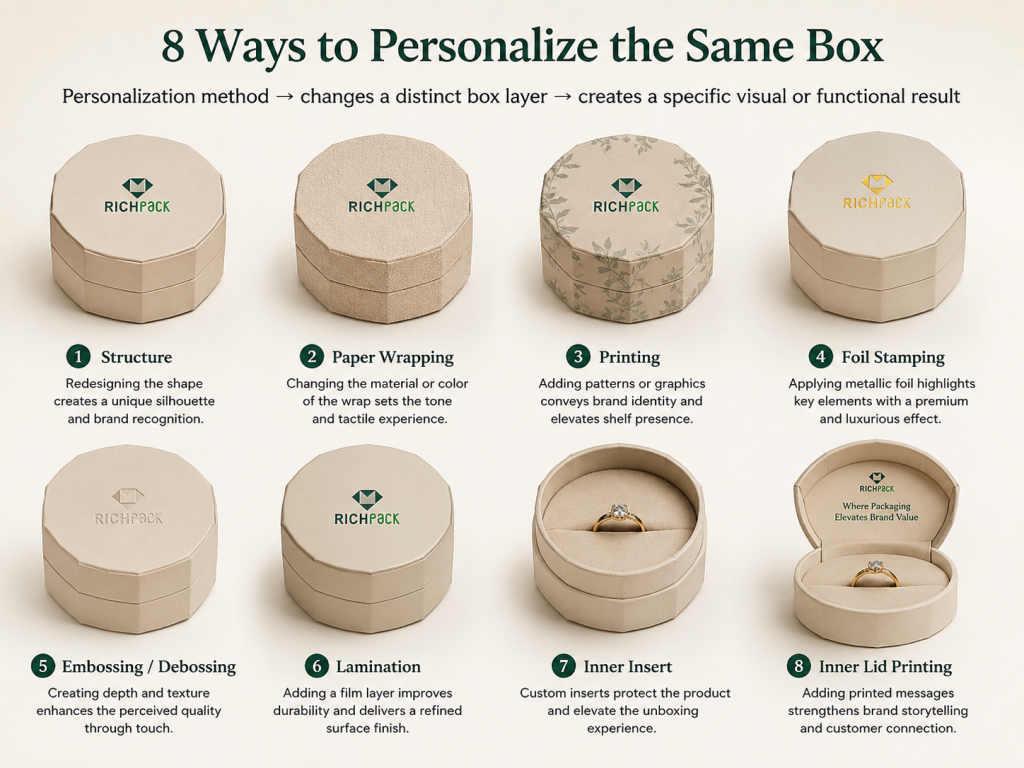
You can change the size, shape, paper wrap, color, artwork, foil, relief, coating, lining, insert, and interior message. The best combination does two jobs at once. It makes the brand easy to recognize and keeps the jewelry in the right position.
After reading this article, you will learn how to:
By the end, you should be able to choose a workable design and know what to test before production.
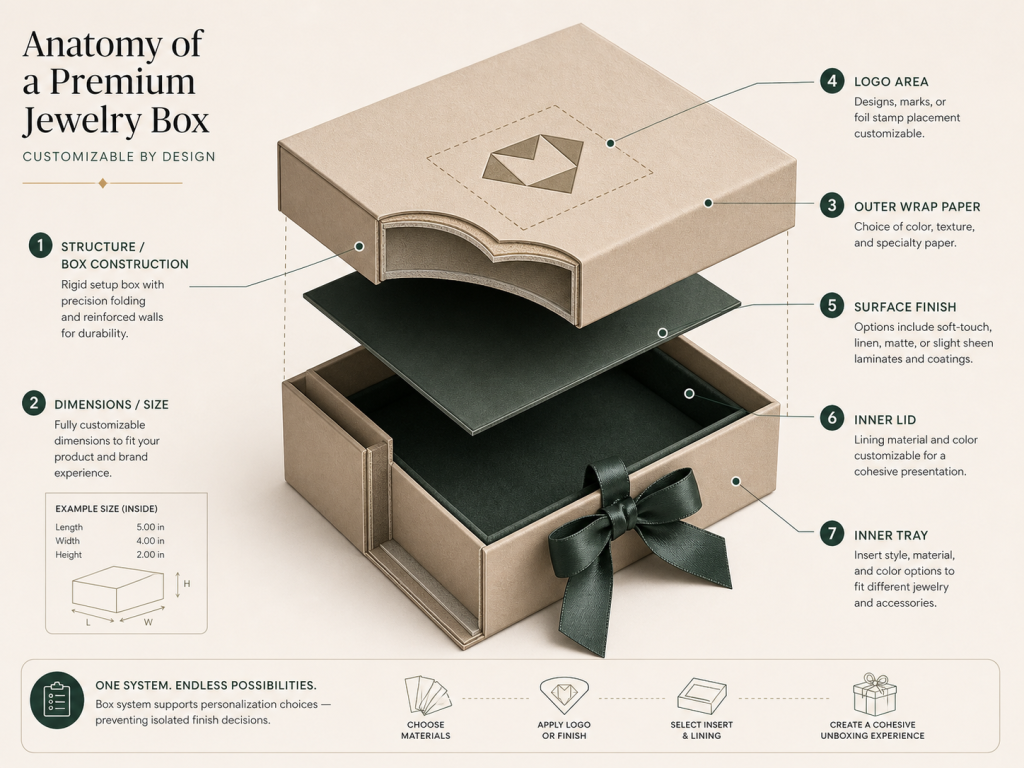
Personalization can change the shell, the visible surface, or the way the jewelry sits inside. Use the comparison first, then remove any option that conflicts with the jewelry, paper, budget, or handling route.
| Method | What It Changes | Best Use | Main Limit | Physical Sample |
| Custom size and structure | Dimensions, opening, proportions | Product fit and a distinct reveal | New structures add development work | Required |
| Paper wrap | Color, texture, touch | Brand color and material character | Texture can hide fine detail | Required |
| Printed artwork | Logo, pattern, text, color fields | Detailed graphics and repeat patterns | Color shifts with paper and coating | Required |
| Foil stamping | Metallic or pigmented foil | Small marks and premium accents | Rough paper can break clean edges | Required |
| Embossing or debossing | Raised or recessed relief | Tactile marks with restrained color | Fine relief can fill or flatten | Required |
| Coating or lamination | Gloss, matte, soft touch, protection | Scuff control and surface feel | Added layers change disposal options | Required |
| Insert and lining | Product position and interior touch | Protection and first view | Poor fit causes movement or hard removal | Required |
| Interior message | Inner-lid text, care note, short link | Story, instructions, authentication | Too much copy competes with the jewelry | Recommended |
Size changes more than appearance. It sets the gap around the jewelry, the space above a stone, and the insert depth. It also controls how much empty board the customer sees after opening the box.
Start with the jewelry at its widest, tallest, and most fragile points. Add the insert and lining thickness before setting the inner box dimensions. Then choose a lift-off lid, drawer, hinged lid, or magnetic book style from the jewelry box collection. Pick the structure that supports the intended reveal.
A stock box with a new logo is still personalization. A fully custom structure becomes useful when the stock size wastes space, compresses the piece, or presents it at the wrong angle.
The wrap is the visible paper bonded over a rigid board core. It can add color, grain, linen-like texture, pearlescence, or a natural kraft look. The core still gives the box its shape.
Texture has a price. Deep grain makes small type and narrow foil lines harder to reproduce cleanly. Ask for both an unprinted swatch and a decorated sample. The flat swatch cannot show the effects of glue, wrapping pressure, corners, and tooling.
Color can also come from printed white paper rather than dyed paper. Printed color offers more control over patterns and multiple shades, while dyed paper can better hide edge wear when the color runs through the sheet.
Printing works well when the design needs more than one color, a repeat pattern, a gradient, or small text. Offset, digital, screen, and other methods do not produce the same result on every wrap.
A small logo should begin as vector artwork. Convert type to outlines and remove hairline details that will not survive at box size. Put each spot color or special finish on its own art layer. The overview of packaging printing methods can help frame the supplier conversation, but the decorated sample decides what works.
Large solid areas deserve extra attention. They make dust, pinholes, scratches, and shade drift easier to see, especially on a dark or high-gloss box.
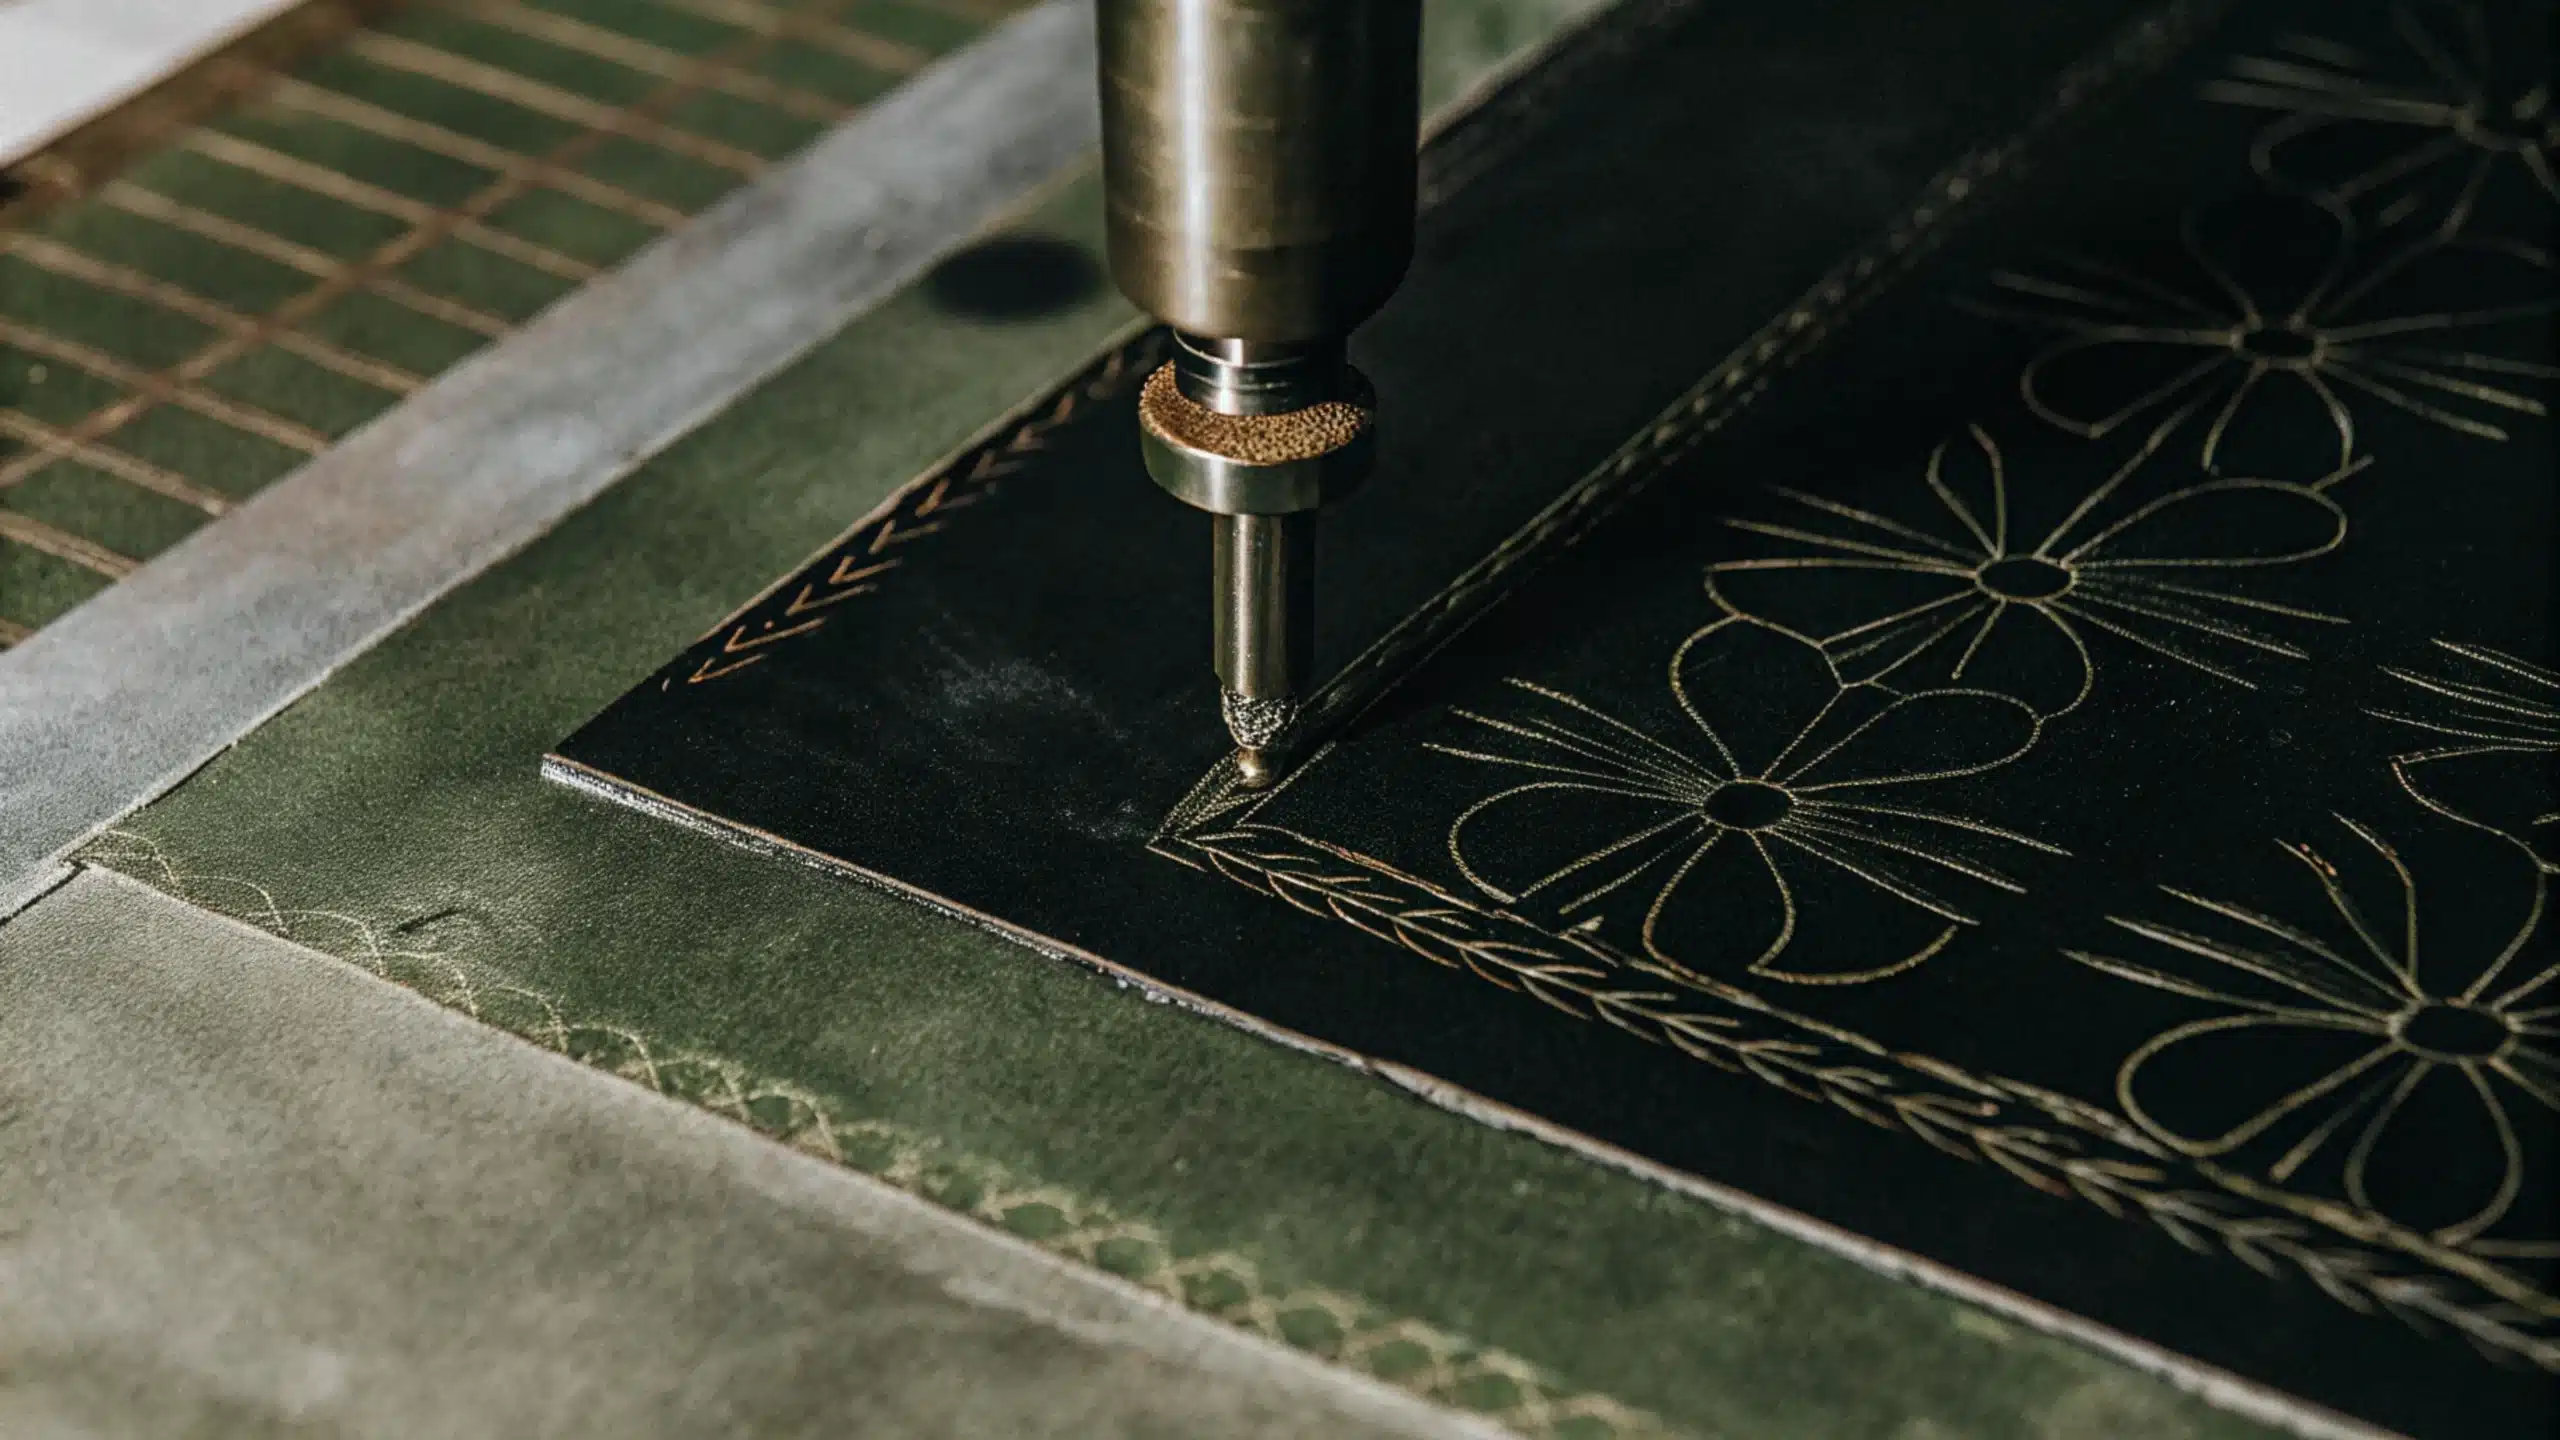
Foil stamping uses a heated tool and pressure to move a thin finish from carrier film to paperboard. The finish can look metallic, colored, matte, glossy, or holographic. It creates an opaque mark that can stay visible on dark paper without building the effect from process inks.
The paper surface matters. Holmen Iggesund notes that foil makes surface flaws easier to see. Smooth, clean paper gives the tool a better chance to transfer an even edge. Heat, pressure, dwell time, foil type, adhesion, and paper stability also affect the result.
Use foil as an accent, not an automatic luxury button. A modest mark on the lid often looks cleaner than a large metallic field that reveals every surface flaw.
Embossing raises a design. Debossing presses it below the surface. Both methods turn a visual mark into something the customer can feel.
Relief needs room. Tiny counters in letters, tightly spaced lines, and sharp corners can close up or lose definition after the wrap meets the board. A blind emboss uses no ink or foil, which can suit quiet branding on pale or textured paper.
Foil and relief can be combined, but registration becomes more demanding. Approve the actual combination on the chosen paper instead of approving foil and relief as separate swatches.
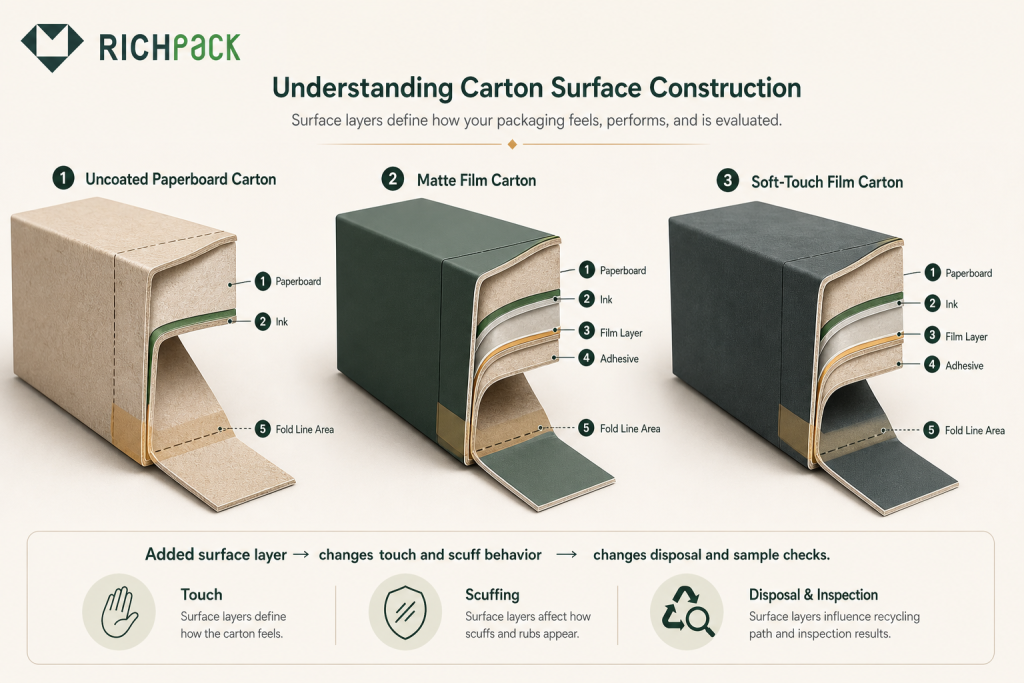
A coating or film changes gloss, touch, and resistance to handling. Matte lamination can calm a bright printed surface, while gloss increases contrast and reflection. Soft-touch film creates a dry, velvety feel on compatible printed paper.
Protection is never absolute. A dark matte surface can still show oil, scratches, and polished rub spots. Ask the supplier to test the finished stack, which includes paper, ink, coating or film, adhesive, and forming process.
The added layer can also change how the pack should be described at disposal. Do not call a mixed construction recyclable solely because the base is paperboard.
An insert holds the jewelry at a chosen angle and controls what the customer sees first. It also limits movement, surface contact, tangling, and impact inside the box.
Common options include paperboard cards, molded fiber, foam, flocked forms, velvet-covered pads, microfiber, and fabric-wrapped cushions. The useful question is not which material looks richest. Ask which insert holds the actual piece without marking it or making removal awkward.
A supplier should cut custom jewelry box inserts from the real jewelry dimensions or a physical product. A photograph with a ruler rarely captures stone height, clasp bulk, chain behavior, or the spring of a cuff.
The inside lid can carry a short brand line, care note, origin statement, serial reference, or scannable link. This area appears after the customer commits to opening the box, so it can hold useful information without crowding the outer lid.
Keep it short. A block of six lines above a small ring usually overpowers the product. Check the reading angle, contrast, and clearance so the lid does not rub against a high stone or metal setting.
Variable codes may support authentication or product records, but they need a defined scan size, quiet zone, contrast, and destination that will remain live. Test the code after printing and after final assembly.
A good box does not use every available finish. It repeats one clear brand cue, fits the jewelry, and survives the way customers and fulfillment teams will handle it.
Choose the feature a customer should recognize from three feet away. It might be a color, a compact mark, a paper texture, a drawer pull, or a distinctive inner reveal.
Repeat that cue with restraint. A gold mark, gold edge, gold ribbon, gold insert border, and gold message can make the jewelry disappear into the package. One main cue and one supporting detail usually give the eye a cleaner path.
Lay the jewelry beside the proposed materials before approving the palette. Warm cream paper can flatter yellow gold and flatten cool white stones. Black can create contrast but expose dust and fingerprints.
“Cardboard jewelry box” can describe more than one build. A rigid setup box uses a thick board core wrapped in paper. A folding carton is cut and scored from thinner paperboard, while a corrugated mailer contains fluted material between liners.
The construction changes the available folds, corners, print route, storage volume, and unit cost. It also changes where artwork belongs. A rigid box often receives printed or decorated wrap paper before or during assembly, while a folding carton is commonly printed flat and then converted.
Ask the supplier to name the board, visible wrap, lining, insert, coating, closure, and adhesive as separate components. That list prevents vague material approvals.
Smooth coated paper supports fine print and clean foil more easily than deep texture. Uncoated kraft gives a natural look but can absorb ink and soften detail. Dark paper needs enough opacity or contrast to keep the mark visible.
The difference between kraft paper and art paper is a useful starting point, not a final production rule. Paper shade, coating, texture, fiber, ink, foil, and press settings still change the result.
Use a matrix when narrowing options:
| Surface | Strong Starting Options | Watch For | Approval Action |
| Smooth coated paper | Fine print, spot color, foil | Fingerprints and scuffs on dark fields | Compare print and rub samples |
| Uncoated kraft | Bold ink, simple marks, blind relief | Absorption and muted color | Print on the exact lot or grade |
| Textured wrap | Large foil, bold relief, simple logo | Broken edges and lost fine detail | Test the smallest artwork feature |
| Dark dyed paper | Foil, opaque spot ink, blind relief | Dust and low contrast | Review under retail lighting |
| Laminated print | Detailed graphics and wipeable surface | Edge lift, cracking, disposal limits | Fold and rub the assembled sample |
Packaging exposes weak artwork fast. A hairline that looks elegant on a large screen can vanish when stamped at 18 mm. Tight spaces inside letters can fill with foil or ink.
Print the logo at final size on plain office paper first. If the small text already strains the eye, the box will not rescue it. Prepare a simplified small-use version with fewer lines, wider gaps, and no fragile tagline.
Keep the master brand mark unchanged for other uses. The packaging version is an optical adjustment for a physical process, not a new identity.
A boutique counter and a parcel network punish boxes in different ways. Counter boxes collect finger oil and repeated lid wear. Shipped boxes face vibration, edge contact, compression, and movement inside an outer shipper.
The jewelry box should not replace the shipping system. Use a fitted mailer, cushioning, and void control when you package jewelry for shipping. Then inspect whether the decorated surface rubs against tissue, a sleeve, another box, or the outer carton.
Run a simple packing-table trial with the people who will pack orders. A beautiful ribbon can become a daily bottleneck if every bow needs ninety seconds and arrives inconsistently.
Some changes affect every unit. Others add a one-time tool or setup. A new structure may need a cutting die, while foil and embossing need dedicated tooling. Extra colors, interior printing, hand assembly, and multiple size variants can add recurring work.
Separate the quote into cost drivers:
A smaller order may suit a stock structure with a printed sleeve, label, or one-color mark. Stable repeat demand can justify a custom structure and dedicated tools.
A paper box can become a mixed-material package after adding film, foam, magnets, fabric, ribbon, metal hardware, or a plastic window. Review the finished bill of materials before making a recycling claim.
FSC labels address fiber sourcing and content categories. FSC 100%, FSC Recycled, and FSC Mix do not mean the complete assembled box will be accepted by every local recycling program. Claims need the correct label, chain-of-custody support, and scope.
If easier separation is a goal, ask how a customer would remove the insert, magnet, ribbon, or sleeve. The steps for how to package jewelry with fewer mixed materials should influence the design before tooling begins.
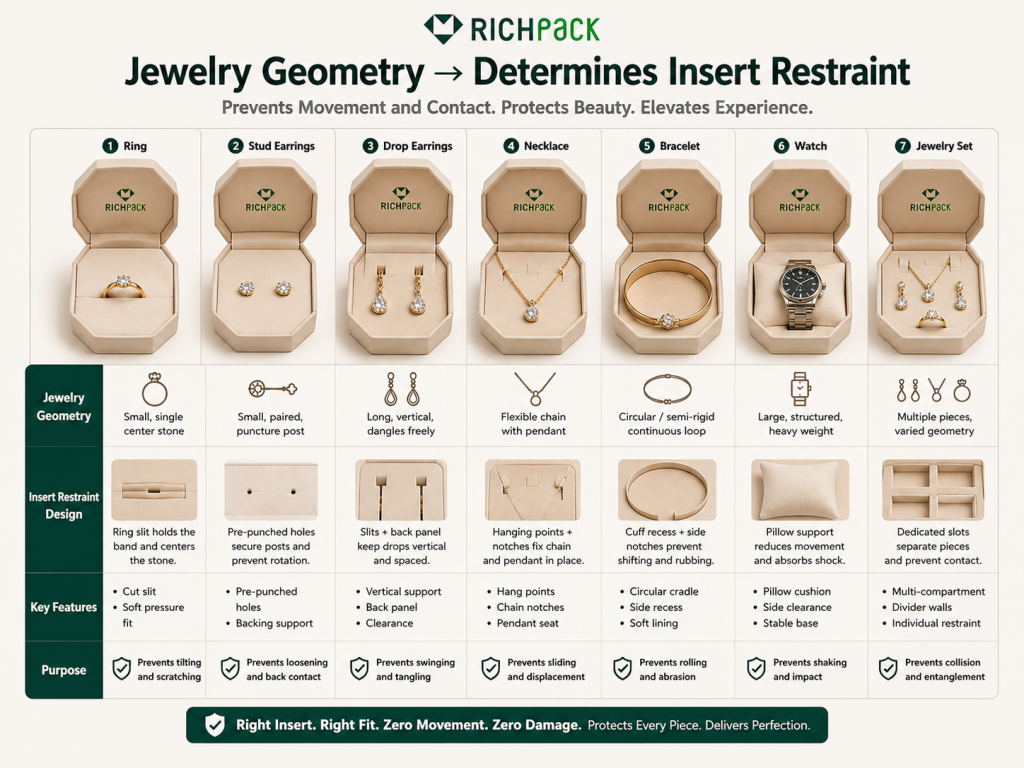
The jewelry decides the insert before the insert decides the look. Compare movement, pressure points, removal, and the first view with the actual product in hand. A guide to how to choose an insert material can narrow the field, but geometry decides the final fit.
| Jewelry | Main Risk | Useful Insert Feature | Clearance Check | Intended First View |
| Ring | Rotation or stone contact | Sized ring slot | Stone and prongs clear the lid | Stone faces forward |
| Stud earrings | Pair shifts or posts bend | Two holes with rear space | Posts and backs do not hit base | Pair sits level |
| Drop earrings and hoops | Swinging and tangling | Card with spaced holes or hooks | Drops hang without touching | Pair hangs symmetrically |
| Necklace or pendant | Chain tangles or pendant strikes | Upper hooks and lower chain pocket | Pendant clears lid and edges | Pendant stays centered |
| Bracelet or bangle | Rolling or surface rub | Pillow, band, or curved support | Clasp and ornament have space | Front detail faces up |
| Watch | Weight pulls against insert | Firm pillow and deep cavity | Crown and lugs clear walls | Dial faces squarely |
| Set | Pieces collide or compete | Zoned insert with separate holds | Tallest piece clears lid | Hierarchy remains obvious |
A ring slot should hold the shank without squeezing delicate plating or forcing a wide band into a narrow cut. The stone needs enough height above the insert to stay visible, plus enough space below the lid to avoid contact.
Test the smallest and largest ring in the range. A slot that works for a thin solitaire may distort a wide signet presentation. Tilt the open box to see whether the ring rotates away from the intended view.
Do not place a deep lid message where a high stone can touch it. A clean empty area often frames the ring better.
Stud earrings need two aligned holes and enough hidden space for posts and backs. If the card sits against a hard base, the posts can bend or prevent the insert from sitting flat.
Check whether customers can remove the backs without pulling the whole insert out. Small finger notches or a removable card can help, but loose parts should not rattle inside the box.
Keep the pair level. A one-millimeter visual shift is easy to notice when two stones sit side by side.
Drops and hoops need more vertical and lateral space than studs. If the holes sit too close, the pieces cross or strike each other during transport.
Use a hanging card, spaced hooks, or a formed insert that supports the upper fitting while letting the lower part rest without a sharp bend. Test the full swing path before closing the lid.
Long drops may need a chain-like pocket or light restraint at the bottom. The restraint should stop movement without flattening tassels, fabric, or soft components.
A necklace insert needs at least two control zones. The upper hooks or slots set the chain width, while a lower pocket or channel stores extra chain and the clasp.
Center the pendant before cutting the lower opening. Then shake the closed sample gently and reopen it. If the pendant turns over or the chain crosses the face, the insert needs another control point.
Chain thickness matters. A narrow slit that holds a fine chain can crease a thicker one or leave visible pressure marks.
Soft bracelets can wrap around a pillow or rest on a curved band. Rigid bangles need a support diameter and box width that prevent rolling without forcing the opening.
Compare velvet and foam inserts with the finished metal surface. Fabric adds softness and color, while foam provides shape and resistance. Either can fail if dye transfer, fiber shed, sharp cut edges, or excessive pressure appears on the sample.
Leave room for charms and clasps. They often create the tallest point even when the bracelet itself looks flat.
A watch adds weight, crown clearance, lug geometry, and strap stiffness. The pillow should hold the strap closed without stretching it or forcing a small strap around a large core.
Set the cavity deep enough to resist sideways movement. Keep the crown and case away from the box wall because edge contact becomes visible on polished metal.
Lift the closed box and rotate it. A heavy watch should not pull the pillow out of its seat or knock against the lid.
A set needs a visual order. Put the hero piece where the eye lands first, then give supporting pieces their own zones. Equal spacing is not always the clearest spacing.
Separate chains, posts, stones, and metal surfaces so they cannot collide. A common cavity filled with loose padding may look full in a rendering but turn into a mixed pile after shipping.
Test removal order. Customers should not have to lift a necklace over exposed earring posts or remove three pieces to reach the ring.
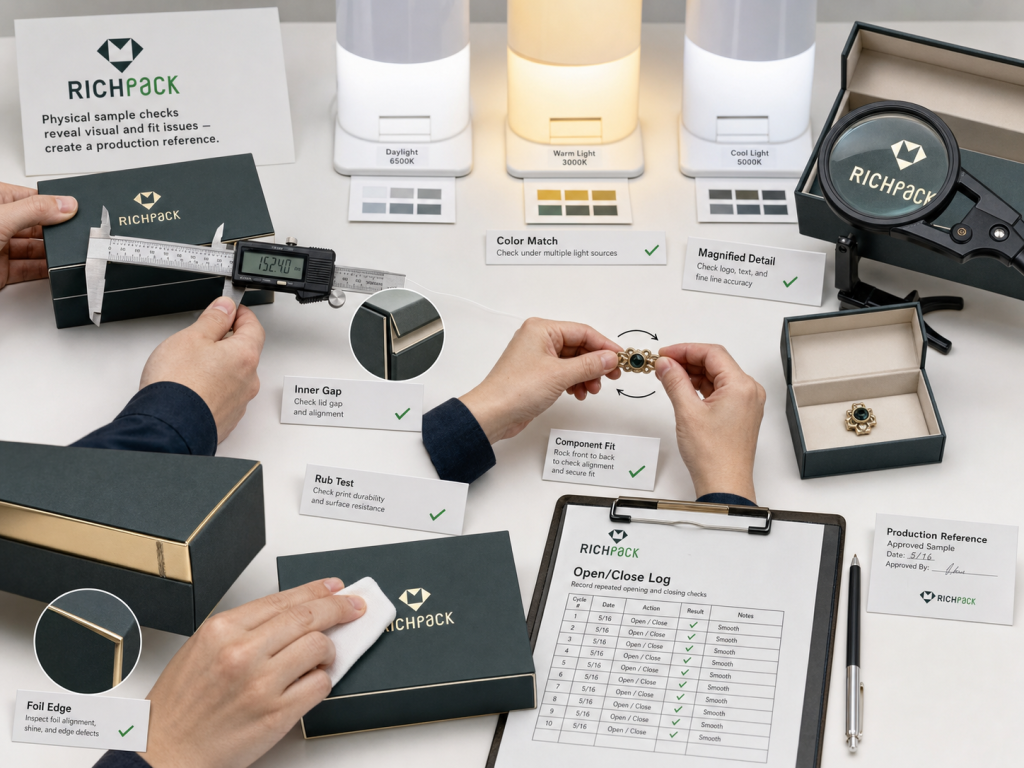
A rendering confirms layout. It does not confirm fit, color, touch, wear, or opening action. Approve the physical sample against a written checklist and keep one signed reference for production.
| Check | Test Action | Visible Failure | Approval Record |
| Internal size | Measure cavity and close with jewelry inside | Pressure, excess gap, lid contact | Finished internal dimensions |
| Color | Compare under controlled and intended light | Shade shift or metameric mismatch | Approved sample and color target |
| Inspect smallest type and lines | Fill, blur, pinholes, misregistration | Final artwork revision | |
| Foil and relief | View straight and at a low angle | Broken edge, void, blister, flat relief | Approved tool and proof |
| Surface | Rub contact areas and work folds | Scuff, smear, polish, crack | Test method and acceptance sample |
| Insert | Shake, reopen, remove, and replace jewelry | Movement, marks, hard removal | Product and insert version |
| Closure | Cycle lid, drawer, hinge, or magnet | Skew, scrape, weak hold, uneven gap | Approved opening action |
Measure the finished inside, not the dieline alone. Wrap paper, lining, glue, folded corners, and insert fabric can reduce usable space.
Place the tallest product in the insert, close the box, and apply normal hand pressure. Reopen it and inspect the stone, setting, dial, or metal surface for a contact mark. Modeling clay or removable indicator film can help reveal hidden contact without damaging a saleable piece.
Record the jewelry sample used for approval. A future product revision can change height even when the item name stays the same.
X-Rite recommends controlled lighting for color checks. Konica Minolta advises comparing samples under more than one standard light source. That second check can reveal metamerism, where two colors match under one light but split under another.
Review the box under a controlled booth if available, then under the store, office, or photography lighting that matters to the launch. Put the approved target and production sample side by side.
Do not approve from a phone photo. Camera processing, display settings, and room light add too many uncontrolled steps.
Read every line at normal distance before using magnification. If a care note needs a phone camera to be legible, it is too small for the box.
Under magnification, look for filled counters, broken strokes, fuzzy reversals, pinholes, and registration movement. Check the same feature near the center and near wrapped edges because forming can change the surface.
Compare the sample with the final artwork revision. A clean sample is useless if production receives an older file.
Tilt the box under a single light. This makes missing foil, dull patches, edge spread, blisters, and uneven pressure easier to see.
Holmen Iggesund recommends checking the result against the proof. Visible faults include poor adhesion, air blisters, dull foil, and uneven lacquer. Heat, pressure, surface smoothness, and other press settings can cause those faults.
Run a fingertip lightly across relief. The design should feel intentional, and the wrap should not split at sharp edges.
Rub resistance is the ability of printed paperboard to resist marking, scuffing, or smudging during conversion, packing, distribution, and use. A sample that looks clean on the presentation table may still mark when boxes touch in a carton.
Rub likely contact areas with a defined material and repeatable number of strokes. Inspect dark solids, metallic ink, coated edges, thumb notches, drawer pulls, and corners.
For folding structures, work each fold several times and inspect for white cracking, film lift, ink loss, or paper delamination. Record the test conditions so later batches are judged the same way.
Load the exact jewelry, close the box, and move it through the orientations it will meet during packing and delivery. Reopen the box without correcting the product first.
Look for rotation, chain escape, contact marks, loose fibers, dye transfer, and an insert that lifts with the jewelry. Then remove and replace the piece several times. A secure insert should not turn the first unboxing into a tug-of-war.
Photograph the approved position from above and from the side. Those views give production inspectors a clearer reference than “fit looks good.”
Cycle the lid, drawer, hinge, sleeve, or magnet with one hand. Listen for scraping and watch whether gaps stay even.
A drawer should not drop out when tipped or bind after the wrap settles. A magnetic lid should meet squarely without forcing the board to twist. A lift-off lid should release without pulling the base off the counter.
Repeat the action after the box has held the jewelry for a day. Inserts and wrapped components can settle, which may change friction and alignment.
Yes, but the practical methods change with quantity. A stock small jewelry gift box with a printed sleeve, label, ribbon, or simple mark can reduce setup work for a short run. A custom structure, foil die, embossing tool, and fitted insert become easier to justify when the design will repeat.
Use a simplified vector mark and test it at final size on the exact surface paper. Fine multicolor detail may suit printing on smooth paper, while a compact opaque mark may suit foil on dark paper. The sample must show whether narrow gaps, tiny text, and sharp corners survive.
Yes, compatible printing methods can decorate kraft paper, but the brown tone and absorbent surface change color and detail. Use bold artwork, expect a more muted result, and test opaque or spot ink when the design needs stronger contrast. Do not approve the color from a white-paper proof.
Some are easier to recycle than others. Check the complete construction, including wrap, film, coating, adhesive, magnet, fabric, foam, window, ribbon, and insert. Review the available packaging material options and verify local collection rules before making a broad claim.
Send the finished jewelry dimensions, product weight, box style, internal size, surface reference, artwork, colors, finish locations, insert concept, quantity range, destination, and launch date. Ask which features the sample will confirm and which may change in production. Compare those fields with the available wholesale jewelry box options before approval.
Personalization works when the brand mark, paper, structure, and insert solve the same problem. A clean foil logo cannot rescue a tangled necklace. A perfect insert cannot fix artwork that disappears into textured paper.
Choose one recognizable cue. Match it to the cardboard construction and the jewelry, then test the finished sample under real light and real handling. That sequence is slower than approving a rendering and much faster than correcting a production batch.
For a sample review, prepare the jewelry dimensions, artwork, preferred structure, and surface reference. Add the quantity range, destination, and launch date. Those inputs turn jewelry box cardboard from a vague idea into a box that a packaging team can check and repeat.


2025-07-13

2025-02-27
2025-03-07
2024-12-05

2025-04-24
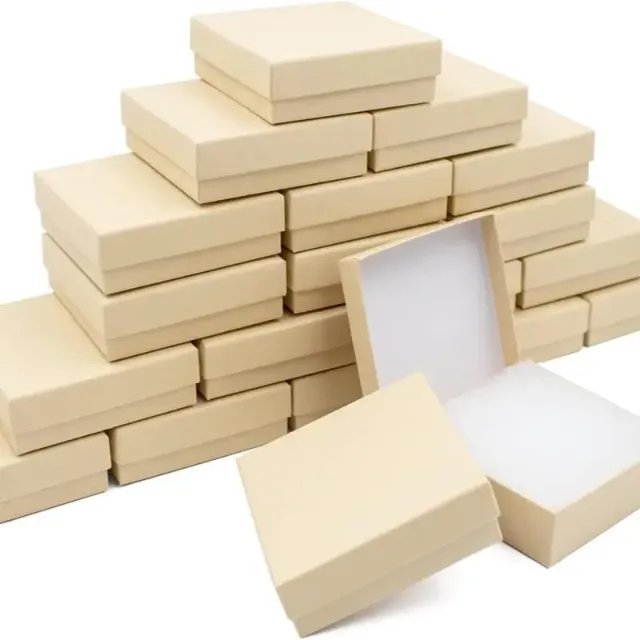
Affordable Custom Gift Boxes for Small Jewelry Shops | Budget-Friendly Packaging Solutions Custom Designs for Small Retailers
View More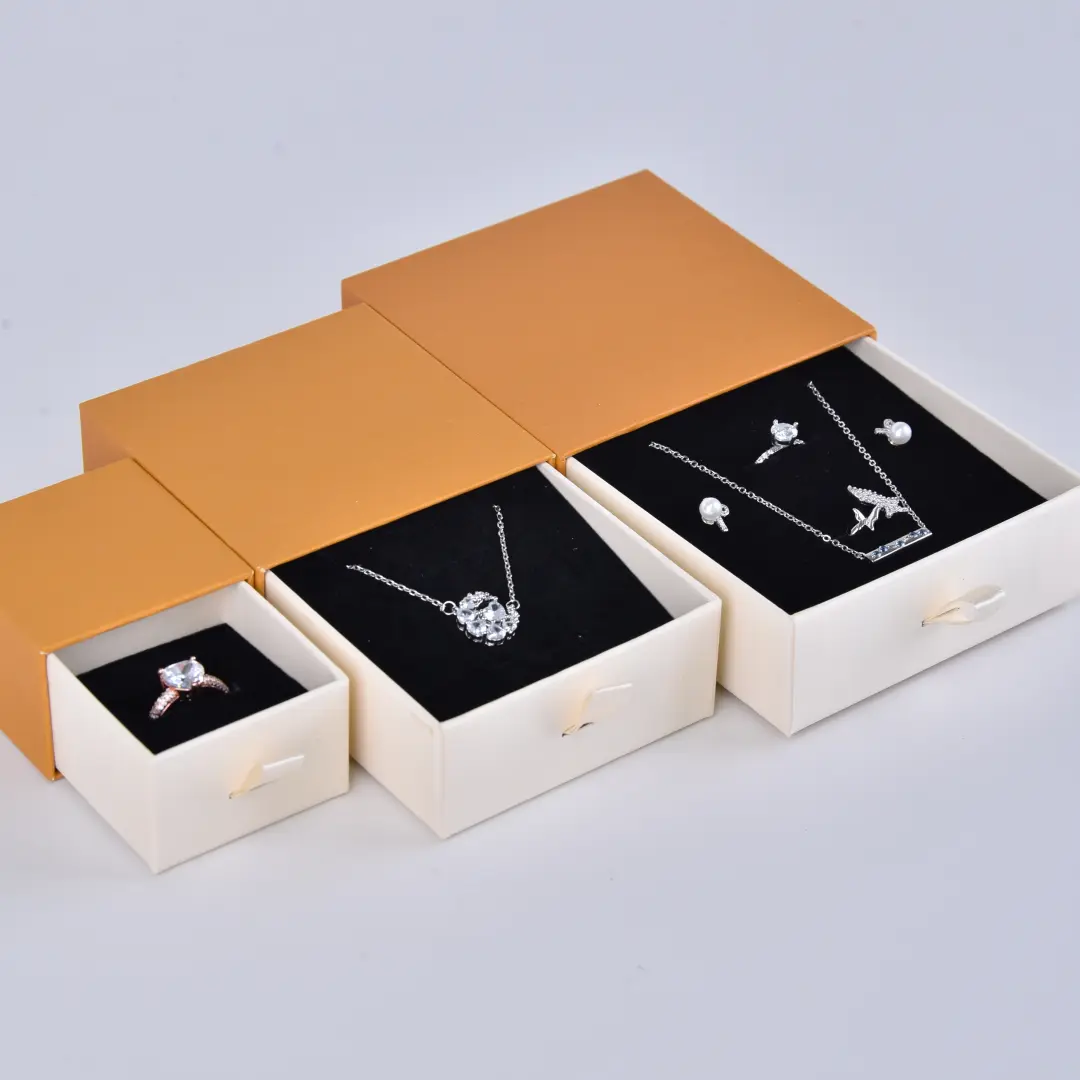
Antique Bronze Sliding Jewelry Box – 5x5x3.5cm Rigid Cardboard Sliding Jewellery Gift Box
View More
Birthday Gift Boxes for men – Sturdy Boxes for His Special Day’s Elegance
View More
Black Magnetic Gift Box | Luxury Black & Gold Rigid Packaging | Richpack
View More
Bracelet Gift Box in Pink Thick Cardboard | Elegant Bracelet Packaging Box for Retail and Wholesale | Richpack
View More
Brown Cardboard Gift Boxes – Classic, Economical丨Tradition in Every Box
View More

