PREV

10 Best Alternatives to Plastic Packaging for High-End Jewelry
2024-11-19




Picture a ring box on a worktable. The logo looks centered and the lid closes. Can the customer lift the ring out without catching it? Will the insert hold it if the parcel tips? A flat proof cannot answer those questions. The finished sample can.
For white cardboard boxes with lids, the buyer and supplier need the same artwork, dieline, material spec, physical sample, and acceptance rules. Keep four release checks distinct:
A presentation box and its corrugated shipper do different jobs, so each needs the right checks. Jewelry brands comparing RichPack’s custom jewelry boxes with logo can prepare a sample review or supplier brief with their own dimensions, defect limits, and test plan.
Printing can reproduce a wrong file perfectly. Start QC by deciding what the team will compare the finished box with. Keep one approved file, drawing, material spec, and sample in the order record, then name who can approve a change.
Approve the artwork and dieline version before production. The dieline is the flat pattern that shows where the box will be cut and folded. Then check the details that can disappear or shift when the box is made:
Keep the approved revision with the purchase order. If anything changes, record who approved it and which sample shows the new version.
Use a screen image to review layout, not final color. Display settings, paper shade, ink, and coating all affect what you see. Agree on the color reference, then review a physical proof under the same viewing conditions you will use later. Keep that proof or approved sample with any spot-color instructions.
Specify the board, visible surface, finish, and any coating or lamination. “White cardboard” alone does not define how it should print, fold, or resist handling marks. Note which side faces out. Review a new sample before accepting a substitute, and use RichPack’s packaging materials overview to frame material questions.
Separate inner dimensions from outer dimensions. The inside must fit the product and insert; the outside affects storage and packing. Define measurement points on the drawing for the base and lid. Agree on variation for the specific structure. A tolerance from another box may not protect a tight jewelry fit or smooth lid movement.
Agree on inspection items, sample selection, hold defects, and who may approve a deviation. If the buyer uses AQL, or acceptance quality limit, the sampling rule and acceptance values should match the order and risk. Put the plan, defect classes, and release authority in the purchase record.
Connect each run to its purchase order, approved file, material batch, sample, and inspection record. Retain an approved reference sample where agreed. Before a reorder, note changes in product, finish, insert, or route. Buyers can review RichPack’s quality and sustainability information when discussing project records.

Check the files, board, dimensions, and lot before printing. These are still easy to stop or replace at this stage. Once the press run starts, the same mismatch can repeat across the batch, so hold any input that does not match the approved spec.
Inspect for dirt, scuffs, dents, creases, warping, exposed fibers, and uneven texture. These defects can show through a light print or remain visible on white panels. Compare incoming stock with the approved sample and record each defect’s type and location.
Caliper is the measured thickness of the board. Check it, weight, and moisture only against values agreed for the order; those properties can affect folding, shape, and lid fit. A usable spec ties each measurement to its method and acceptance limit:
Set any missing value before using it to reject a lot. For jewelry projects, RichPack’s paperboard packaging guide can help frame material questions.
Check that the coating or lamination works with printing, creasing, gluing, and finishing. A surface may crack at a fold or lift at an edge after conversion. Review a finished sample for bubbles, delamination, poor adhesion, or marks, then agree how to judge the lot.
Proofread names, logos, care copy, required marks, and barcode content against the approved file. Check that folds, glue flaps, lid overlap, or inserts do not cover text. Define who verifies barcode scans. Content approval is separate from print quality: a sharp error is still wrong information.
Compare the dieline and print layout so text and graphics avoid cuts, folds, and glue zones. Check crease and cut alignment, then fold a sample and inspect for cracks, exposed edges, or artwork shifting across a seam. Record the panel that needs adjustment.
Confirm that adhesive and assembly materials suit the board, coating, and construction. Check how to handle the glue and how long it needs to set before inspection. “Water-based” or “low-odor” does not prove finished-box performance or product-contact safety. Review an assembled sample and request supporting material information when needed.
Receive each shipment in this order:
Before the run starts, fold and finish a sample against the approved drawing and proof. Check whether the lid closes, the edges meet, and the insert still fits. If the sample needs a change, update the controlled file or specification and approve the revision before work continues.
| Checkpoint | What to compare | Record | Hold the input when |
| Files | Artwork, dieline, text, barcode | Approved revision and reviewer | Files conflict or an approval is missing |
| Board | Type, finish, surface, agreed measurements | Supplier lot and inspection result | Material differs from the approved specification |
| Structure | Dimensions, cut, crease, glue zones | Drawing revision and sample result | The sample cannot be assembled to the approved design |
| Quantity | Item, lot, count, carton marks | Purchase order and receiving record | Identity or quantity cannot be reconciled |

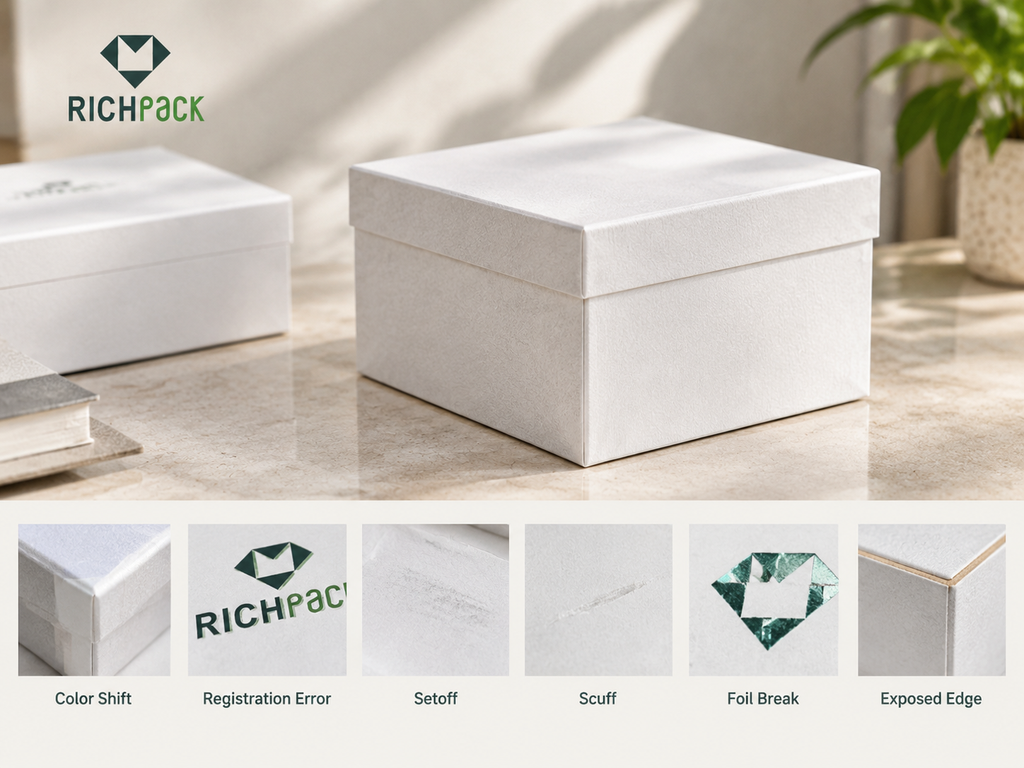
Look at the finished box against the approved physical reference. When a defect appears, name what failed and where. “Print looks off” is hard to fix; “the red logo on the lid shifts toward the fold” gives the supplier a place to start.
Compare production pieces with the approved color reference under the agreed viewing conditions. Check solid areas, brand colors, and small logos for shifts or uneven coverage. Record the sample, location, and method. Any instrument-based limit belongs in the specification with its measurement method.
Inspect color layers, borders, logos, and artwork near folds or edges. Misregistration means the color layers do not line up. It can create a fringe, doubled line, or off-center lid graphic. Check the assembled box because folding may reveal shifts hidden on a flat sheet. Compare with the approved drawing and sample.
Check three things separately:
A person should proofread the copy; a designated operator or scanner can verify barcode function. Record content and print-quality results as separate checks.
Look for patchy solids, smearing, or setoff. Setoff is ink transfer to a surface that touches the printed area. Check panels that face each other in the closed box, since ink can mark the lid interior or insert. Follow the agreed handling and drying conditions; set any rub-cycle or time limit in the project specification.
White panels show small marks easily under retail lighting. Inspect the surfaces and edges customers see for:
Photograph defects where useful and classify them with the agreed list. The photo documents the sample; it does not replace the written acceptance limit.
Check edges and detailed areas for lifting, bubbles, broken foil, incomplete transfer, crushed texture, or cracks at folds. Texture can change foil and coating results, so use a sample with the planned material and finish stack. Review converted details, not only a flat proof.
Inspect for rough edges, missing cuts, shifted folds, cracked creases, and exposed board. Fold a sample and check corners and the lid seam from the customer-facing side. Record repeated defects so the supplier can correct the die or process.
Use the agreed light and approved reference sample. Keep an identified sample with the inspection record when later batches need comparison. Note date, lot, reviewer, and accepted variation. A customer review or verbal opinion is not a production reference.
At production start, a first finished piece can expose issues that a flat proof cannot show, such as a lid rubbing at the seam or foil breaking on a crease. The buyer and supplier should decide which production checkpoints need a sample review and record who may approve continuation. This keeps the review tied to the order rather than an informal visual check.
The drawing can be right while the finished box still feels wrong. Test the complete box with the intended jewelry or a representative sample. The lid and insert work as one fit, so inspect them together.
Measure the inside space for the item and insert, then check outside dimensions for storage and shipping. Use the approved drawing’s measurement points. Record both sets when a ring holder or pendant needs specific clearance.
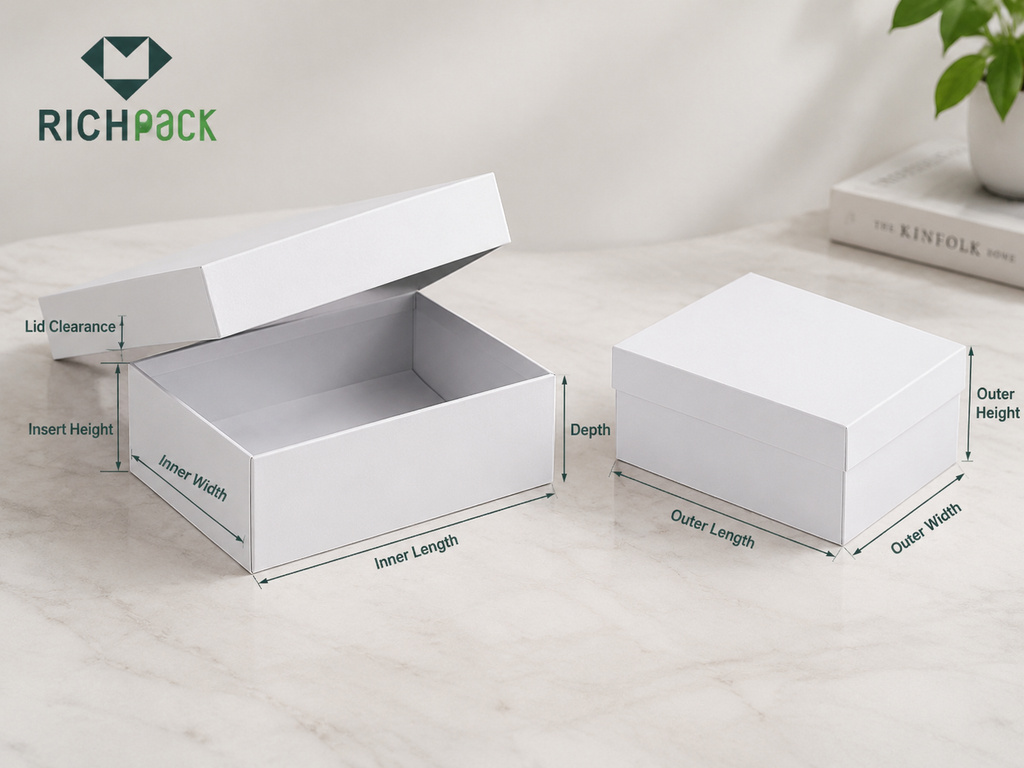
Use the same short sequence for each approved sample:
Repeat the check after assembly and finishing. Board, wrap, coating, and adhesive affect the completed fit, so set criteria for the actual construction.
Open the assembled sample and inspect folds, glue areas, corners, and joints for lifting, splits, exposed adhesive, gaps, or shifting panels. Handle it as a customer would. Record the defect location to distinguish a structural issue from a surface mark.
Check that the box sits square and corners align after assembly. A leaning base or uneven lid may point to a cut, crease, glue, or assembly problem. For stacking or parcel shipment, assess the complete pack; a neat appearance does not prove shipping strength.
Put the jewelry in the insert, close the box, and handle it as planned. A ring, earrings, necklace, bracelet, watch, or set may need a different restraint. Check whether:
Review RichPack’s jewelry box range to identify a structure, then confirm the fit with the actual piece and sample.
For a custom project, compare RichPack’s custom jewelry box inserts with the jewelry dimensions and handling need. Confirm material, size, and fit for the specific design.
Check surfaces touching the piece, clasp, chain, or stone. Open and close the box, then handle the packed sample as planned. Look for fibers, dust, pressure marks, or a lid rubbing a raised setting. A soft lining does not prove tarnish protection; any such claim needs a defined active component and test evidence.
Recheck fit when the product, insert, board, wrap, or finish changes. A small change in the jewelry profile can shift where the insert supports it; a different wrap thickness can reduce clearance under the lid. Keep the tested jewelry sample or its dimensions with the approval record so the next reviewer knows what the fit decision covered.

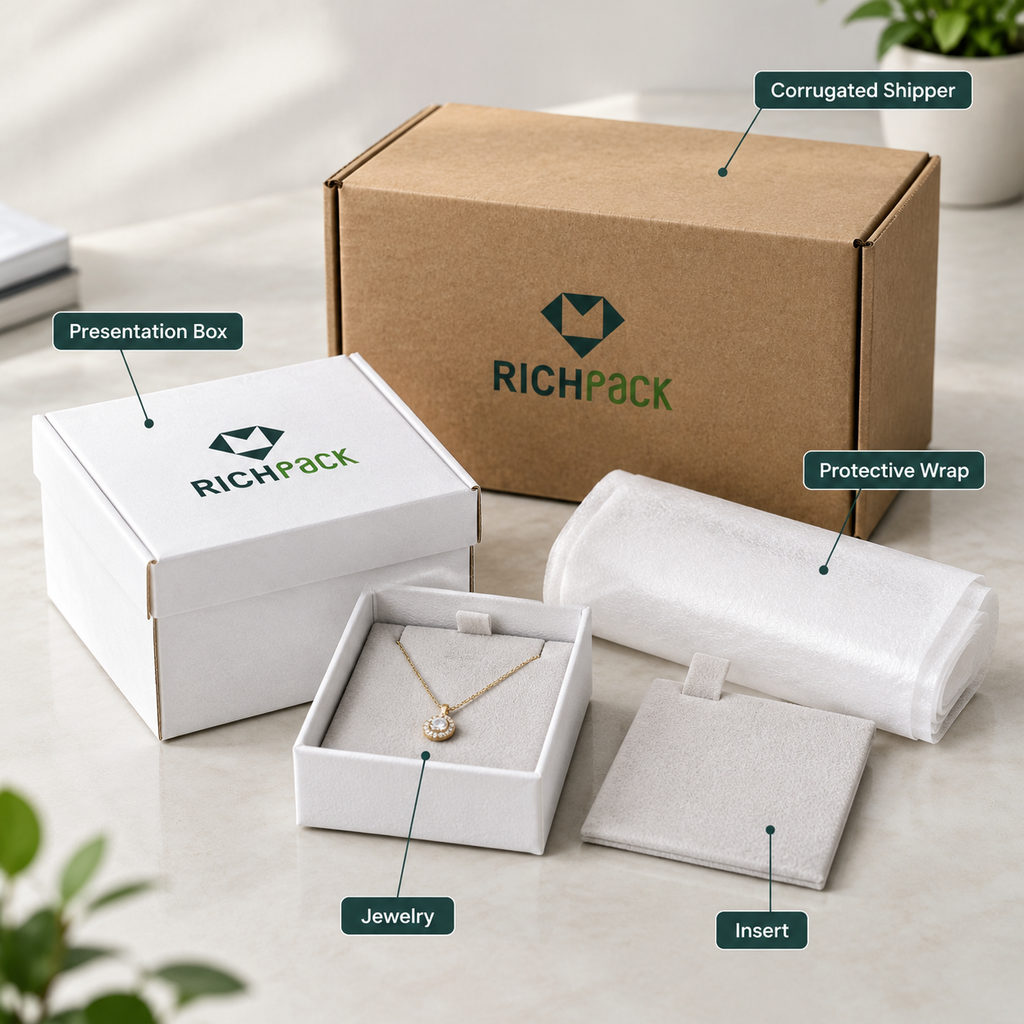
Choose checks for the complete package and route. The presentation box, inner protective pack, and corrugated shipper do different jobs. Record the layer tested, sample preparation, represented condition, and release authority.
Define sample selection and critical, major, and minor defects for the order. Buyer and supplier should agree on sample size and acceptance rules. Specify the response to a failed sample: hold, sort, rework, retest, or reject. Record the decision and approver.
If boxes will be stored or shipped under a load, assess the outer pack and stacking arrangement. A corrugated-carton test does not automatically describe a rigid paperboard jewelry box. Match the method to the material and configuration; record load conditions and observed damage.
Drop or vibration tests make sense when the route and product risk call for them. Before testing, lock the pack configuration:
Use a qualified test provider when results are contractual or need independent verification. Keep the report with the sample and lot record.
Consider moisture or temperature exposure when the route or storage conditions create risk. Define exposure and inspection points before testing. Materials and finishes may respond differently, so do not generalize one construction’s result to another. Use only conditions in the approved test plan.
Check that finished boxes are protected from rubbing, crushing, dust, and movement in the shipper. Verify quantity, orientation, carton identification, barcodes, and buyer-required marks. Use current destination or retailer requirements, not an old carton label.
For the jewelry itself, compare the inspection plan with the handling steps in RichPack’s guide to packaging jewelry for shipping. Then review whether RichPack’s packaging distribution service addresses the actual route and carton configuration. Neither replaces a project-specific transit test.
The release record should let another reviewer understand why the lot passed or stopped. Keep these items together:
Mark the lot pass, hold, rework, or reject. Include written approval for any accepted deviation.
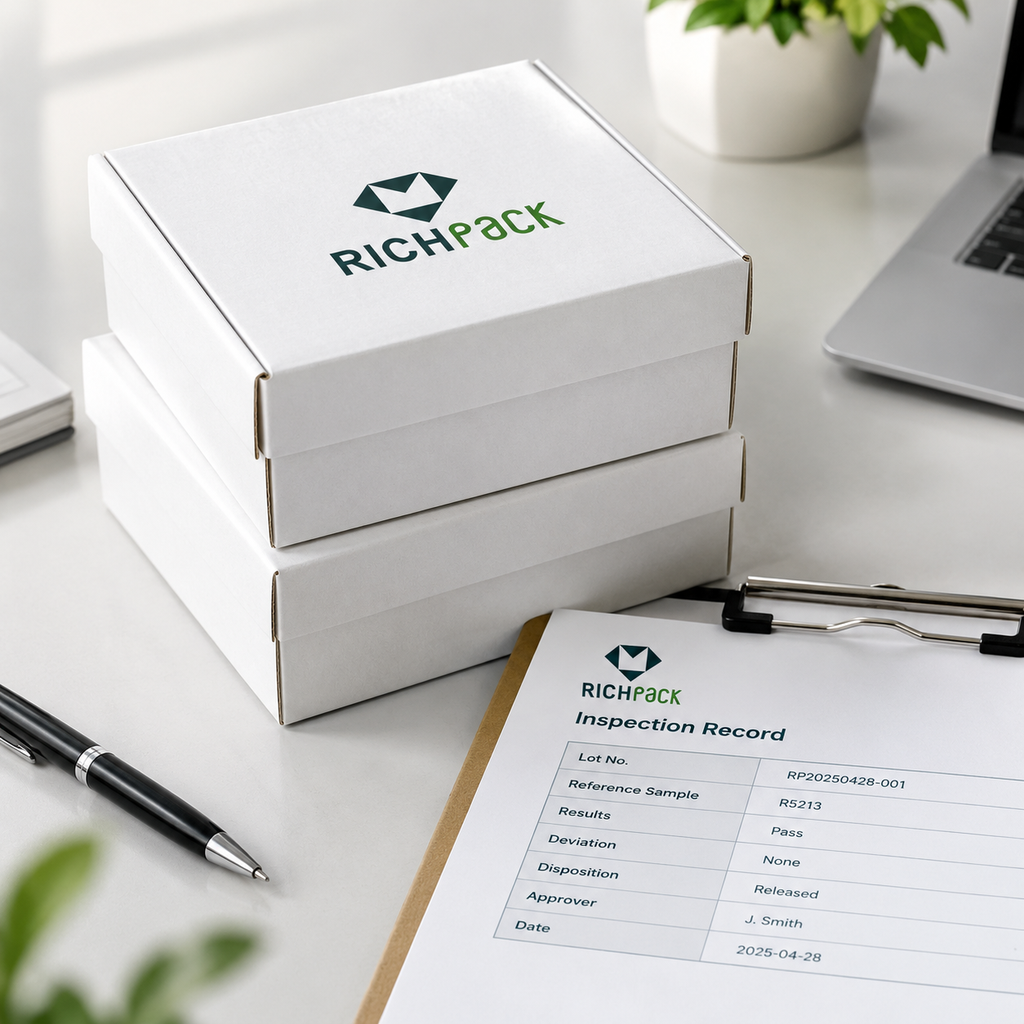
When a batch fails, keep the response clear:
Agree on sorting, replacement, and retest costs in the purchase terms.
| Package layer | Possible check | Use when | Do not assume |
| Presentation box | Dimensions, lid fit, insert fit, surface contact | Retail display, gifting, or product presentation matters | Corrugated carton ratings define jewelry-box fit |
| Inner protective pack | Restraint, cushioning, abrasion, closure | The item can move or rub inside the outer pack | A neat box alone prevents product movement |
| Corrugated shipper | Compression, drop, vibration, marks | Parcel handling or stacking creates a transport risk | One test represents every route and load |
Before testing, agree on the full pack configuration and the pass criteria. A test result applies to the sample that was tested, including its insert, wrap, carton, and packing method. If any of those change, assess whether the old result still represents the new order. Keep the test report with the lot record and note any damage by component, not only “package failed.”
Give the supplier a brief connecting the product, sample, inspection steps, defect rules, and release decision. Replace “ensure high quality” with what to compare, what evidence to save, and who can approve changes.
Give the supplier the details needed to build and inspect the correct pack:
Do not leave an unknown value for the supplier to guess.

Put the approved references in one place:
For new artwork or structure work, RichPack’s packaging design service is a relevant discussion point. Confirm the actual drawing, sample, scope, and approval responsibility for your order before production starts.
Describe defects in plain terms: color shift, misregistration, smearing, scuff, exposed board, rough cut, open glue joint, crooked lid, insert gap, or product movement. State priority surfaces and how to record issues. Reference photos help, but written limits control acceptance.
Map each checkpoint to a stage, owner, sample, method, record, and decision. Include prepress, incoming material, production sample, in-process checks, final inspection, and transit tests. Set the sample plan and acceptance rule. Name who arranges lab work and reviews the report.
Ask the supplier to document the lot, defects, correction, retest, and release. CAPA, or corrective and preventive action, records the fix and changes intended to prevent recurrence. On reorders, compare the brief with the last approved sample and review changes in board, finish, insert, size, artwork, or route.
Send the brief as one controlled set: purchase details, drawings, artwork, approved sample reference, defect photos, inspection plan, and release record. Put revision dates on the files and identify the person who can approve a substitute or deviation. That gives procurement, design, and quality teams one shared decision record if a question appears during production.
RichPack’s custom packaging projects resource offers a place to discuss a project brief. Before selecting a partner, confirm the materials, test scope, records, commercial terms, and approvals your order needs. You can also review RichPack’s packaging manufacturing service without treating a general service description as proof of a particular capability or result.
Quality control compares files, materials, printed parts, and finished packs with the order’s approved requirements. It covers checks before, during, and after production. The buyer and supplier set limits and records for the box and its use.
Confirm the artwork and dieline revision, color reference, board, dimensions, barcode or copy, sample, and acceptance criteria. Make the same references available to file preparers and inspectors. Resolve mismatches before the run.
Assemble a finished sample and open and close it as agreed. Check for rocking, skew, catching, excess force, rub marks, and gaps. Test after finishing, which can affect fit. Set pass limits for the construction.
Check jewelry boxes for dimensions, lid and insert fit, surface contact, and product movement. Select compression, drop, or vibration tests for the outer shipper when route and risk call for them. Match the method to the material and layer; corrugated measures are not universal jewelry-box standards.
Ask for the purchase order and lot, approved reference, inspection points, sample plan, results, photos, defects, deviations, test reports, corrective action, and release decision. Include reviewer and date. Agree on required records before production.
They can serve as jewelry presentation packaging when structure, insert, size, finish, and closure suit the piece. Test the jewelry or a representative sample for movement, removal, lid clearance, and contact. Add an outer shipper for parcel delivery.
Reliable checks start with one approved target and continue through materials, print, structure, fit, transport, and release. For jewelry, test the insert, lid clearance, contact surfaces, and movement with the actual piece or a representative sample. Assess the presentation box and shipper separately.
Before placing or repeating an order, send the supplier the file revisions, product and box dimensions, approved sample, defect definitions, sampling plan, test needs, and release record. If you are comparing RichPack’s custom packaging solutions, bring those same fields into the discussion so design, sampling, production, and shipping decisions can be reviewed against the same brief.


2024-11-19

2024-11-15

2024-11-21

Richpack · Choosing the Right Hinged Box A Comprehensive Guide Hinged boxes have become a sustainable packaging solution, prized for their versatility and adaptability. According to the latest industry analysis, the global sustainable packaging market is experiencing robust growth, driven by innovations like plant-based plastics and materials. This guide examines the various types of hinged… Continue reading Quality Control Checks During the White Cardboard Boxes with LidsPrinting Process

The study find that The 15% minimum recycling target for each packaging material was expected to be reached in all EU Member States except for plastics. This highlights a positive trend in packaging materials cost-benefit. Paper, glass, and metal are preferred for their recyclability. In this blog we’re here to guide you through the exciting world of packaging materials, where… Continue reading Quality Control Checks During the White Cardboard Boxes with LidsPrinting Process

Uncover how strategic material selection ensures exact dimensions, reduces transportation waste, and meets modern business needs across industries. Ideal for brands prioritizing quality, sustainability, and cost-effective packaging innovation.
Large white box with lid for jewelry sets | White rigid packaging box with clean surface | Custom bulk by Richpack
View More
Black & White Gift Bags – Classic, Sturdy丨Present Gifts Sleekly for Any Occasion
View More
Custom White Magnetic Folding Clothing Packaging Paper Gift Box Luxury Skin Care Gift Box
View More