

 PREV
PREV
2026 Best Custom Jewellery Packaging Ideas That Will Shine Your Brand
2024-11-15




A jewelry box can look right on the counter and still travel badly in its shopping bag. An oversized bag lets the box tip. A tight bag crushes tissue, catches corners, and slows the handoff.
Custom Paper Shopping Bags work best when the bag is built around the finished order. Measure the jewelry box, pouch, tissue, care card, certificate, ribbon, and any other item the customer carries away. Then compare the bag format, paper, handle, finish, landed cost, and loaded sample before you release production.
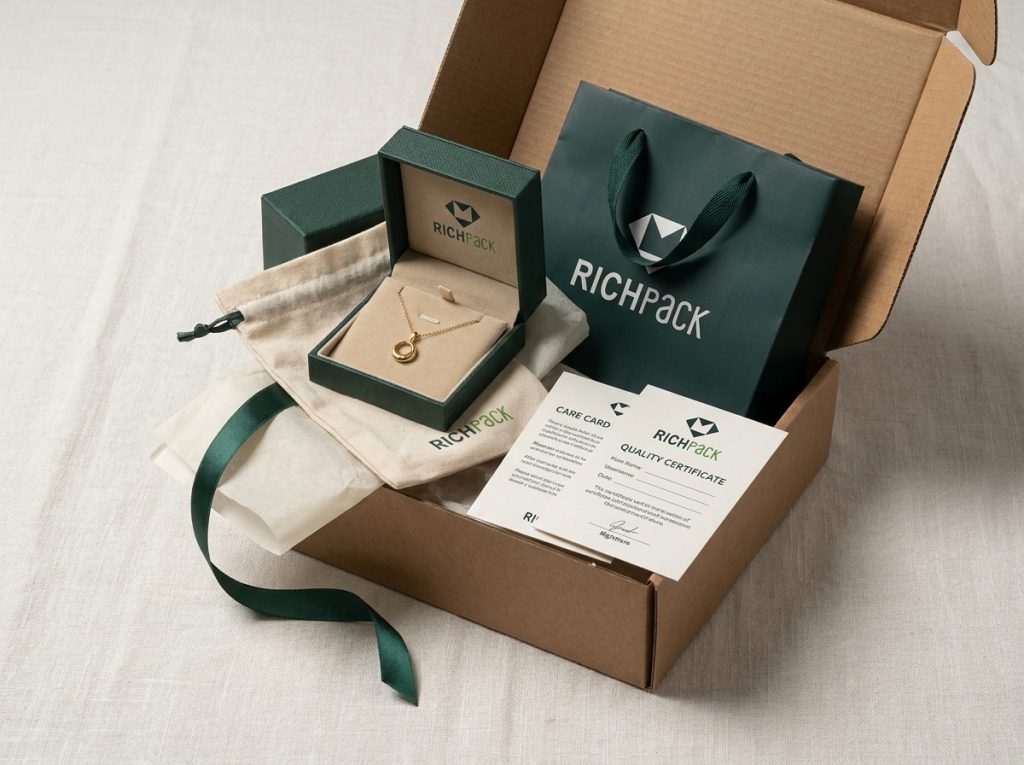
A custom paper shopping bag is made to a brand’s chosen size, paper, structure, print, handle, and finish. A stock bag comes in a preset format and may receive a simple logo print, label, or stamp.
Both can work. Choose by product fit, brand control, and order volume. The volume must support the custom run.
Stock bags are useful when demand is new, order volumes are small, or several products can share one standard size. They are faster to source and reduce the risk of holding obsolete packaging after a product change.
Custom bags give the brand control over dimensions, handles, reinforcement, paper color, print, and finish. A stock bag may make a small jewelry box look lost. It may also catch a wide gift box at the gusset or clash with the box and ribbon.
| Decision | Stock Bag | Custom Bag | When the Difference Matters |
| Size | Preset | Built around the pack-out | A box tips, catches, or leaves excess space |
| Paper | Limited range | Chosen for print, feel, and structure | The bag must match a jewelry box collection |
| Handles | Standard attachment | Material and reinforcement can be specified | The loaded bag pulls at the rim |
| Simple logo or limited area | Artwork can use the full approved print area | Brand color and layout must stay consistent | |
| Order risk | Lower initial commitment | Higher setup and inventory commitment | Demand and reorder plans are stable |
Brands use custom bags to control the final retail handoff. The bag can keep a high-value purchase private and make a gift easier to carry. It also keeps the exterior presentation consistent with the packaging inside.
Control costs more. A custom size may need a die, a printed sample, a higher minimum order, and more warehouse space than a stock format. Use it when those costs fix a real carrying, display, or storage problem.
A fitted bag makes checkout easier because store staff do not need to fold, force, or rebuild the pack. A stable base helps keep the jewelry box level, while a suitable handle provides the customer with a comfortable grip.
Gift buyers notice when the handoff feels complete. Tissue, a card, and a box can fit in a single ordered pack. Extra parts add bulk when they do not improve protection, privacy, carrying, or display.
The shopping bag is the outer layer used after a store, showroom, pop-up, or event sale. It carries the finished presentation pack from the counter to the customer’s next stop.
The bag should not replace a jewelry box or pouch. It also should not replace the corrugated shipper, cushioning, and closure needed for parcel delivery. Each layer has a separate job.
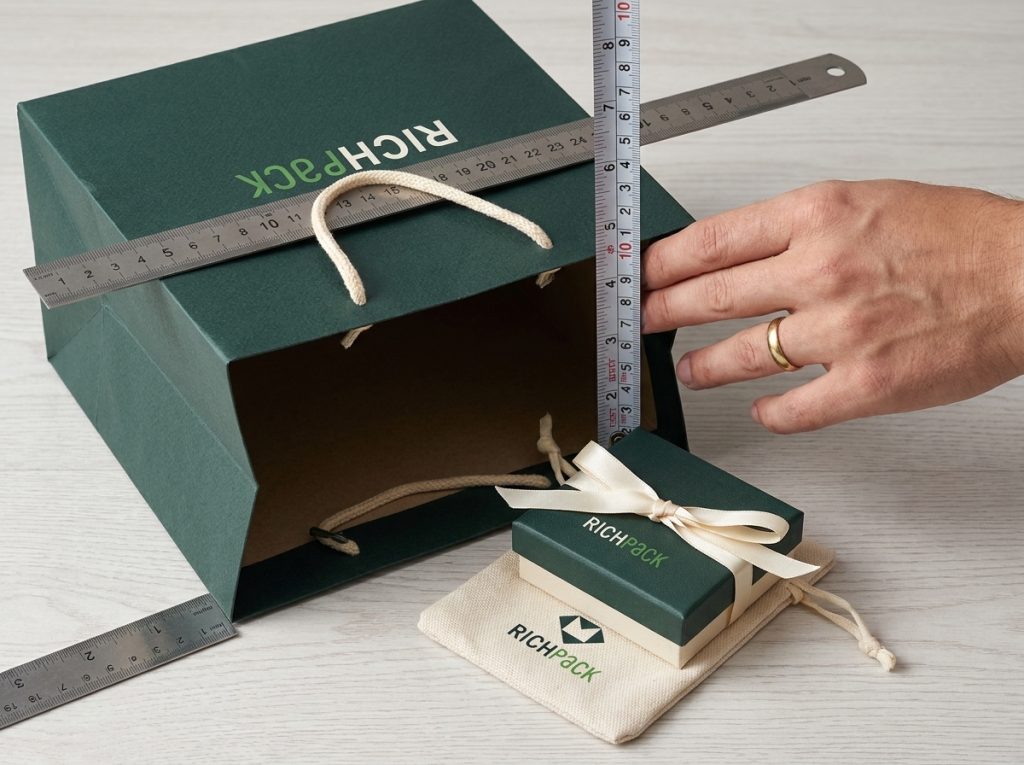
Measure the complete order as the customer receives it. A ring box alone gives an incomplete size. Tissue, a care card, a certificate, ribbon tails, and a gift message all change the final footprint.
The inside materials matter too. Inside the box, velvet lining, EVA foam, and rigid paperboard inserts add dense mass. A multi-piece pack can weigh much more than its outer size suggests. The bag brief may need a stronger bottom board, a higher paper GSM, a wider handle patch, or a different handle attachment.
Treat that weight as a system load. The box carries the insert and jewelry. The bag base carries the box, tissue, cards, and any second box.
Record the finished weight. Write it on the RFQ. Ask the supplier to state the tested paper, bottom board, patch, glue, and handle construction. Do not turn GSM into an unsupported load rating.
List every component before choosing the bag:
A multi-item order needs a second check. Two necklace boxes stacked together place a different load on the base than one ring box, even when both combinations fit inside the same bag.
Brands can specify the bag body, print, handles, reinforcement, and accessories. RichPack’s custom paper bags provide the most direct starting point, while packaging design support helps connect the bag to the box and other branded parts.
Useful decisions include:
Every option affects another part of the bag. A rope handle changes the top construction. A dark flood print changes rub and fold checks. A bottom board improves shape but adds another material to the finished pack.
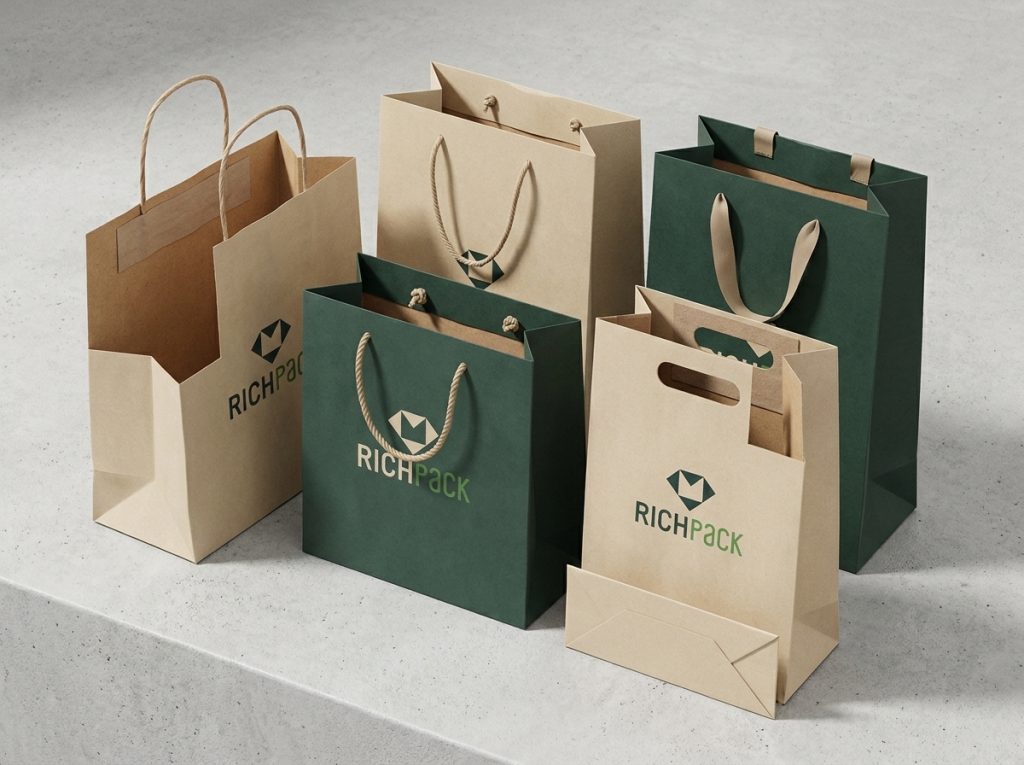
Paper bag labels can describe material, market position, sales channel, or physical construction. A kraft boutique bag with rope handles may also be a luxury retail Euro tote. Treat the labels as overlapping descriptions, then confirm the actual structure.

| Market Label or Format | Physical Feature | Best Jewelry Use | Main Limitation | Sample Check |
| Kraft bag | Brown, white, or colored kraft body | Natural, simple, or high-volume collections | Paper shade affects printed color | Check the logo on the chosen paper |
| Luxury bag | Refined paper, handles, print, and finishing | Premium retail and gifting | Added parts can raise cost and complicate recovery | Carry the loaded sample and inspect folds |
| Euro tote | Folded top with cord or ribbon handles | Jewelry boxes and coordinated gift packs | More assembly and carton volume | Pull-test the handle attachment |
| Twisted handle bag | Paper cord glued under the top | Everyday retail and efficient production | Less formal than some rope systems | Check grip and top-edge pull |
| Die-cut bag | Handle opening cut into the body | Small, light jewelry packs | Grip can be less comfortable | Carry it for the expected walking time |
| Flat satchel | Slim format with little or no gusset | Cards, pouches, and slim boxes | Poor fit for deep rigid boxes | Insert and remove the full pack |
| Wide-gusset bag | Deep side folds and base | Gift sets and multiple boxes | Contents can shift if the base is too open | Check tip and slide movement |
Kraft describes a paper family, not one fixed color or environmental claim. It can be brown, white, recycled, coated, or printed, depending on the grade and conversion.
Brown kraft gives darker inks a muted base and can support a plain, tactile look. White kraft provides a brighter print surface. Ask for the exact paper specification and a printed sample instead of choosing by the word kraft alone.
Luxury describes the finished result and market position. It may involve a dense or textured paper, a folded top, cord or ribbon handles, precise printing, reinforcement, and a controlled finish.
More decoration does not guarantee a better result. A clean bag with an accurate color can suit fine jewelry well. Give it a handle that feels good. Foil, embossing, film, eyelets, and ribbon should each earn their place.
Retail bags cover a wide range of store handoffs. An everyday collection may need a simple paper handle bag. A limited jewelry launch may need a smaller Euro tote with a fitted bottom board.
Store operation matters here. Staff needs to open, fill, close, and hand over the bag without fighting the gussets or catching the box corners.
Boutique bags often use smaller runs, distinctive colors, and a closer fit to the product range. The label says little about structure, so the brief still needs dimensions, paper, handles, reinforcement, print, and quantity.
A small jewelry studio may use one boutique bag for rings and earrings, then add a second size for necklace boxes and sets. That keeps inventory manageable without forcing every order into one oversized bag.
A Euro tote usually has a folded top and separate cord or ribbon handles. The turn-top hides the handle attachment and gives the rim a finished edge.
This format works well for rigid jewelry boxes because the top and base can be reinforced. The supplier still needs the loaded weight, box footprint, handle material, attachment method, and required carry test.
Twisted paper handles are paper cords fixed under the top area. They suit automated or high-volume production and keep the material system simpler than many textile or plastic handles.
Comfort depends on cord size, handle length, load, and attachment. A small jewelry order may be light, but a thin cord can still feel sharp if the customer carries several boxes for a long walk.
Flat paper handles use folded paper strips attached to the bag. They pack neatly and work well for everyday retail or lighter gift orders.
Check the attachment area after the bag has held the real load. The handle can remain intact while the paper around the glue patch begins to tear.
A die-cut handle is an opening cut into the bag body. This format stores flat and avoids a separate handle component.
The opening removes material from a high-stress area, so paper choice and reinforcement matter. It is better suited to compact, light packs than to a wide box that pulls hard against the top edge.
Merchandise bags and flat satchels are slim formats made for flat or shallow contents. They can suit a jewelry pouch, care kit, gift card, or slim presentation box.
A deep, rigid box will force the sides outward and distort the print. Measure the box depth before treating a flat format as a low-cost substitute for a gusseted bag.
A wide gusset adds depth. A flat bottom helps the bag stand during filling and carrying.
These features suit gift sets and multiple jewelry boxes, but extra depth also gives the contents room to move. A fitted base, tissue arrangement, divider, or smaller bag can improve stability.
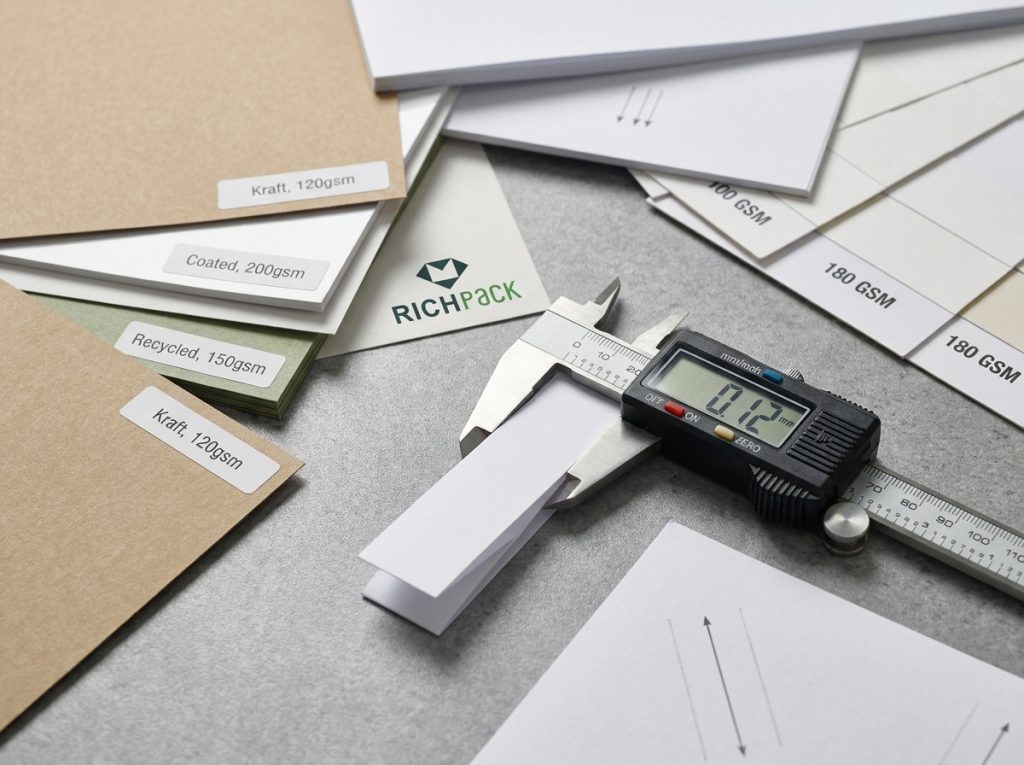
Paper specifications describe different properties. Basis weight and GSM describe mass under defined measurement systems. Caliper and PT describe thickness. None of them, on its own, proves how a finished bag will carry a loaded jewelry box.
| Term | What It Measures | What It Does Not Prove | Buyer Check |
| Basis weight | Mass of a ream at a paper grade’s basis size | Comparable thickness across unlike paper grades | Ask for paper grade and basis size |
| GSM | Grams per square meter | Caliper, stiffness, tear strength, or bag load rating | Compare actual sheets and converted samples |
| PT | Thousandths of an inch in common packaging usage | Fiber strength or finished bag performance | Confirm the supplier’s caliper method |
| Caliper | Physical sheet thickness | Basis weight or structural performance by itself | Measure or review the paper data sheet |
| Grain direction | Main fiber orientation | Finished fold quality without a trial | Check fold and score direction on a dummy |
| Gusset | Folded expansion area | Stable fit by itself | Load the finished pack-out |
Basis weight is the weight of a ream, commonly 500 sheets, cut to the standard basis size for that paper grade. The basis size changes between paper categories, so two papers marked with the same pound value may have different thickness and feel.
A quote that lists only pounds leaves an international buyer without a clean comparison. Ask for the paper grade, basis weight, GSM, and a physical sheet or bag sample.
GSM is grams per square meter. It gives one mass-per-area value across paper types and markets.
A higher GSM means more paper mass per square meter. It does not automatically mean better tear resistance, a stiffer bag, cleaner folds, or a higher safe load. Fiber, moisture, caliper, grain, conversion, glue, and reinforcement all affect the finished result.
In packaging work, one point commonly equals 0.001 inches of thickness. A 12 pt sheet is about 0.012 inches thick, subject to the supplier’s measurement method and material tolerance.
PT is useful when a buyer needs a thickness target. It still does not describe fiber strength, stiffness, surface treatment, or how the converted bag handles a load.
GSM measures mass per area. PT measures thickness. Papers can share a GSM and have different calipers because fiber furnish, density, coating, and manufacturing differ.
Request both values when thickness affects the fold, handle attachment, or premium feel. Then approve the converted sample because the seam, turn-top, score, and bottom construction determine how the sheet behaves as a bag.
Caliper is the sheet thickness. Grain direction is the main direction in which fibers align during papermaking.
Folds often behave differently with and across the grain. Put critical scores, top folds, and gussets through a blank dummy before approving artwork. A paper data sheet cannot show whether a dense print will crack on the chosen fold.
Kraft paper is chosen for strength, a natural or clean retail look, and efficient converting. Recycled paper can reduce demand for virgin fiber, but its exact recycled content and source need documentation.
Coated paper gives a smoother print surface. Specialty papers can add color, texture, or fiber character. Each option changes ink holdout, fold quality, rub behavior, color, price, and the finished bag’s material composition.
Side gussets let the bag expand in depth. Bottom folds create the base and help the bag open for filling.
The gusset should follow the finished box depth and the intended clearance. A deep gusset with a narrow box can leave the load unstable. A shallow gusset can pinch the box corners and push the side folds into the print.
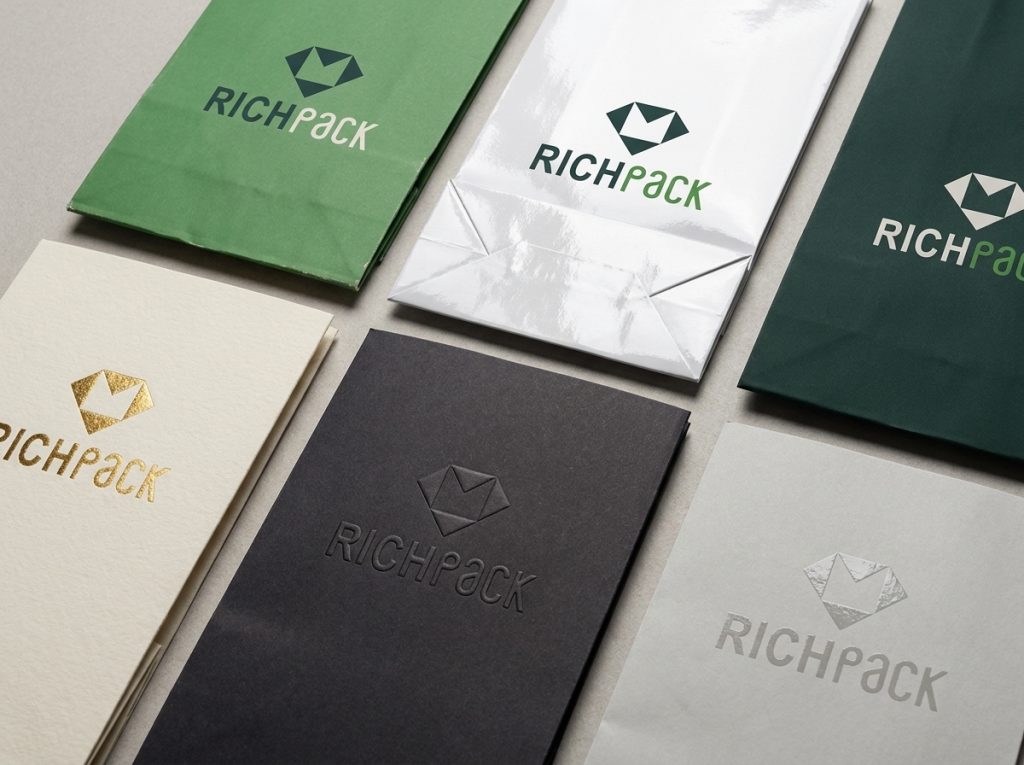
A finish may come from the paper surface, a coating, a film, an ink effect, foil, or pressure. Ask the supplier to name the material and process. Matte or soft touch alone does not identify the finished build.
| Finish | Visible Effect | Suitable Paper | Fold or Wear Risk | Environmental Note | Approval Sample |
| Matte surface | Low reflection | Uncoated paper, coating, or matte film systems | Dark colors may show rub marks | Composition depends on the process | Printed folded sample |
| Gloss surface | Higher reflection and color depth | Coated paper, varnish, or film | Scratches and fold stress may show | Film or coating changes the BOM | Printed folded sample |
| Soft touch | Low-gloss, tactile surface | Selected coatings or films | Scuffing and finger marks vary | Do not assume plastic-free | Handled sample |
| Foil stamping | Metallic or colored foil detail | Smooth or textured surfaces | Fine detail and folds need control | Foil and carrier system need review | Production-method proof |
| Embossing | Raised paper or printed feature | Papers that hold the relief | Deep relief can weaken fine details | Usually needs no added ink at the relief | Embossed sample |
| Spot UV | Local high-gloss contrast | Smooth printed surfaces | Register and fold position matter | Adds a cured coating | Registered print proof |
A matte surface reduces glare and can make dark colors feel calm and controlled. The effect may come from uncoated paper, a matte coating, or a matte film.
Those constructions do not behave the same. Ask what creates the finish, then check color density, rub marks, fingerprints, folds, and material separation on the actual sample.
Gloss increases reflection and can deepen printed color. A gloss paper, varnish, UV coating, or film can create the effect.
Place the sample beside the jewelry box under store lighting. Strong reflections can compete with metallic logos and polished jewelry, while scratches may become easier to see on a dark surface.
Soft touch describes a tactile result. Suppliers may use a coating or a film to create it.
The sample should answer practical questions: Does it mark when handled? Does the surface rub at the gusset? Does the film crack or lift at a fold? What material was added, and how does it affect the intended recovery route?
Foil stamping transfers a foil layer with heat and pressure. It gives a metallic or colored detail without relying on process ink to imitate metal.
Fine lines, textured paper, large solid areas, seams, and folds can change the result. Approve the foil on the production paper at the production size, near any score or handle feature that affects pressure.
Embossing raises a shape from the paper. Debossing presses it inward.
The relief needs enough area and paper support to stay visible after conversion and packing. Check the back of the panel, the fold distance, the printed registration, and whether the bag will rub against other bags in the carton.
Spot UV places a glossy cured coating on selected areas. It can create a quiet contrast on a matte printed field, but the register must hold between the print and the spot layer.
Metallic ink, pearlescent ink, and opaque white have different limits. Ask for a method-specific proof instead of approving an on-screen simulation.
Dense dark print can whiten or crack along a fold if the paper, ink film, score, and grain direction do not work together. Matte and soft-touch surfaces may also show rub marks where flat bags slide inside a carton.
Fold the printed sample, stack it, handle it, and carry it. Record where damage appears. A flat press sheet cannot answer those questions.
Custom options work as a system. A handle changes the top construction. A bottom board changes the base and material mix. A coating changes print appearance and may alter the end-of-life claim.
| Element | Common Choices | What It Changes | Cost or Production Effect | First Sample Check |
| Size | Stock family or custom dimensions | Fit, material use, carton volume | Custom tooling or setup may apply | Insert and remove the full pack |
| Paper | Kraft, coated, recycled, colored, textured | Strength, print, feel, fold, claims | Paper availability and run size matter | Review sheet and converted dummy |
| Flexo, offset, screen, digital, spot color | Detail, color control, setup, run profile | Plates, setup, proofing vary | Approve artwork and physical proof | |
| Handle | Twisted paper, flat paper, rope, ribbon, die-cut | Grip, appearance, attachment force | Manual assembly may add time | Carry the loaded sample |
| Reinforcement | Turn-top, patch, bottom board | Rim and base stability | Adds material and assembly | Inspect after load and storage |
| Accessory | Tissue, divider, closure, label | Presentation and product organization | Adds packing steps and BOM items | Run a counter packing trial |
Size controls fit, material use, print proportion, carton volume, and store handling. Begin with the finished pack-out, then add only the clearance needed for packing and removal.
RichPack’s packaging organized by size can help compare product families, but the final bag should still be checked against the actual jewelry packaging.
Choose the body paper and surface together. A smooth white-coated sheet supports different artwork than an uncoated brown kraft sheet.
Ask how the paper is supplied, printed, scored, glued, and finished. The same artwork may need a different ink, underprint, line weight, or color target on another surface.
Printing options include flexography, offset lithography, screen printing, digital printing, and spot-color systems. The useful choice depends on artwork, paper, quantity, color requirements, and the converter’s equipment.
Do not choose a method from a generic quality ranking. A simple one-color mark on kraft and a photographic design on coated paper create different production problems.
Twisted and flat paper handles suit efficient retail production. Rope and ribbon can give a softer or more formal grip. Die-cut handles keep the bag flat and remove a separate component.
Handle comfort and strength depend on several linked parts. Check handle length and width, loaded weight, the hole or glue position, the turn-top, the patch, and paper tear resistance.
A turn-top folds the upper edge inward. It hides attachments and gives the rim more layers. A handle patch adds material behind the point where force enters the bag.
Ask the supplier to show the attachment in a cut sample. Then carry the loaded bag long enough to see whether the handle, patch, or surrounding paper begins to move.
A bottom board spreads the load and keeps the base flatter. An internal divider can stop two boxes from striking each other or sliding into one corner.
These parts can improve a gift-set bag, but they add material and packing work. The custom jewelry box inserts inside the presentation box still control the jewelry itself; the shopping bag divider only organizes the finished boxes.
Ribbon ties, folded tops, labels, tissue, and cards can complete a gift handoff. They also change the packing sequence and the space inside the bag.
Run the full counter procedure before production. A closure that looks neat in a rendering may take too long to tie during a busy store shift.
Start with the finished order, not a generic industry label. A jewelry store may sell a tiny ring box and a long necklace box under the same brand. A heavy watch box and a multi-piece gift set add two more pack types. They do not need the same bag.
| Element | Common Choices | What It Changes | Cost or Production Effect | First Sample Check |
| Size | Stock family or custom dimensions | Fit, material use, carton volume | Custom tooling or setup may apply | Insert and remove the full pack |
| Paper | Kraft, coated, recycled, colored, textured | Strength, print, feel, fold, claims | Paper availability and run size matter | Review sheet and converted dummy |
| Flexo, offset, screen, digital, spot color | Detail, color control, setup, run profile | Plates, setup, proofing vary | Approve artwork and physical proof | |
| Handle | Twisted paper, flat paper, rope, ribbon, die-cut | Grip, appearance, attachment force | Manual assembly may add time | Carry the loaded sample |
| Reinforcement | Turn-top, patch, bottom board | Rim and base stability | Adds material and assembly | Inspect after load and storage |
| Accessory | Tissue, divider, closure, label | Presentation and product organization | Adds packing steps and BOM items | Run a counter packing trial |
Build the order exactly as it will leave the store. Close the jewelry box, add the sleeve or pouch, wrap the tissue, place the cards, and arrange the ribbon.
RichPack’s jewelry boxes show the range of box formats that may sit inside the bag. Use the actual box SKU and accessories in the measurement trial.
Measure the widest, deepest, and tallest points of the finished pack. Keep ribbon loops, protruding bows, sleeves, and stacked cards in their normal position.
Then test the space needed to insert and remove the pack without rubbing the box corners. There is no useful universal clearance because paper stiffness, box shape, tissue, packing method, and hand access differ. Approve the space with a physical dummy.
A tall necklace box may fit upright in a narrow bag, while a wide set box needs a deeper gusset and a stable base. Turning the box can reduce bag volume, but the new orientation may make the box harder to present or remove.
Keep the logo position in view during this check. A wide box can push the gussets outward and change how the front panel looks when carried.
Loaded weight matters more than the price or size of the jewelry. A dense watch box, several rigid boxes, catalogs, and event materials can create a heavier pack than one fine ring.
Ask the supplier how the handle force travels through the turn-top, patch, paper, seams, and base. Then test that exact construction. Do not turn the paper GSM into an unsupported load rating.
The handle must feel comfortable for the expected load and carry time. A soft rope or ribbon can suit a formal jewelry gift, while a twisted paper handle may fit everyday retail and simpler material goals.
Check the drop length with the packed bag. A handle that is too short crowds the opening. One that is too long lets a small bag swing and tip more easily.
Place the bag, jewelry box, ribbon, tissue, and cards under the same store light. Compare their visual hierarchy and the approved color targets.
The bag may use kraft paper, while the box uses coated wrap. Those surfaces will not reflect color in the same way. Set coordinated physical targets and decide which component carries the primary brand color.
Use order data to decide how many bag sizes the range needs. One size may cover rings and earrings. A second may cover necklaces and bracelets, while watches and sets need another structure.
Too many sizes raise inventory and picking complexity. Too few sizes waste paper and make small purchases look untidy. Test common order combinations before locking the family.
Unit price tells only part of the cost. Add setup, dies, samples, inner packing, and export cartons. Then add freight, duties where they apply, storage, inspection, and unused stock risk.
Use a planning model before a quote. If the plain bag line is 100 units of cost, a custom handle package modeled at a 12% to 15% uplift puts that line at 112 to 115 units. This is a budget example, not a market rule.
A stronger handle may improve service life. A claim such as “50% longer” needs a matched-load-carry test with the same paper, patch, glue, load, and carry method.
Compare current quotes on one specification. Separate the fixed die or setup cost from the per-bag price, then add carton volume, freight, storage, inspection, and obsolete stock risk.
Keep the math beside the quote.
A lower unit price can come with a larger minimum order or bulky cartons. Use a cost-effective jewelry packaging project as a planning reference. Compare current quotes on the same specification and delivery terms.
Artwork must account for the physical bag. Gussets fold, seams overlap, handles cover part of the top area, and bottom folds can hide or distort a design.
| Pack-Out | Finished Dimensions | Loaded Weight | Clearance Need | Bag Candidate | Loaded Sample Result |
| Ring box gift | Measure after tissue and card are added | Record the full packed weight | Finger access at the sides and top | Small gusseted bag | Pass only after easy removal and carry check |
| Necklace box | Include ribbon and certificate | Record box plus accessories | Protect long corners from catching | Tall or wide format based on box orientation | Check bowing and corner contact |
| Watch box | Include outer sleeve if used | Record the heavier finished load | Stable base and comfortable handle | Reinforced Euro tote or tested equivalent | Check base deflection and top attachment |
| Multi-box set | Measure the intended stack or arrangement | Record the complete set | Stop boxes from tipping or colliding | Wide gusset with fitted base or divider | Check movement while walking |
Choose the visual hierarchy before assigning every color. The bag may carry the main brand field, while the box uses a neutral wrap and a metallic logo. Another collection may reverse that relationship.
Record the approved physical samples. A color code is useful, but the final target is the printed result on each substrate.
Bleed extends artwork beyond the trim or cut edge so small cutting movement does not leave an unwanted unprinted line. The print area is the usable panel space after allowing for folds, seams, handles, and other construction features.
Use the supplier’s current dieline. Do not reuse a similar bag template unless the converter confirms that dimensions, seam position, handle holes, turn-top, and bottom folds match.
Supply the file format requested by the printer. Vector artwork, outlined fonts, linked or embedded images, named spot colors, and the correct dieline layers reduce avoidable prepress changes.
Keep logos and small type away from folds, seams, punched holes, and areas hidden by handles. Review the artwork both flat and as a folded mockup.
Choose the process after the artwork, paper, quantity, and color requirements are known. Flexography works well for many repeating bag jobs. Offset works for detailed prepared-sheet printing. Screen and digital methods fit other run sizes and surfaces.
Ask the supplier what press and conversion route will produce the job. A method name alone does not define resolution, color control, setup cost, or lead time.
Paper shade, coating, ink film, finish, and viewing light change color. A logo printed on brown kraft will not look the same as the file on a bright coated sheet.
Approve the color on the production paper. When bag and box substrates differ, place the samples side by side. Approve how they look together instead of demanding an exact visual match from numbers alone.
Fine lines and small type can fill in, break, or lose clarity on rough paper or in a high-speed process. Register describes how accurately print elements align. Trap adds a small overlap between colors to prevent a visible gap when the register moves within tolerance.
Ask for the printer’s minimum line, type, screen, and register requirements for the chosen process. Adapt the design before the proof instead of discovering the limit during production.
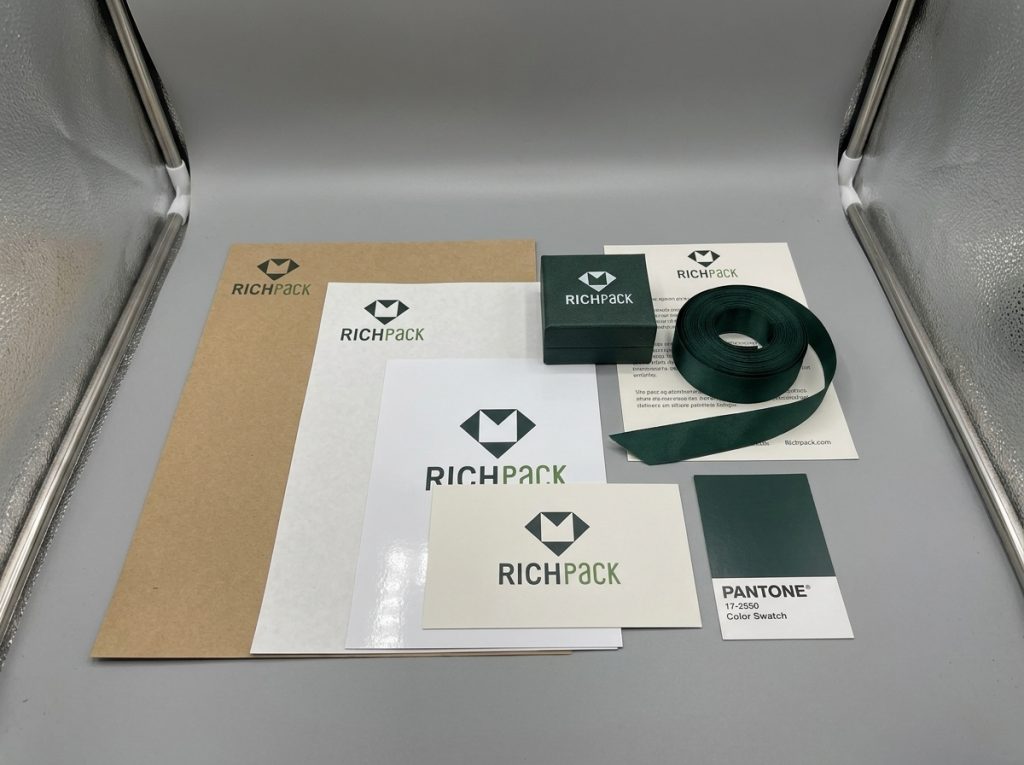
Lay every component together before approval. Check color hierarchy, logo size, metallic tone, paper warmth, finish level, and the order in which the customer sees each item.
A luxury jewelry box design case can help frame the box side of that review. The shopping bag should support the presentation instead of competing with the jewelry box for attention.
A paper body does not settle the environmental claim for a finished bag. Ink, adhesive, film, handles, eyelets, and reinforcement boards all affect the claim. Labels, local collection, and customer use matter too.
| Claim | Required Evidence | Construction Check | Market Boundary | Approval Owner |
| Responsible fiber sourcing | Applicable certification and chain-of-custody evidence | Confirm the claimed paper components | Follow the certification body’s claim rules | Procurement and compliance |
| Recycled content | Supplier documentation with content type and percentage | Confirm which components contain recycled material | Qualify pre-consumer and post-consumer content as required | Procurement and legal review |
| Recyclable | Evidence for the finished construction and available collection | Review film, handles, eyelets, glue, labels, and boards | Claims depend on market access and processing | Compliance and local market team |
| Reusable | Construction and use case that support repeated use | Check handles, folds, base, soil, and storage | Avoid promising a reuse count without testing | Product and compliance teams |
| Compostable | Applicable certification and conditions for every relevant component | Review inks, coatings, adhesives, handles, and labels | State industrial or home conditions accurately | Compliance and legal review |
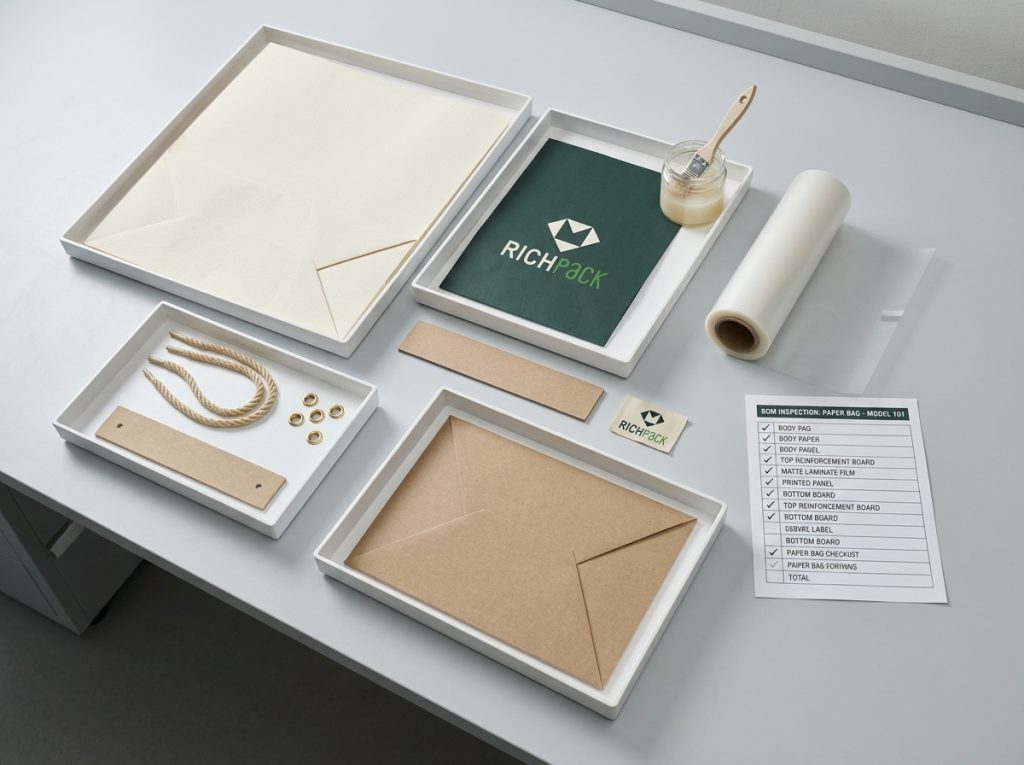
Review the body paper, print, coating, film, adhesive, handle, eyelet or tip, top reinforcement, bottom board, divider, closure, and label. Record each item in the bill of materials.
A single added part can change separation and processing. Review the marketed bag, not a paper sample in isolation.
A forest-sourcing certification supports defined sourcing claims when the certified chain and label rules are followed. It does not, by itself, prove that the finished bag is recyclable, compostable, or made from recycled fiber.
Use the exact claim supported by the supplier’s current certificate and transaction documents. RichPack’s sustainable paper packaging solutions provide a relevant internal route, while the final claim still needs project documents.
Ask for the recycled content percentage and whether the figure refers to pre-consumer, post-consumer, or combined material. Confirm which part of the bag carries that content.
A recycled paper body does not make a textile handle or plastic film recycled. Write the claim so it identifies the material and percentage that the evidence supports.
A coating or film may improve print, moisture resistance, or touch. It also changes the finished material system. Rope, ribbon, plastic tips, metal eyelets, and reinforcement parts need the same review.
Request plain material names. Terms such as eco film, green coating, or recyclable handle need a specification and a market-specific end-of-life check.
A reusable bag needs a practical second use, enough durability, a comfortable handle, and a size people want to keep. Extra strength that adds material without creating a likely reuse does not prove a better result.
If components need separation, test whether a customer or processor can separate them without destroying the paper body. Record that expectation in the design brief.
Recyclable claims depend on the finished construction and access to suitable collection and processing. Biodegradable and compostable claims require separate evidence and conditions; the words are not interchangeable.
Write the destination market into the claim review. A bag sold across several countries may need different languages because collection, labeling, and legal requirements differ.
Paper and plastic bags differ in mass, strength, water response, reuse patterns, transport volume, collection, and processing. A material name alone cannot settle the comparison.
Define the same carrying task, expected reuse, bag construction, market, and end-of-life route before comparing them. Avoid a universal claim that paper always has a lower impact.
Each supplier should quote one shared specification. Prices cannot be compared when paper, dimensions, handles, print, reinforcement, packing, or delivery terms differ.
| Requirement | Supplier A | Supplier B | Supplier C | Evidence Received | Risk Note |
| Finished size and tolerance | Dieline and specification | ||||
| Paper and surface | Data sheet and sample | ||||
| Handle and reinforcement | Cut sample and loaded test | ||||
| Print and color | Artwork limits and physical proof | ||||
| MOQ and price breaks | Current quotation | ||||
| Lead-time stages | Written schedule | ||||
| Carton size and pieces per carton | Packing specification | ||||
| Environmental documents | Certificates and declarations | ||||
| Inspection plan | Tolerance and sampling agreement |
Confirm that the supplier can source the paper and convert the required structure. Ask which operations happen in-house and which are subcontracted.
Review samples that use a similar paper, gusset, handle, print coverage, and finish. A supplier’s best rigid box does not prove its paper bag line can hold register or bond a heavy bottom.
Ask which press will print the job, how the supplier controls color, and what proof options are available. Include line, type, screen, trap, and register limits in the artwork review.
A physical proof needs an approval method. Record the light, reference, acceptable variation process, and who can release the color.
Request a sectioned sample or construction drawing that shows the seam, turn-top, handle attachment, patches, bottom folds, and board placement.
Load it with the real jewelry pack. Pulling an empty handle tells little about how the surrounding paper behaves under sustained load.
Minimum order and lead time depend on the structure, materials, printing route, finish, capacity, and destination. Use current written quotes and separate the stages for artwork, samples, material, production, inspection, and transport.
A low-MOQ jewelry packaging case offers a related planning example. Your comparison still needs current setup costs, price breaks, carton data, freight, storage, and reorder assumptions.
Use a blank dummy to test dimensions, gussets, opening, box removal, handle length, base, and packing sequence. Use a printed sample to approve color, artwork, finish, folds, rub behavior, odor, and the combined presentation.
Do not let a flat PDF replace either sample. The dummy answers structure questions; the printed sample answers visual and process questions.
Set tolerances before the purchase order. Cover finished dimensions, print position, color approval method, handle position, glue, folds, board placement, contamination, odor, and visible damage.
Agree on the inspection method and the records the supplier will provide. Sample across cartons and carton positions instead of checking only the top units in one box.
Match documents to the supplier, material, site, product, market, and claim. Check the certificate scope and validity instead of accepting a logo file or a generic policy page.
Keep approved claims with the purchase specification. If the paper, handle, film, adhesive, or production site changes, review the claim again.
Save the approved dieline, artwork, and physical color target. Keep the paper code, handle spec, finish, signed sample, packing spec, and inspection rules with them.
Ask the supplier to report substitutions before production. A paper or coating with a similar marketing name can behave differently at the fold or under ink.
Use one approved version.
Test the converted, printed bag with the real packed order. Record the condition and result so a corrected sample can be compared with the first one.
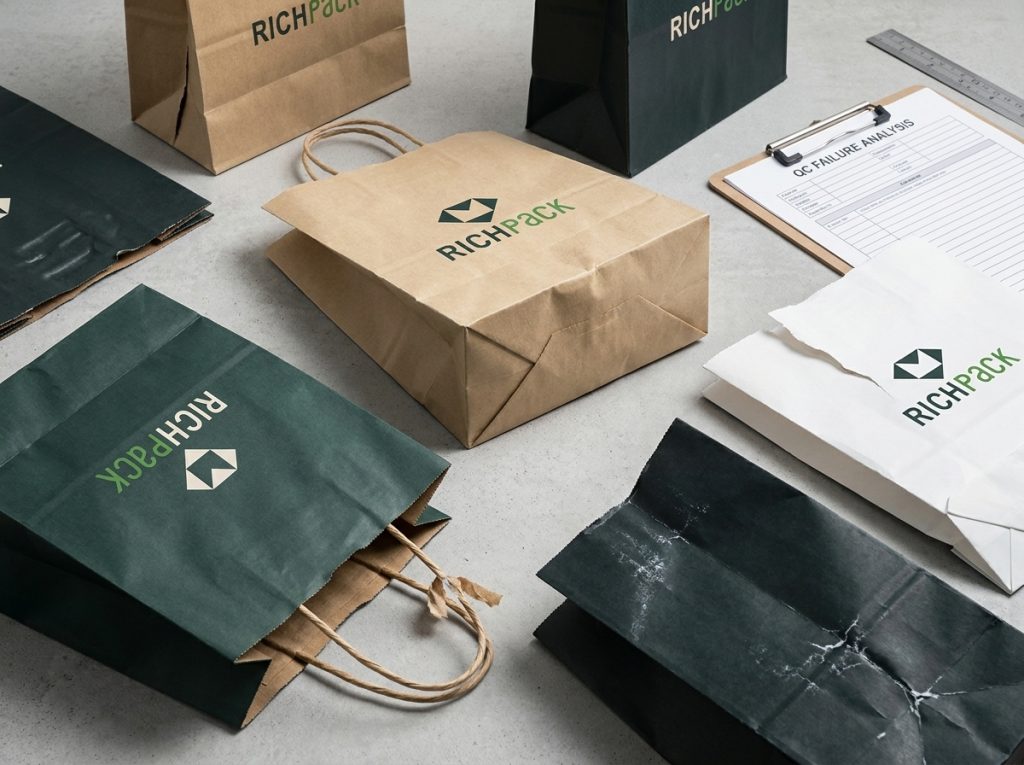
| Test | Load or Condition | Pass Criterion | Evidence | Owner | Corrective Action |
| Carry | Real finished pack-out | No tear, slip, unsafe deformation, or uncomfortable grip under the agreed method | Photos and test record | Packaging team | Change handle, patch, paper, or structure |
| Standing | Counter and floor surfaces | Bag remains stable for the agreed use | Photo or video record | Retail operations | Adjust base, gusset, fit, or board |
| Handle attachment | Agreed load and duration | Attachment and surrounding paper stay intact | Section photos and record | Supplier quality | Change attachment or reinforcement |
| Seam and bottom bond | Loaded bag and agreed environment | No opening, peeling, or excessive base movement | Inspection record | Supplier quality | Adjust bond design or process |
| Rub and fold | Printed, converted, stacked, and handled sample | Appearance stays within the approved limit | Retained sample and photos | Brand and supplier | Adjust paper, ink, finish, score, or packing |
| Odor | Sealed sample rested under an agreed condition | No unacceptable odor under the brand’s review method | Signed review | Brand team | Review ink, coating, adhesive, cure, or airing |
| Carton | Production packing arrangement | No crushing, transfer, distortion, or handle marks beyond the approved limit | Carton trial record | Logistics and supplier | Change packing, count, dividers, or carton |
Use this fault tree after the matrix when a sample fails:
Check the first visible failure.
| Failure Symptom | Start Here | Check Next | Corrective Action and Retest |
| Handle pulls out | Mark the first tear or stretch point | Patch size, hole or glue position, turn-top layers, loaded weight | Change the attachment or reinforcement, then repeat the same carry cycle |
| Top edge tears | Inspect the rim beside the handle | Paper caliper, grain direction, score depth, edge distance, box contact | Move the feature or strengthen the rim, then test with the same pack-out |
| Bottom sags or tips | Check where the box sits on the base | Bottom board GSM and size, gusset width, empty clearance, load center | Fit the base to the box or add a divider, then repeat standing and carry checks |
| Side seam opens | Find the first lifted bond | Glue coverage, cure time, seam overlap, humidity, carton pressure | Change the bond process or seam design, then inspect after rest and carry |
| Ink scuffs or fold cracks | Compare damage with the score or carton contact | Ink density, coating or film, rub direction, score pressure, packing friction | Change the print or finish and repeat fold, rub, stack, and carry checks |
| Odor remains | Separate the bag from the jewelry box and pouch | Ink, adhesive, coating, cure, storage, sealed rest time | Keep the bag out of product contact until the cause is resolved and retested |
| Carton marks appear | Map the mark to a contact or pressure point | Bag count, dividers, board edges, moisture, compression | Change the carton pack and repeat a transit simulation |
Pack the bag with the actual box combination and accessories. Use the expected carry method and record the load, duration, handle behavior, rim, seams, and base.
Keep the load unchanged.
The result applies only to the tested construction and condition. Changing paper, handle, patch, adhesive, board, dimensions, or load requires a review.
Record the same load on every retest.
Place the bag on the store counter and on a level floor. Watch the base, side walls, box position, and handle pull.
A bag can stand empty and tip when loaded. If the jewelry box slides to one gusset, reduce excess space, change the base, or add an organizing part.
Inspect the handle, knot or glue area, hole, eyelet where used, patch, turn-top, and the paper around them. Failure can begin in the body paper even when the handle remains unbroken.
Repeat the check after carrying and after the bag has rested under load. Record stretching, tearing, glue movement, and permanent deformation.
The body seam and bottom folds transfer load through bonded areas. Check them after the bag is filled, carried, and placed down several times under the agreed trial.
Humidity and temperature can affect paper and adhesive behavior. Test conditions should reflect the intended route when those factors matter.
Handle the printed bag, fold it, stack it as supplied, and slide samples against each other. Inspect dense colors, soft-touch surfaces, metallic details, gussets, top folds, and bottom creases.
Keep an approved sample and photos. Terms such as minor rub or acceptable fold crack are too vague unless the buyer and supplier share a visual limit.
Keep the failed sample.
Seal the finished sample for an agreed rest period, then open it and review the odor. Ink, coating, film, adhesive, packing, and incomplete curing can affect the result.
The shopping bag must not touch bare jewelry. The jewelry box, pouch, insert, and lining control direct contact. Strong bag odor can still spoil the presentation.
Pack the folded bags as the supplier will ship them. Check carton compression, edge damage, print transfer, moisture exposure, warped boards, crushed handles, and pressure marks.
The retail bag still needs an outer parcel system for e-commerce delivery. RichPack’s packaging distribution is relevant to that wider route. Do not use an outer-shipping test result as proof that an isolated retail bag meets a different carrying standard.
Measure the finished jewelry pack-out, including the box, pouch, tissue, cards, certificate, ribbon, and the insert materials inside the box. Use a bag that is easy to pack and open. Keep the space tight enough to stop the box from tipping, then approve the fit with a loaded dummy.
Some can enter paper recycling streams, but the answer depends on the finished construction and local collection. Review films, coatings, handles, eyelets, adhesives, labels, and reinforcement boards before making the claim.
Rope and ribbon handles suit many formal jewelry bags because they can provide a soft grip and a refined appearance. Twisted paper can be a better fit for simpler material goals or efficient retail production; the final choice needs a loaded comfort and attachment test.
Kraft is a paper family that can provide a natural or clean retail surface and useful strength. Coated paper has a smoother treated surface for print; compare paper shade, fold quality, rub behavior, finish, sourcing evidence, and the complete bag construction.
Cost depends on the bag size, paper, handles, reinforcement, print, finish, and quantity. Use current quotes for the final budget. A planning model can test a 12% to 15% handle uplift, but it cannot prove a service-life gain without a matched carry test. Add samples, packing, freight, duties where they apply, storage, and inspection to compare total landed cost.
Approve a blank dummy for fit and structure, then a printed sample for color, artwork, finish, folds, rub, odor, and presentation. Keep the signed specification, physical target, packing standard, and inspection limits for production and reorders.
The packed jewelry order should set the design brief for Custom Paper Shopping Bags. Measure it, choose a structure that carries it well, and approve the print and claims on the real materials.
Before requesting a quote, prepare the pack-out dimensions, loaded weight, target markets, order quantity, brand colors, and launch date. RichPack can use those inputs to review the bag structure and sample plan alongside the jewelry box and other presentation parts. Start with Quote Now when the specification is ready. Use Request Sample when fit and materials still need a physical check.


2024-11-15

2026-04-20

2025-01-24
2026-06-26
2025-09-16
2026-07-25

Blue Paper Shopping Bags for Jewelry Packaging | Elegant Blue Gift Bags | Richpack
View More
Custom Earring Cards in Brown Paper | 2 x 2 Inch Jewelry Display Cards for Retail and Wholesale | Richpack
View More
Custom Paper Bags with Handles for Easy Carrying – Practical Paper Bags with Sturdy Handles
View More
Durable Waterproof Laminated Paper Bags for Durability | Reliable, Long-Lasting Packaging Solutions for Jewelry Distributors and Retail Businesses
View More
Eco-Conscious Recycled Paper Jewelry Bags with Branding | Ideal for Jewelry Wholesalers Looking for Sustainable and Custom Packaging Options
View More
Eco-Friendly and Personalized Recycled Paper Bags with Custom Prints | Tailored Packaging Solutions for Jewelry Brands and Retail Store Display Needs
View More

